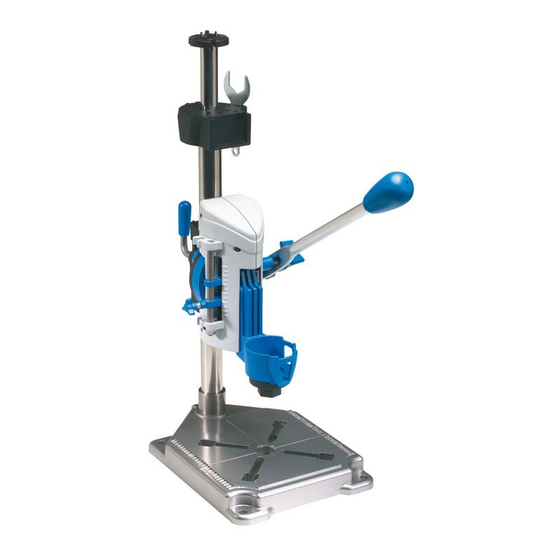
Dremel WorkStation 220 Manual de instrucciones de uso y seguridad - Página 7
Navegue en línea o descargue pdf Manual de instrucciones de uso y seguridad para Herramienta eléctrica Dremel WorkStation 220. Dremel WorkStation 220 18 páginas. Combined drill press and tool holder
También para Dremel WorkStation 220: Manual de instrucciones de uso y seguridad (12 páginas)

ATTACHMENT FOR USE WITH DREMEL
ROTARY MODELS 285, 395, 398, 400, 780
AND 800.
Your Dremel Workstation 220 will convert
rotary tools to a drill press for drilling, to a
tool holder for sanding or polishing, or to a
flex shaft tool stand.
1. Assemble the tube to the base and secure
with hex bolt and square nut.
2. Insert the square nut (short end first) into
the press and install the height adjustment
lever. Place the press onto the tube and
tighten lever.
IMPORTANT! Workstation is for use with only
one tool at time. Do not a hang tool on hanger
assembly when another tool is mounted in the
press.
The Crow's Nest tool storage will hold the
following tools (not supplied):
• Drill bit set (Model 628 or 636)
• Rotary tool wrench
• Mounting wrench
• Bits with shank size less than or equal to
3.2 mm
• Rotary tool collets (Models 480, 481, 482,
483)
NOTE: The drill bits are held in the tool by a col-
let system. The bit may be installed before or
after the rotary tool is installed in the drill press.
1. Depress and hold the shaft lock button
while rotating the collet nut and shaft. Con-
tinue to rotate the collet nut and shaft until
the lock engages and holds the shaft (fig-
ure B).
2. Use the wrench from your Dremel Rotary
Tool and turn the collet nut counter-
clockwise to loosen it.
3. Release the shaft lock button.
4. Insert the drill bit into the collet as deep as
possible to ensure proper gripping of the bit
and to minimize run out. Do not insert the
bit so far that the flutes touch the collet
or collet nut to avoid chipping or cracking
the bit.
GB
Assembly (Figure A)
3. With press in vertical position, insert square
4. Install the crow's nest on the tube with
5. Install the cord holder.
6. Install the hanger wire and cap.
7. The base must be secured to a workbench
Operating
5. Re-engage the shaft lock button and tight-
6. Insert the rotary tool into the press with the
NOTE: Models 398, 400 and 800 will mount
with the spindle lock to the right.
NOTE: When clamping rotary tool in holder,
make sure tool is seated properly and vent
openings are not covered.
7. Twist the top tube counterclockwise to
NOTE: Tube should not be extended when tool
is being used in tool holder.
8. The Depth Stop is used when you wish to
4
nut inside the drill press and assemble the
angle lock lever to the press.
small holes facing up.
using the appropriate size hardware (not
supplied).
en the collet nut; first by hand, then using
the wrench until bit is held securely.
spindle lock to the front. Clamp the tool to
the tool bracket by tightening the clamp nut
(figure C).
loosen and enable the tube to be adjusted
up or down. After desired height is
achieved, turn tube clockwise to tighten it
(figure E).
Insert the cord into the cord clips (figure D).
Holder will keep cord away from the work
area.
drill holes to a measured depth. A scale on
the press housing is provided for your con-
venience.
Set the depth stop adjustment to the de-
sired depth and tighten depth stop lock
knob (figure D).
