3Shape TRIOS S3A-18 Manual de instalación - Página 6
Navegue en línea o descargue pdf Manual de instalación para Equipamiento dental 3Shape TRIOS S3A-18. 3Shape TRIOS S3A-18 14 páginas.
Step 4: Connect the other end of the Ethernet cable to the PC
(if no Ethernet ports are available in the PC, use an Ethernet-to-USB adapter) .
Step 5: Connect the power (mains) cord to the power supply . The other
end of the power (mains) cable goes into a grounded power outlet
(not shown in the Figure) . To isolate the pod and thus the scanner from
supply mains, unplug the power cord from mains .
Step 6: Insert a battery fully into the rear of the scanner . (Figure 5, S26)
or Insert the TRIOS 4 cord into rear of scanner (Figure 5, S27) .
Step 7: Place the scanner in the pod .
Scanner Battery Charging (Figure 1, S9 and S10):
Before you start: Place the battery charger either on a flat surface hori-
zontally or attach it to the wall mount vertically, with battery containers
pointing upwards .
Step 1: Attach the power cord and plug it to mains power .
Step 2: Push the batteries one by one into the charger until they click into
place . When charging, the LED above each battery will indicate the status:
• A pulsating green means that charging is ongoing;
• Constant green means that the charging is completed;
• Yellow means that an error has occurred, either the battery is not
inserted correctly, or the charging is outside operating conditions
for temperature .
CAUTION
If the charger continues to indicate yellow, the battery
is damaged and should be discarded, unless the battery
is too hot or too cold (see section 4 .8) .
4.8 Starting and Shutting Down TRIOS
Please follow the steps below to start TRIOS IOS system for the first time:
Step 1: Turn the system ON .
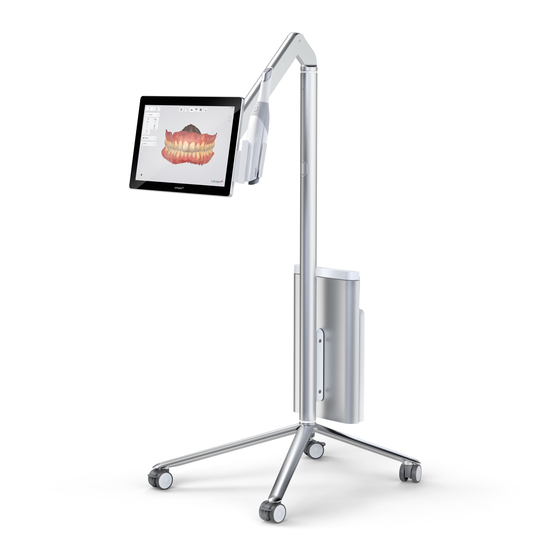
S3A: Press the standby button on the top of the backside of the display .
The TRIOS software starts automatically .
S3P: Start the PC . If the PC has no TRIOS software pre-installed, please
install the TRIOS software first . In case of difficulties with software instal-
lation, plase contact 3Shape support .
Step 2: Log on using a default TRIOS Operator .
Step 3: Configure and use your TRIOS IOS system .
For models S3P-8, S3A-10, S3A-18
The wired scanner turns on automatically when the MOVE/MOVE+ cart
is turned on, or when the smart cord is plugged into the scanner .
For models S3P-2, S3A-14, S3A-22
To activate the wireless scanner, press the button on the top of the
scanner when the MOVE/MOVE+ cart or computer is turned on .
The scanner can be turned off manually by removing the battery .
Follow on-screen instructions for connecting to the wireless scanner .
When using the TRIOS IOS system, the user is guided by messages shown
in the TRIOS software . This includes when calibration of the scanner
is due . Other messages include a reminder to mount the scanning tip:
"Please make sure the scanning tip is mounted on the scanner . "
6
Calibration
A calibration of the handheld TRIOS scanner is required before using TRIOS
for the first time, or to compensate for thermal variation and aging effects
due to wear . During regular use the TRIOS software will prompt the user
when calibration is due . To perform the calibration, attach a cleaned and
sterilized or high-level disinfected scanner tip on the scanner tube .
Remove the sleeve from the calibration target .
Mount the calibration target on the calibration adaptor with the grey side,
marked with the letter B, facing up .
Attach the calibration adaptor to the cleaned and sterilized or high-level
disinfected scanner tip . Go to the Settings page in the TRIOS software, select
TRIOS → Scanner Management → 3D calibrate scanner, and then follow the
on-screen instructions . Remember to save changes when prompted .
For a more detailed description of the 3D calibration, please refer to the
TRIOS online help .
Color Calibration
A color calibration of the handheld scanner is required
before each scan in order to get optimal colors .
Attach a cleaned and sterilized or high-level disinfected
scanner tip on the scanner tube .
Remove the sleeve from the color calibration target .
Mount the color calibration target to the calibration adaptor
with the color side, marked with the letter A, facing up .
Attach the calibration adaptor to the cleaned and sterilized
or high-level disinfected scanner tip .
Go to the Settings page in the TRIOS software, select TRIOS → Scanner
Management → Color calibrate scanner, and then follow the on-screen
instructions, which will also include validation of the performed color cali-
bration . Remember to save changes when prompted .
For a more detailed description of the color calibration,
please refer to the TRIOS online help .
Proper shutdown
Inside the TRIOS software, click on the Power button and select Shutdown
or press the the standby button on the back of the monitor on the MOVE/
MOVE+ cart . System S3A (MOVE/MOVE+ cart) only: The light under the
standby button turns off to confirm that the system is shut down .
CAUTION
When switching off the system, allow enough time for it to
shut down properly before disconnecting the mains cable .
System S3A (MOVE/MOVE+ cart) only
IMPORTANT NOTICE
The standby button can also be used to force TRIOS IOS
system to shut down in case the screen stops responding .
To force a shutdown, push and hold the standby button
pressed for about 5 seconds . Then, restart the system .
4.9 Starting TRIOS Online Help
The TRIOS online help can be started from the TRIOS software by clicking
on the Help button and choosing User Manual .