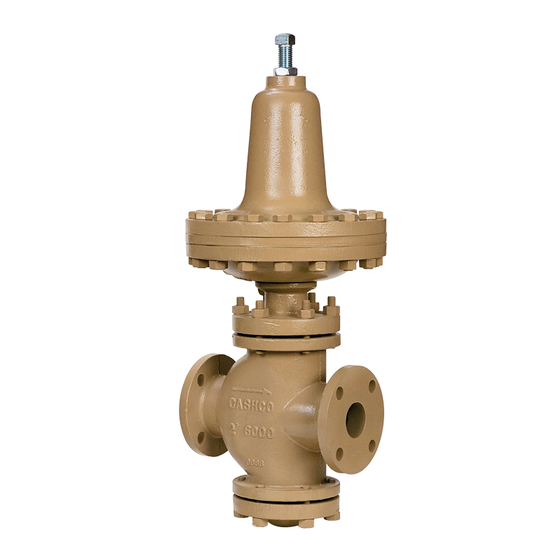
cashco 8310HP-1+6 Manual de instalación, uso y mantenimiento - Página 3
Navegue en línea o descargue pdf Manual de instalación, uso y mantenimiento para Controlador cashco 8310HP-1+6. cashco 8310HP-1+6 10 páginas. Differential pressure reducing regulators

10. Pressurize the source of loading (P
allow to fill the spring chamber cavity. Slightly open the
bleeder valve to vent any air as the spring chamber is
filling. Close bleeder valve when all air has escaped.
11. Develop system flow to a level near its expected normal
rate, and reset the regulator differential set point by
turning the adjusting screw CW (viewed from above)
to increase outlet pressure, or CCW to reduce outlet
pressure.
V. SHUTDOWN
Loading Pressure must be shut off before shutting
down the system pressure.
1.
To prevent force imbalances and possible di a phragm
failure, the loading pressure (P
shutdown first from its source of pres sure. Systems
se quenc ing must ensure this oc curs.
VI. MAINTENANCE
SYSTEM UNDER PRESSURE. Prior to performing any
main te nance, isolate the regulator from the system
and relieve all pressure. Failure to do so could result in
personal injury.
A. General:
1.
Maintenance procedures hereinafter are based
upon removal of the regulator unit from the pipeline
where installed.
2.
Owner should refer to owner's pro ce dures for
re mov al, handling, cleaning and disposal of
nonreusable parts, i.e. gaskets, etc.
3.
If desired, new gaskets may be lubricated with a
light oil provided it is compatible with the fluid.
B. Diaphragm Replacement:
1.
Using an overhead hoist, lift regulator out of the
piping installation and on to a flat work surface.
SPRING UNDER COMPRESSION. Prior to re mov ing flange
bolts, relieve spring compression by removing the ad just-
ing screw. Failure to do so may result in flying parts that
could cause per son al injury.
IOM-8310HP-DIFF
) pres sure and
Load
CAUTION
) should always be
Load
WARNING
WARNING
12. Reduce system flow to a minimum level and observe
set point. Outlet pressure will rise from the set point
of Step 9. The maximum rise in outlet pressure on
decreasing flow should not exceed the stated upper
limit of the range spring by greater than 10%; i.e. 10-
40 psig (.69-2.8 Barg) range spring, at low flow the
outlet pressure should not exceed 44 psig (3 Barg).
If it does, consult factory.
13. Retighten nut (33) on adjusting screw and install
closing cap.
SECTION V
2.
It is recommended that manual operation not be
attempted by a bypass valve during a shutdown.
3.
When the loading pressure (P
the regulator outlet pressure (P
stantially. When this is observed, the inlet (upstream)
block valve may be closed. Close downstream block
valve.
SECTION VI
2.
Remove closing cap (35). Relax compression on
range spring (28) by turning ad just ing screw (32)
CCW (viewed from above) until re moved from
spring chamber (13).
3.
Draw or embed a match mark between di a phragm
case (14), spring chamber cast ing (13) along
flanged area and across body spacer (25) for (1+8).
4.
Remove all flange nuts (30) and bolts (29).
5.
Remove spring chamber (13), spring button (27),
and range spring (28).
6.
Draw second match mark on diaphragm case
(14) flange in alignment with a match mark on the
threaded end of the valve plug assembly (12) to
indicate "free vertical movement" position of the
valve plug assembly (12).
7.
Secure the "flats" above the threaded end of the
valve plug assembly (12) with ad just able wrench,
re move pressure plate nut (24) by rotating CCW
(viewed from above).
NOTE: Do not rotate the valve plug assembly (12).
The plug (12.1) and seat rings (10 & 11) have been
me chan i cal ly lapped at the factory per ANSI Class
II seat leakage and assembled to pro vide op ti mum
"free vertical movement".
8.
Pry loose pressure plate (22) from diaphragm(s) (20).
In spect pressure plate to ensure no de for ma tion
due to over-pres sur iza tion. If de formed, replace.
Remove o-ring (53).
) has been shut down,
Load
) should decrease sub-
2
3
