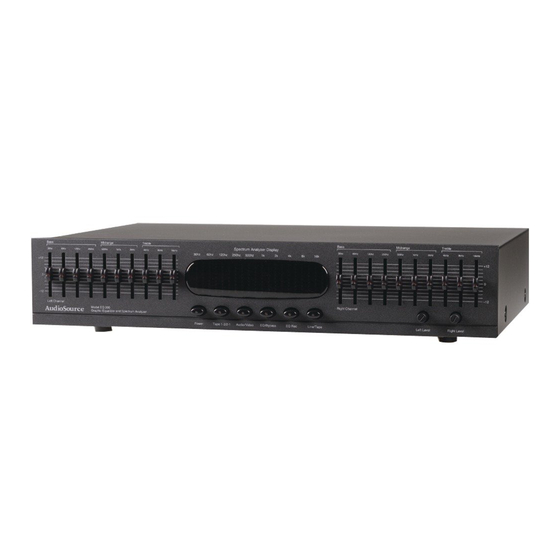
AudioSource EQ 200 Manual del usuario - Página 4
Navegue en línea o descargue pdf Manual del usuario para Ecualizador estéreo AudioSource EQ 200. AudioSource EQ 200 4 páginas. Ten-band stereo graphic equalizer with spectrum analyzer display
También para AudioSource EQ 200: Manual del usuario (7 páginas), Manual del usuario (12 páginas), Manual del usuario (5 páginas)

EQ 200
OWNER'S MANUAL
Using the Controls (continued)
7. Level Controls
Both left and right channels have a control marked "Level". This controls
the level, or volume of each channel. Usually, these controls can be
set to their maximum position, but these levels can be reduced if an
overly strong input signal causes distortion. Usually, similar adjustments
should be made for both channels.
8. Spectrum Analyzer Display
This provides a visual display of the relative signal levels in each of the
EQ sliders. The Spectrum Analyzer display is divided into ten columns
of LEDs which correspond to the ten EQ sliders. You can use this display
to assist you in setting your equalizer sliders, as well as to obtain
information about the frequency content of the music as you play it
through the EQ 200.
9. EQ Sliders
Each of these sliders will give 12 dB of "Boost" and 12 dB of "Cut".
There are ten sliders per channel – ten for the Left channel, and ten
for the Right channel.
Hooking it all up
The EQ 200 should be connected through the "Tape Monitor Loop" of your receiver, integrated amplifier, or preamplifier. Since the EQ 200 replaces the
tape deck, remember to activate the "Tape Monitor" switch on your receiver, integrated amplifier, or preamplifier – as you would when playing your tape
deck. Your tape deck can now be plugged into the back of the EQ 200.
When making or changing connections, it is always wise to unplug the power cords of your components – or at least make sure the power is "Off", so
you won't hear any unexpected "pops" during connection of cables.
The steps below are for connecting two tape decks, the EQ 200, a receiver, and an auxiliary source such as an MP3 player. Your set up may vary.
1. Connect the TAPE OUT or TAPE RECORD jacks (different components use different terminology) on the back of your receiver/integrated
amplifier/preamplifier to the AUDIO IN jacks of the EQ 200.
2. Connect the MAIN OUT jacks of the EQ 200 into the TAPE IN or TAPE MONITOR jacks of your receiver/integrated amplifier. This completes the "loop".
3. Always make sure to engage the "TAPE MONITOR" button on our receiver, no matter which input source you want to listen to. This allows the
"equalized" signal to be heard on any source material.
4. You can connect two tape decks to the EQ 200. For Tape 1, connect the LINE OUT or MONITOR jacks on your tape deck to the TAPE 1 IN (play)
jacks on the EQ 200. Next, connect the LINE IN or RECORD jacks on your tape deck to the TAPE 1 OUT (rec) jacks on the EQ 200.
5. You may use the VIDEO IN jacks on the EQ 200 to connect any high output source, such as an MP3 player, CD player, tape deck, or the audio
outputs of a DVR, cable box, DVD player or VCR.
Note: Any of the inputs-
Audio In, Video In, Tape 1 In,
or Tape 2 In can be used as
inputs for the EQ 200.
VIDEO
IN
OUT
L
AUDIO
R
TAPE
TAPE
OUT (rec)
IN (play)
L
R
4
MP3 / CD
DVD / VCR
CABLE BOX
DIGITAL ANTENNA
DIGITAL-
CONVERTER
VIDEO
PHONO
CD
AUX
13970 SW 72nd Ave. Portland, OR 97223 • 503.914.4688 • www.audiosource.net
9. EQ Sliders (continued)
Looking at the front panel, the sliders that control the lowest frequencies
are on the left, with the higher frequencies farther right. Usually,
identical adjustments should be made for both channels.
These sliders are one octave apart from one another. This corresponds
with the entire range of human hearing. The last page of this owners'
manual contains a chart, showing which sliders to adjust to affect the
sound of various instruments.
For instance, the lowest note of a bass guitar is 42 Hz. By adjusting the
sliders at 30 Hz and 60 Hz you can raise or lower the volume of the
bass guitar, bass drum, and any other musical instruments that occupy
this frequency range. On the other hand, the sound of the female vocalist
occupies a frequency range from roughly 200 Hz to 1500 Hz. By adjusting
the sliders within this range, you can change the tonal character of the
female voice, and any other musical instruments that occupy this
frequency range.
RECEIVER
LINE
LINE
OUT
IN
LINE
LINE
OUT
IN
L
R
CASSETTE DECK 2
L
R
CASSETTE DECK 1
