4M FLASHING EMERGENCY LIGHT Manual - Página 2
Navegue en línea o descargue pdf Manual para Juguete 4M FLASHING EMERGENCY LIGHT. 4M FLASHING EMERGENCY LIGHT 2 páginas.
D. ASSEMBLY
1
1
N
N
E
E
D
D
3
3
C
C
5
5
H
H
1. Turn the base (A) upside down and insert the motor pulley-end (D) first into its slot. Install the motor cover (E) and secure it with two
screws (N).
2. Turn the base upright again. Place the large pulley (F) on the centre spindle and secure it in place with the pulley cap (G).
3. Slot the LED holder (C) into the pulley cap (G), carefully feeding the wires through the central hole.
4. Push the bare metal ends of the three black wires into one of the terminals and secure them with a terminal cap (M). Check that the
bare metal of each wire is touching the metal of the terminal. Repeat with the three red wires in the other terminal.
5. Stretch the pulley belt (H) around the large pulley and the pulley on the motor.
6. Apply the reflective stickers (K) to the inner faces of the reflector holders (J). There are two stickers for each holder.
2
2
G
G
F
F
4
4
M
M
6
6
J
J
K
K
7
7
9
9
O
O
11
11
L
L
L
L
7. Clip the reflector holders (J) onto the large pulley (F).
8. Align the slots on the cover (B) with the tabs on the base, then push the cover into the base and rotate it to lock it in place.
9. Secure the cover with the washer screw (O).
10. Insert two 1.5-volt AAA batteries into the battery case, making sure the battery terminals are the correct way round. Install the battery
cover (I) and secure it with a screw (N).
11. Put the sticker (L) for decoration.
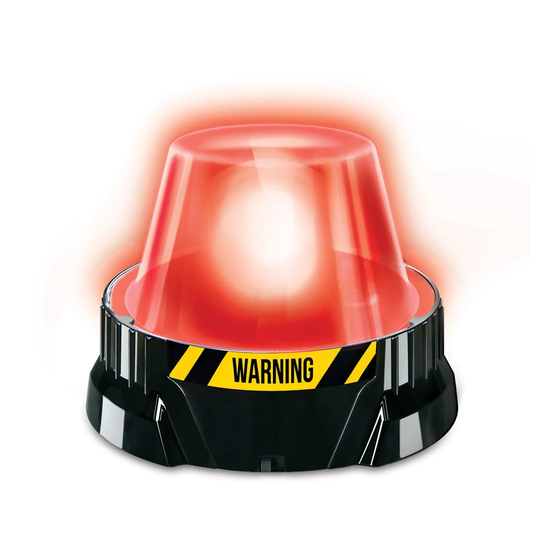
12. Slide the switch to the ON position. The reflectors will spin and the light will start to flash.
8
8
B
B
10
10
I
I
12
12
L
L