Cookmaster 20070111 Manual del usuario - Página 6
Navegue en línea o descargue pdf Manual del usuario para Fumadores Cookmaster 20070111. Cookmaster 20070111 8 páginas. Electric smoker
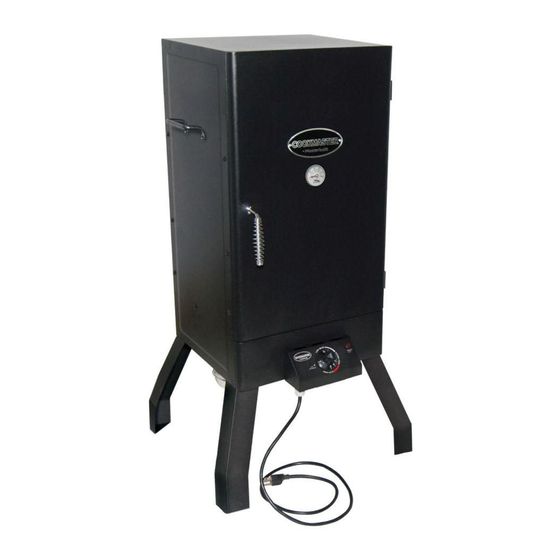
ASSEMBLY INSTRUCTIONS
Tools required for assembly: Adjustable Wrench, Phillips Head Screwdriver.
6
A
1
5
A
5
Step 1
Carefully position smoker as
shown.
Attach leg (6) to bottom of smoker body
(1) using phillips head screws (A).
Repeat step for remaining legs.
1
Step 2
Mount side handle (5) to smoker
body (1) using phillips screws (A).
Repeat step for opposite side.
OPERATION INSTRUCTIONS
IMPORTANT FACTS ABOUT USING SMOKER
• Maximum temperature will range between 266°F - 284°F (130°C - 140°C) when control panel is
set on HI.
• Wood chip bowl MUST be in place when using smoker. This minimizes the chance of wood flare ups.
• Wood chips must be used in order to produce smoke and create the smoke flavor. See "Wood
Smoking Guide for Meats" section in this manual.
• Check drip can often during cooking. Empty drip can before it gets full. Drip cup may need to
be emptied periodically during cooking.
• Do not open smoker door unless necessary. Opening smoker door causes heat to escape and
may cause wood to flare up. Closing the door will re-stabilize the temperature and stop flare up.
• Do not leave old wood ashes in the wood tray. Once ashes are cold empty tray. Tray should be
cleaned out prior to and after each use to prevent ash buildup.
• This is a smoker. There will be a lot of smoke produced when using wood chips. Smoke will
escape through seams and turn the inside of smoker black. This is normal.
HOW TO CLEAN SMOKER
For cooking grates, water bowl and drip cup use a mild dish detergent. Rinse and dry thoroughly.
For wood chip bowl, clean frequently to remove ash build up, residue and dust.
For the interior and exterior of smoker simply wipe down with a damp cloth. Do not use a cleaning
agent. Make sure to dry thoroughly.
Do not clean with metal scouring pads. Pieces can break of the pad and touch electical pars, cre-
ating a risk of electrical shock.
ALWAYS MAKE SURE UNIT IS UNPLUGGED AND COOL
TO THE TOUCH BEFORE CLEANING AND STORING.
Step 1: Plug power cord into an outlet (refer to
"Warnings & Important Safeguards" section of
manual).
Step 2: Turn dial to set temperature. Ready light
will turn off when unit has reached set temperature
and is ready for use.
Step 3: When cooking time has elapsed and food
is done, turn dial to MIN and unplug power cord
from outlet.
* Allow excess grease to drain into grease clip
shown on page 8.
10