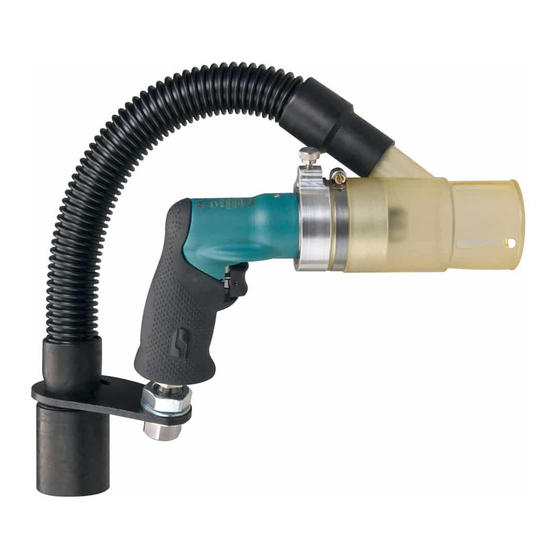
Dynabrade 52906 Seguridad, funcionamiento y mantenimiento - Página 4
Navegue en línea o descargue pdf Seguridad, funcionamiento y mantenimiento para Taladro Dynabrade 52906. Dynabrade 52906 9 páginas. .4 hp vacuum drill; pistol grip / central vacuum / rear exhaust

Disassembly/Assembly Instructions – Vacuum Pistol Grip Drills (Cont.)
A snug fit will trap the cylinder while still allowing it to be shifted from side to side with a slight amount of finger pressure. A loose fit will
9.
not achieve proper preload of the motor bearings.
Motor Assembly Complete:
Tool Assembly:
For All Models:
Secure the wrench flats of the 52960 Sleeve Adapter in a vise with aluminum or bronze jaws. Install the 01464 Seal, 01472 Tip Valve and the small
1.
end of 52943 Spring against the tip valve. Apply a small amount of Loctite #271 (or equivalent) to the external threads of the 52959 Inlet Adapter, and
install it to the 52960 Sleeve Adapter. (Torque to 17 N•m/150 in. lbs.)
Use the exploded view of the muffler components for the correct order of assembly and install these onto the inlet bushing sub assembly from step 1.
2.
Note: For drill models 52903/04/05/06/07 - slide 52958 Aspirator as shown and install 97444 Retaining Ring in grove closest to thick hex head. Slide
(4) 01696 Felt Rings, align felt rings so that all the tabs are inline and orientated with the cutout in the handle grip. For models 52905 slide 52958
Aspirator as shown and install (2) 01696 Felt Rings. Slide 52984 Baffle as shown up and inside felt rings. Install 97444 Retaining Ring in groove below
the 52984 Baffle. Install 96077 O-Ring into the handle at the base of the oval shape counter bore.
Secure the housing in a vise with aluminum or bronze jaws. Pull trigger apply a small amount of the Loctite #567 (or equivalent) to the external threads of
3.
the 52960 Sleeve Adapter and install it onto the housing. (Torque to 17 N•m/150 in. lbs.)
After threaded surfaces have been properly cleaned and primed, apply a small amount of Loctite #567 (or equivalent) to 52751 Inlet Adapter before
4.
assembling to 52959 Inlet Bushing Assembly. Hold the 52959 Inlet Bushing Assembly stationary with an adjustable wrench when installing the
air connection fitting.
With the housing secured in the vise, install the 52955 Trigger Assembly. Be sure to locate the notched area of the valve stem so that the 50936 Pin
5.
will retain the trigger assembly. Note: Left side of housing has a slip fit to pin and right side will retain pin.
Install the motor assembly into the housing. Insure 97807 O-Ring is properly secured before installing motor.
7.
Install the correct spacer for the specific model tool.
8.
Use the 96239 Bearing Press Tool and arbor press to install the 02698 Bearing onto the spindle/carrier. (Place the press tool against the inside
9.
race of the bearing.)
For Models: 52903/04/05/06/07
Install planet gears and pins into the carrier(s). Use external retaining ring pliers to install the 97443 Retaining Ring.
10.
Install ring gear into the housing so that the notches in the ring gear align with openings for the set screw and lubricant fitting.
11.
Important: For Models 52903 and 52904 install the 52966 Washer (2) between the planetary carrier and motor, assemblies.
Apply a small amount of Loctite #567 (or equivalent) to the threads of the 50784 Set Screw and install flush with outer housing surface,
12.
Do Not over tighten.
Lubricate the planetary gears through the lubricant fitting. Initially apply 3 plunges of lubricant. (Apply 1 plunge at intervals of every 50 hours of use
13.
there after.) Order and use the recommended Dynabrade 95542 Grease and the 95541 Lubricant Gun to ensure maximum gear life.
For All Models:
Use the 96240 Bearing Press Tool to install the 01139 Bearing into the nose cover. (Place the press tool against the outside race of the bearing.)
14.
Use internal retaining ring pliers to install the 97445 Retaining Ring into the nose cover.
15.
Install the spindle/carrier adapter assembly into the nose cover.
16.
Use the 16 mm crowfoot and torque wrench and a 3/16" hex key to install the 52954 Spindle Nut turning it clockwise.
17.
(Torque to 17 N•m/150 in. lbs.)
Carefully secure the housing in a vise so that the motor opening is facing up. To avoid damaging the housing do not over tighten the vise.
18.
Apply a small amount of Loctite #567 to the housing threads and carefully align the nose cover, spindle or planetary gear assembly(ies) with the
19.
housing and the air motor assembly turning it clockwise. Use a 26 mm crowfoot and torque wrench. (Torque to 17 N•m/150 in. lbs.)
Use the 96453 Open-end Wrench (16 mm) and a hex key wrench secured in the jaws. (Hand Tight)
20.
Tool Assembly Complete:
Special Repair Tooling Referenced:
96210 Bearing Removal Tool
96241 Bearing Press Tool
96232 Arbor Press
Gear Lubricant Maintenance Instructions:
Lubricate the planetary gears through the grease fitting. Apply 1 plunge at intervals of every 50 hours of use. Order and use the recommended Dynabrade
95542 Grease and the 95541 Lubricant Gun to ensure maximum gear life.
Use to remove bearings, gears, and other components.
96239 Bearing Press Tool
96242 Bearing Press Tool
6
96240 Bearing Press Tool
96346 (2") Bearing Separator
