Automation Controls Group UniDrive SCC-3 Manual de instalación y solución de problemas - Página 10
Navegue en línea o descargue pdf Manual de instalación y solución de problemas para Unidad de control Automation Controls Group UniDrive SCC-3. Automation Controls Group UniDrive SCC-3 11 páginas. Smart conveyor control generation iii

After Removal of a Slug Signal
4.3.3
(If Rev Slug is Not Active)
During Slug mode of operation, parcels are not tracked by the
system logic. Some parcels will likely be between sensors at the
time the Slug signal is removed.
Beginning with the zone where the Slug signal was asserted and
cascading upstream, each zone will run for up to 2.5 seconds
until either the time expires or a parcel is discovered.
After Removal of a Reverse Slug Signal
4.3.4
(If Slug is Not Active)
Since Reverse (Rev) Slug causes the zones to coast, parcels that
were in motion will come to rest in more or less random
locations. Beginning with the zone where the Rev Slug signal
was asserted and cascading upstream, each zone will run for up
to 2.5 seconds until either the timer expires or a parcel is
discovered.
5
Diagnostics & Troubleshooting
Feedback LEDs
5.1
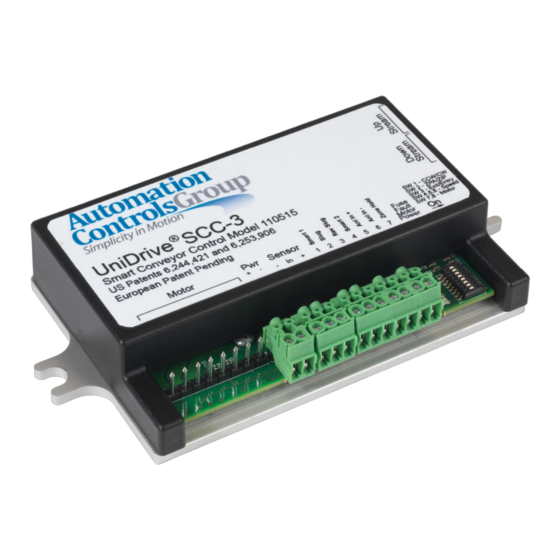
The SCC-3 provides four (4) LED indicators shown as item 5 in Figure
1: SCC-3 Controller Components. These LEDs are often useful in
diagnosing various wiring and connection problems. If power is
connected there will always be at least one LED illuminated or
flashing. When no LED is illuminated, there is no power.
Fuse LED (Red)
5.1.1
CAUTION: This robust next-generation fuse will not blow
under normal circumstances. Inspect all wiring
connections to assure that there are no short circuits.
This LED is off under normal circumstances. It illuminates
constantly if the 10 amp replaceable fuse is blown and power is
applied with the proper polarity. The 10 amp fuse on the board is
not user-accessible. If the blown fuse LED is illuminated, return
the board to your distributor or supplier for analysis or repair.
NOTE: The control's on-board fuse is NOT replaceable.
Fault LED (Red)
5.1.2
This LED is off under normal circumstances. If a problem is
detected, it provides one of the following five signals:
One (1) flash in 4 seconds: The board has a hardware
problem. Return it to your supplier.
Two (2) flashes in 4 seconds: The input voltage is too high.
Reduce the voltage.
Three (3) flashes in 4 seconds: The input voltage is too low.
Increase the voltage.
Four (4) flashes in 4 seconds: There is a problem with the
motor cable or connection. Check to see that the cable is not
damaged and that all of the wires are secure.
Five (5) flashes in 4 seconds: Control over temperature.
Six (6) flashes in 4 seconds: Extreme over current.
Constantly ON: The motor is stalled or the sensor is
continuously blocked. Check for mechanical obstructions.
Motor LED (Amber)
5.1.3
Four flashes in 4 seconds: Components on the board
have overheated and the circuit is limiting the power to
the motor to about half (50%) of normal. This problem
will correct itself when the board has cooled adequately.
Check for mechanical obstructions.
Constantly ON: Motor current is at the maximum
allowed and is being electronically limited. Check for
mechanical obstructions.
Flickering: If the motor starts under significant load, the
current may be limited briefly causing the LED to flicker.
If the LED flickers constantly, this is an indication that the
motor is operating at its upper limit and may never reach
the full speed. This is not a cause for concern and no
corrective action is required.
Power LED (Green)
5.1.4
Constantly ON: Power is properly applied as long as the fuse
is not blown.
Firmware Version Display
5.2
Three (3) of the feedback LEDs are used to communicate
the firmware revision of the control assembly during the
start-up sequence. Each time that power is applied to the
board, the green (power) and red (fault) LEDs will turn on
immediately. After 1.0 second the amber LED will flash on
for 0.75 seconds followed by an off period. An off period of
1.5 seconds represents a decimal point separating major
revisions from minor revisions. An example is shown below.
Figure 3: Firmware Version Display Example
The example sequence above represents firmware revision
1.2. When the red (fault) LED turns off, the start-up sequence
has ended and normal operation begins.
SCC-3 Product 110515 Revision 1.3 April 19, 2018 | Page 10
