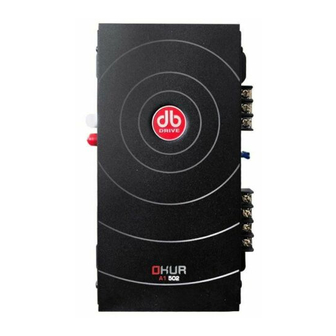
DB Drive A1 750 Manual del usuario - Página 2
Navegue en línea o descargue pdf Manual del usuario para Amplificador DB Drive A1 750. DB Drive A1 750 2 páginas.

I
NTRODUCTION
Congratulations on your purchase of a
selection of a
DB Drive
car audio product indicates a true appreciation of fine musical
reproduction. Whether adding to an existing system or including your
a new system, you are certain to notice immediate performance benefits.
KEEP YOUR SALES RECEIPT
Take this time to attach your sales receipt to the manual and put in a safe place. In case
of any unforeseen reason this product may need warranty service, your receipt will be
necessary to establish purchase date.
RECOMMENDATION
A power amplifier's performance is only as good as its installation. Proper installation will
maximize the system's overall performance. It is recommended that you have our product
installed by an authorized
DB Drive
retailer. However, if you decide to install it yourself,
please carefully read through this manual and take your time to do a quality installation.
IMPORTANT!
Before making any connections, disconnect the car's battery until the
installation is completed to avoid possible damage to the electrical system.
F
use amplifiers power wire at the battery
Be sure to fuse the power wire within 12" of the car's battery. This will protect the car's
battery in case of a short circuit between the power amplifier and battery. THIS IS A
MUST, the amplifier's built-in fuse will only protect the power amplifier not the car's
battery!
Use high grade wire connectors
To ensure maximum power transfer and secure safe connections, it is recommended to
use high grade barrier spades (for connection at amplifier) and terminal rings (for connec
tion at battery).
Do not run any wires underneath vehicle
Exposed wires have a chance of being cut or damaged. It is best to run all wires through
the vehicle under the carpet and/or side panels. This lends to a cleaner installation and
less risk of damage.
Use caution when mounting amplifier
Remember there are many electrical wires, gas lines, vacuum lines, brake lines as well as
a gas tank in the automobile. Make sure you now where they are when mounting the
amplifier to avoid puncturing lines, shorting wires or drilling holes in the gas tank.
Run signal wires away from electrical wires
To avoid possibility of induced noise from the car's electrical system (i.e. popping noises
or engine noise), run wires away from the car's electrical wiring.
Make all ground wires as short as possible and at the same point
In order to reduce the chance of ground loops (i.e. engine noise), make the grounding
wire as short as possible to reduce the wire's resistance. Also, when using multiple
components, make sure all units are grounded at the same point.
Avoid sharp edges when running the wires
To avoid the possibility of power, signal or speaker shorts, be careful not to allow the
amplifiers wires to come in contact with sharp edges. Use a grommet to protect the wire
when running through the fire wall.
DB Drive
state-of-the-art power amplifier. Your
DB Drive
01
IMPORTANT! The following speaker connection are for the amplifier in normal mono
configuration.
amplifier in
Make the speaker connections using speaker wire that is at least 16 gauge or heavier.
As with any audio component, proper phasing of the amplifier and speakers is essential
for strong bass response. When connecting, make sure that positive (+) from the amplifier
is connected to the positive (+) of the speaker, and the same for negative (-).
Please note that although the A1 500 , and A1 750 are mono amplifiers, we have
provided two sets of speaker terminals on the amplifier. These terminals are connected in
paralleled internally (connected together). The second set of speaker terminals are
intended for ease of connection when running multiple woofers.
2 CHANNEL SPEAKER CONNNECTION
4 CHANNEL SPEAKER CONNNECTION
CH1
+
-
4 Ohm Speaker
MONOBLOCK SUBWOOFER CONNNECTION
*
Can also power a pair of 4 Ohm or 2 Ohm DVC Subwoofers.
S
PEAKER CONNECTIONS
Speaker Output
+12V
L
L
R
R
Fuse
Speaker Output
Power Input
CH2
Ground
Remote
+12V
Fuse
-
+
-
4 Ohm Speaker
4 Ohm Speaker
Mono Subwoofer Output
Fuse
+12V
*
4 Ohm DVC Woofer
(2 Ohm minimum)
02
Power Input
Remote
Ground
A1 502
Speaker Output
CH3
CH4
A1 504
+
-
+
-
-
4 Ohm Speaker
Power Input
Remote
Ground
A1 500
