Galaxy DX 2517 Manual del usuario - Página 5
Navegue en línea o descargue pdf Manual del usuario para Transceptor Galaxy DX 2517. Galaxy DX 2517 9 páginas. Am-fm-ssb-cw-pa amateur base station transceiver
position. This will give you an SWR reading. When you are
finished, be sure to turn the "CALIBRATE" pot fully CCW to the
"RF" position so you are able to read your output power. You will
hear the "RF" switch click on.
4. NB/ANL SWITCH: This switch controls the Noise Blanker and
Automatic Noise Limiter simultaneously. They are turned on and
off together. The noise Blanker is very effective for eliminating
repetitive impulse noise such as ignition interference. The
Automatic Noise Limiter reduces strong atmospheric or man-
made interference.
5. ROGER BEEP SWITCH: When this switch is placed in the
ROGER BEEP position, the radio automatically transmits an
audio tone at the end of your transmission so that people who are
having trouble hearing you will know that you are done speaking.
As a courtesy to others, use the Roger Beep only when necessary.
6. NOISE FILTER: This filter de-emphasizes audio high frequency
response in order to increase the signal-to-noise ratio of weak
signals. While you will notice a dramatic reduction in the
"rushing" sound when this filter is activated., it does not have
much effect on the signal-to-noise ratio of strong signals.
7. +10KHz SWITCH: This switch adds 10KHz to the frequency
being used. Example, if frequency counter display 28.765, flip the
switch and the display will read 28.775MHz.
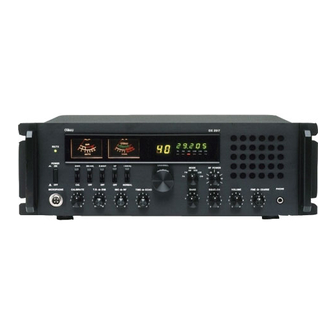
8. SIGNAL/MODULATION METER: This meter indicates signal
strength of incoming signals during receive and your percentage
of modulation when transmitting in the AM. Modulation readings
are most accurate when using maximum output power. The
modulation meter does not work at all in FM or SSB.
- 7 -
9. CHHANEL DISPLAY: The channel display indicates the
current selected channel.
10. FREQUENCY COUNTER: The frequency counter indicates
the frequency of operation.
11. MICROPHONE JACK: Used to connect microphone for voice
source.
12. CALIBRATE CONTROL: In the "RF" position, the left meter
reads power output in watts. When rotated clockwise, it is used in
conjunction with the "SEW/CAL" switch (No.3).
13. DIM CONTROL: Controls the brightness of the meter lamps
and display digits.
14. TALK BACK: This is a switched pot that controls the volume
of the talkback sound. It does not affect the sound your
transmitting. You can turn the talkback off (Fully CCW) or adjust
the volume as you desire. This talkback circuit can be used
anytime – even without any sound effects.
15. RF GAIN CONTROL: This control is used to reduce the gain
of the RF amplifier under strong signal conditions.
16. MIC GAIN CONTROL: This control adjusts the microphone
gain in the transmit mode. This feature is designed for use in a
high-ambient noise environment or to maximize talk power.
17. TIME/ECHO CONTROL: This "TIME" control pot turns the
ECHO on and off and is used to set the time delay of the ECHO
repetitions. The ECHO control sets the intensity of the ECHO
effect.
- 8 -