DCbox GBMA Manual
Navegue en línea o descargue pdf Manual para Monitor DCbox GBMA. DCbox GBMA 2 páginas. 4" (10 cm) dot matrix large display

4" (10 cm) DOT MATRIX LARGE DISPLAY
GBMA
with 1~4 ALARMS / ANALOG OUTPUT / RS-485
D
Please understand key indicators & functions at the first operation.
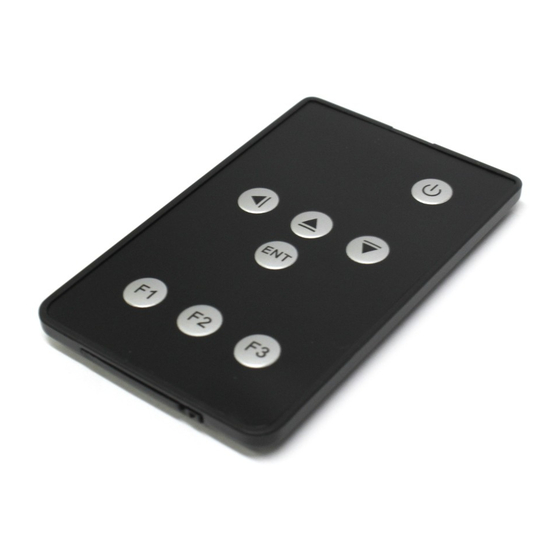
FRONT PANEL & KEY FUNCTIONS
Up Key
Shift Key
Code Switching Key
ID Display Key
Symbol
Key Name
1. In the measuring status, press this key can enter to ID confirmed page.
ID Confirmed Key
2. In the parameter setting, press this key can back to the measuring page.
1. In the measuring status, press this key can enter to parameter pages.
Enter Key &
ENT
2. In the parameter setting, press this key can save the value & go to
Save Key
next parameter.
Shift Key
1. In the parameter setting , press this key can move the cursor left.
Up Key
1. In the parameter setting, press this key can increase the digits.
Down Key
1. In the parameter setting , press this key can decrease the digits.
PROGRAMMING MODE OPERATING PROCEDURES
Display
Power On
Mea suring Status
Present value for measurement
ENT
Press
Pass Code
P.CO
Press
(P.Cod)
ENT
Press
Pass code is correct that will enter to parameter groups.
P.Code Corre ct
Pass code is wrong that will back to measuring status.
NO
YES
SYS
Press
ROP
Press
ENT
ENT
Press
Press
System Setting Group
Alarm Settin g Group
A/O Setting Group
ID Confirmed Key
Down Key
Enter Key &
ENT
Save Key
F2
F3
F1
Reset Key
Descriptions
Descriptions
Parameter Group Setting Procedures
to enter pass code.
Press
Press
AOP
DOP
ENT
ENT
Press
Press
Press
RS485 Settin g Group
Input/Output Adjustment
P1
MANUAL
SYS
ENT
Press
DP
ENT
Press
DSL
ENT
Press
DSH
ENT
Press
ZB
ENT
Press
ZDT
ENT
Press
HB
ENT
Press
HDT
ENT
Press
SQR
ENT
Press
DIS
ENT
Press
FIL
ENT
Press
DOV
ENT
Press
AVG
ENT
Press
LCU
ENT
Press
COD
ENT
Press
LCU
ENT
Default
Press
ID
ENT
Press
0000
ADJ
Press
ENT
Display
Descriptions
System Setting Group Procedures
Press
to select decimal point (0, 1, 2, 3, 4).
Decimal Point
Setting (dP)
EX: if the value shows "0.00" that means the decimal point is 2 digits.
Press
to modify display low scale for the input signal zero value.
Display Low Scale
EX: If the input signal is 4~20mA; 4mA is shown display 0.00,
Setting (dSL)
this parameter must be set for 000.00.
Press
to modify display high scale for the input signal span value.
Display Hi Scale
EX: If the input signal is 4~20mA; 20mA is shown display 100.00,
Setting (dSH)
this parameter must be set for 100.00.
Zero Band
to modify zero band setting.
Press
Setting (Zb)
Zero Trac king Time
to modify zero tracking time setting (0~99 sec)
Press
Setting (Zd t)
Input Holding Band
to modify input hold band setting.
Press
Setting (Hb)
Input Holding Time
to modify input holding time setting (0~99 sec)
Press
Setting (Hdt)
Root Square
to select root square setting (NO or YES)
Press
Setting (Sqr)
Display Sel ection
Press
to modify display selection (DIS, MAX, HD)
Setting (diS)
PS: DIS: Current Display; MAX; Max. Hold; HD: Hold Data
Display Filter
Press
to modify display filter setting (0, 1, 2, 5).
Setting (FiL)
Display Over value
to modify display overvalue setting (0~9999).
Press
Setting (dov)
Press
to modify display average (1~99).
Display Average
PS: Please use this function for stable display value
Setting (AvG)
when input signal is unstable.
Display Low Cut
to modify display low cut to 0 (0~99).
Press
Setting (LCU)
Pass Code
Press
to modify pass code (0~19999).
Setting (Cod)
PS: Please don't forget the new pass code after modification.
to lock the keys, using key lock function
Key Lock
Press
only can view the parameters, but cannot modify any values.
Setting (LoC)
PS: no (unlock) ,YES ("ENT" unlock , others lock).
Press
to modify identification (00~99).
Identification
Setting (id)
PS: If the ID is 00; Meter can received any Infrared Control.
P2
Default
Customers
specify
Customers
specify
Customers
specify
0000
0000
0000
0000
NO
DIS
0000
0000
0005
0000
0000
NO
0000
