Dynex DX-DRTVL103 Manual del usuario - Página 12
Navegue en línea o descargue pdf Manual del usuario para Adaptador Dynex DX-DRTVL103. Dynex DX-DRTVL103 16 páginas. Grand support de montage mural ultra-mince avec inclinaison de - 5° optionnelle
También para Dynex DX-DRTVL103: Manual (6 páginas), (Spanish) Instrucciones De Montaje Manual (16 páginas), (Francés) Instructions De Montage Manual (16 páginas)
12
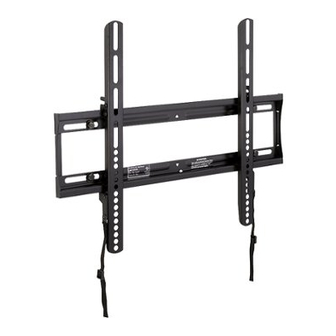
Step 6:
Mount the wall plate
Note: Any material covering the wall (such as sheetrock) must not exceed 5/8" (16 mm).
Option 1: Mounting on a wood-stud wall
Locate the studs. Verify the center of the stud with an edge-to-edge stud finder.
At the wall height you determined in the previous step, align the wall plate (01) against the wall and make sure
that it is level. Use a pencil to mark the screw hole locations, then remove the wall plate.
Drill pilot holes to a depth of 3" (75 mm) using a 7/32" (5.5 mm) diameter drill bit.
Align the wall plate with the pilot holes, then place the washers (05) over the holes in the wall plate. Insert the lag
bolts (04) through the washers, then tighten the lag bolts only until the washers are pulled firmly against the wall
plate.
Caution: Avoid potential injuries or property damage! DO NOT over-tighten the lag bolts (04).
< 5/8"
(16 mm)
You'll need:
05 (4)
04 (4)
01
16"
(406 mm
05
04
Stud
Pencil
finder
Need help? Call 800-305-2204
01
Level
Drill
DX-DRTVL103
3" (75 mm)
7/32" (5.5 mm)
Socket wrench with
wood drill
1/2" (13 mm) socket
or adjustable wrench