Cordex UT5000 Manual del usuario - Página 5
Navegue en línea o descargue pdf Manual del usuario para Instrumentos de medida Cordex UT5000. Cordex UT5000 13 páginas. Intrinsically safe ultrasonic thickness gauge
También para Cordex UT5000: Manual de inicio rápido (3 páginas), Manual del usuario (12 páginas), Instrucciones para un uso seguro (7 páginas), Instrucciones para un funcionamiento seguro (8 páginas)
GETTING STARTED
Inserting The Battery
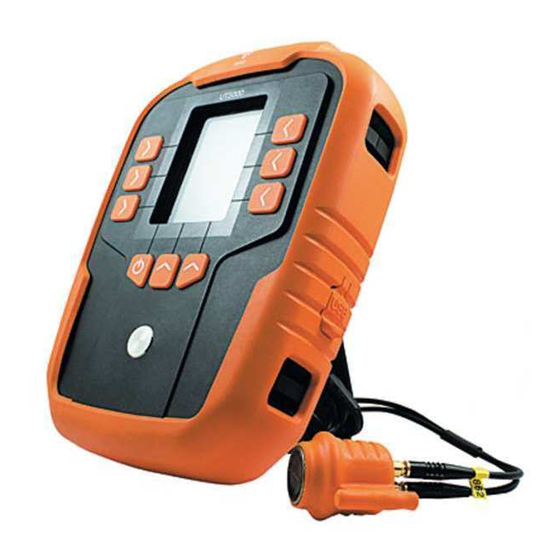
The battery compartment is in the rear of the
instrument under the orange shockresistant
overboot.
WARNING!
Use only a Tadiran 3.6V Lithium
Thionyl Chloride Cell (19.0Ah, SL-2780/S,
CorDEX Part No: CDX5000-327). The use of
any other type of battery is strictly forbidden!
To change the battery:
1
Remove the orange shock-resistant overboot
by stretching it over the lower corners of the
unit at the front. It may help to remove the
stand from the back and to open the USB and
probe connector covers.
2
Half turn the two screws on the compartment
cover and then carefully lift off the cover.
3
Make sure that the rubber sealing of the cover
is not damaged or removed from the guiding
notch.
4
Insert the battery.
WARNING!
- Ensure correct orientation
according to the sketch on the battery cover
to avoid internal damage.
RUGGED
AUTHORITY
When exchanging the battery, the memorized
parameter and calibration values are deleted.
Therefore, you need to execute a new
calibration and enter the relevant parameters
again after exchange of the batteries.
After battery replacement, switch the
instrument on/off twice to reset it to a
predefined operating status. All previous
settings will be restored to the tester after
connecting to the CorDEX CONNECT™
software, or the UT5000 Mini app.
!
Always use with outer orange
overboot fitted and never
open the battery or USB
compartments in a hazardous
environment.
Connecting the Probe
WARNING!
Only approved transducer ( CorDEX
part no: ExTC4/10) with approved cable
( CorDEX part no: CDX5000-221) can be
operated in ATEX zone environments.
Press the probe plugs (it does not matter
which way round the connectors are fitted)
into the connector sockets on the rear of the
UT5000.
Turning the Power On/Off
To switch the UT5000 on or off, press the
Power button and hold it down for about 5
seconds. The UT5000 has an AUTO SLEEP
feature: it turns off automatically when the
device has not been operated for a fixed
period of time (see page 18). To resume the
operation condition, press any button.
UT5000 – Intrinsically Safe Ultrasonic Thickness Gauge
Calibration/ Zeroing
The UT5000 has a calibration disc mounted on
the front of the unit. To calibrate the probe:
1.
Apply a drop of the supplied couplant (see
page 12) to the disk or the probe.
2.
Press the probe onto the disc and hold it
firmly.
3.
Press the SETUP key.
4.
Use the arrow keys to highlight Transducer
Setup ; then press the SEL key.
5.
Use the arrow keys to highlight Probe zero
built in ; press the SEL key.
6.
After the UT5000 has taken several
measurements, press the SEL key.
The unit is now zeroed and ready for use.
9