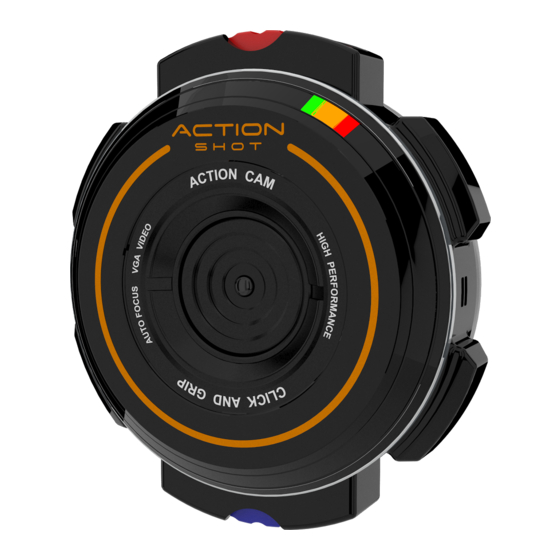
JAKKS Pacific Action Shot Instrucciones - Página 3
Navegue en línea o descargue pdf Instrucciones para Cámaras de acción JAKKS Pacific Action Shot. JAKKS Pacific Action Shot 4 páginas. Digital video camera

CONTROLS
Mode; Battery Level
Record (Rec) / Stop Button
LED Indicator
USB Port
Power / Mode
Microphone
Selection Button
CHARGING THE BATTERY
1
Insert one end of the USB CONNECTOR into the Action Shot
Insert the other end into your computer's USB PORT. The Action Shot
responds with a sound and the battery begins charging.
TO YOUR COMPUTER
2
BATTERY CHARGE LEVEL:
LED INDICATOR blinks RED: Battery Low/Empty
LED INDICATOR blinks ORANGE: Battery Half Full
LED INDICATOR is SOLID GREEN:
Battery Fully Charged
Fully charging the Action
Shot
™
Camera takes
approximately 2 hours.
POWER ON/OFF
1
PRESS & HOLD the POWER /
MODE SELECTION BUTTON
for 2 SECONDS to turn the
camera ON.
3
PRESS & HOLD the POWER / MODE SELECTION BUTTON for 5 SECONDS to turn the camera OFF.
Video Viewer
Connection Port
Speaker
Micro SD Card Slot
Reset Button Hole
™
Camera's USB PORT.
™
Camera
3
Remove the USB CONNECTOR from the Action Shot
Camera's USB PORT. Remove the other end from your
computer's USB PORT. A fully charged battery will
function for approximately 2 to 4 hours, depending on
use.
2
The LED INDICATOR lights up
SOLID RED. The Action Shot
™
Camera responds with a sound.
MODES
OPERA TION
™
PHOTOGRAPHY MODES
SINGLE IMAGE
GREEN LED INDICATOR ON: PRESS the REC / STOP BUTTON to take a single photo. The camera makes a sound and
records a single image. Each time the REC / STOP BUTTON is pressed, another photo is taken. The camera's internal
memory will store approximately 2,000 still images.
TIME LAPSE IMAGES
GREEN LED INDICATOR ON: PRESS and HOLD the REC / STOP BUTTON for 2 seconds. The camera makes a sound
and records a single image approximately every 2 seconds (the result will be time-lapse images). PRESS the REC / STOP
BUTTON again to end recording; The camera makes a sound. The camera's internal memory will store approximately
2,000 images.
Action Shot™ Camera has been optimized for OUTDOOR & DAYLIGHT use. For best results INDOORS, use in well lit areas.
IMAGE TRANSFER
To transfer your videos and still photos to your computer:
1. Attach the Action Shot
™
Camera to your computer via USB CABLE (see Steps 1 & 2 in the CHARGING THE BATTERY section).
2. The camera responds with a sound.
3. Download the videos or images to your computer.
4. Remove the USB CABLE when your are nished (see Steps 5 & 6 in the CHARGING THE BATTERY section).
Visit www.actionshotcamera.com for the latest information and FREE editing software.
The Action Shot
™
Camera operates in 3 MODES:
• VGA MODE 30fps (640 x 480).
• QVGA MODE 60fps (320 x 240)
• PHOTOGRAPHY MODE (640 x 480)
™
When the Action Shot
Camera is turned ON by pressing the POWER / MODE SELECTION
BUTTON (the first time), it begins in VGA MODE, which is 30fps (640 x 480). The resulting
video is in NORMAL RESOLUTION and plays back at NORMAL SPEED.
If you PRESS the POWER / MODE SELECTION BUTTON a second time, then the LED
INDICATOR lights up SOLID ORANGE. The camera responds with a sound and enters
QVGA MODE (60fps; 320 x 240). The video will appear in SLOW MOTION when played
back.
If you PRESS the POWER / MODE SELECTION BUTTON a third time, then the LED
INDICATOR lights up SOLID GREEN. The camera responds with a sound and enters
PHOTOGRAPHY MODE.
VGA MODE
RED LED INDICATOR ON: PRESS the REC / STOP BUTTON to START recording. The
camera responds with a sound as it begins to record video images. The camera is able to
record approximately 2.5 minutes of VGA video using the internal memory. PRESS the
REC / STOP BUTTON again to STOP recording. The camera responds with a sound and
stops recording. To view your video, see the IMAGE TRANSFER section below.
QVGA MODE
ORANGE LED INDICATOR ON: PRESS the REC / STOP BUTTON to START recording.
The camera responds with a sound as it begins to record video images. The camera is
able to record approximately 2.5 minutes of QVGA video using the internal memory.
PRESS the REC / STOP BUTTON again to STOP recording. The camera responds with a
sound and stops recording.
