Garageio Blackbox Manual de instalación - Página 2
Navegue en línea o descargue pdf Manual de instalación para Abrepuertas de garaje Garageio Blackbox. Garageio Blackbox 2 páginas. 1 door installation
Step 6 of 9
Mount the activator to your garage door
•
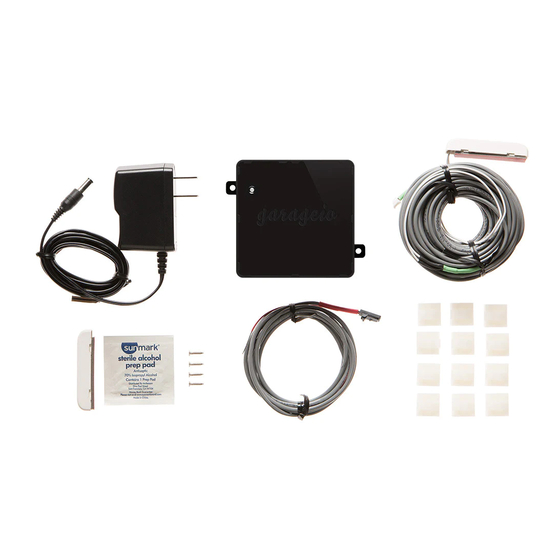
Locate the activator package (Part C). Use a piece of masking
tape to temporarily affix the activator to the edge of your
closed garage door, near the top.
•
Test for any interferences by manually opening and closing the
door, then permanently mount the activator by using either
the adhesive backing or supplied screws.
Step 7 of 9
Install the sensor
•
Locate the green-banded sensor cable (Part F). Using the
adhesive backing or supplied screws, mount the sensor on
the wall at the same height as the activator so they vertically
align when the garage door is closed. They should be no
more than 1/2 inch apart.
•
Route the sensor cable back to the Blackbox along the outside
of the garage door rails, securing it with the provided cable
clips to avoid any moving parts of the door.
Questions?
Visit garageio.com/support to view solutions to the most common installation issues.
Step 8 of 9
Power up the Blackbox
•
Plug the power adapter (Part ) into the Blackbox DC IN port,
and then into a nearby power outlet. Switch the Blackbox on.
•
The front light will blink red while the Blackbox connects to
your wireless network. Once successful, the front light will
blink green for several seconds while the Blackbox sets
itself up.
Step 9 of 9
Almost there!
Create a Garageio account online to finish setup.
garageio.com/connect
1 Door Installation
PAGE 2