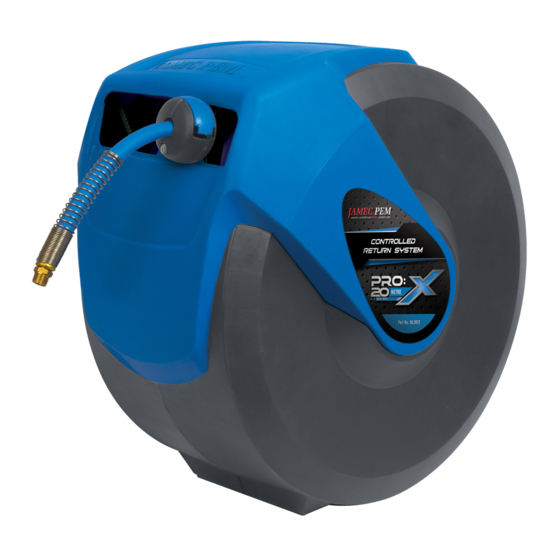
JAMEC PEM 58.3012 Instrucciones de uso - Página 3
Navegue en línea o descargue pdf Instrucciones de uso para Herramientas JAMEC PEM 58.3012. JAMEC PEM 58.3012 4 páginas. Air and water hose reel
También para JAMEC PEM 58.3012: Manual de instrucciones (8 páginas)

OPERATION
Slowly pull out the hose to the required length. A 'click' noise will be heard. To
1.
lock the reel, allow the hose to retract slowly after hearing 'click'.
To release the hose, pull out the hose until you hear a 'click', and then allow the
2.
hose to slowly retract while guiding the hose back into the hose reel. The self
layering mechanism will coil the hose back onto the inner drum.
To avoid injury and damage, always hold the hose while it is retracting. This hose
3.
reel has a controlled return function which allows the hose to return slowly if it is
let go. It is always recommended to always hold the hose while it's retracting. In
the event the hose is let go this controlled return function will stop the hose from
reacting too fast.
IMPORTANT :
IF THE HOSE BECOMES TANGLED AND WILL NOT RETRACT - SLOWLY PULL
OUT THE HOSE PAST THE TANGLED SECTION AND THEN ALLOW THE HOSE TO
SLOWLY RETRACT WHILE GUIDING THE HOSE BACK INTO THE HOSE REEL.
ALWAYS ENSURE THE HOSE IS CLEAN AND NOT TWISTED.
ADJUSTING THE STOP-BALL
The location of the hose stopper can be adjusted to allow more hose or less hose to
be exposed when fully rewound.
Pull out the desired length of hose, ensuring the hose reel is in the lock position.
1.
Open the latch on the hose stopper and move it to the desired position on the hose.
2.
Re-latch the hose stopper at desired position
3.
:
CAUTION
Always make sure the hose reel is in the locked position before removing the hose
stopper and make sure the hose stopper is securely fastened before unlocking the
reel.
CAUTION:
Only adjust the spring when the hose is fully rewound. Do Not Over-tighten
Using a flat head screw driver, remove the side cover marked "Coil Spring
4.
Adjustment" by prying it open where indicated.
Fold out the crank handle.
5.
Turn the crank clockwise to increase
6.
the tension, counter clock-wise to reduce the tension.
Turn the crank handle five times in the desired direction. Check the spring
7.
tension by pulling a short length of the hose and letting it rewind.
Repeat this process until there is just enough tension to fully rewind the hose
8.
The hose tension should only to tensioned to the point where the hose stopper
9.
"just" makes it back to the hose reel. If the hose is returning to hard and fast to
the hose reel then the tension is too much and needs to be adjusted accordingly.
(Over tensioning will not be covered by warranty)
DO NOT OVER TENSION THE SPRING. DOING SO WILL NOT ALLOW THE HOSE TO
BE PULLED OUT ENTIRELY AND MAY RESULT IN DAMAGE TO THE HOSE REEL
AND SPRING MECHANISM
Note that all the hose needs to be pulled
2.
out from the hose reel prior to commencing. So the procedure in point 1 will
have to be done several times as the spring tension will increase as the hose is
extracted.
Once all the hose has been pulled out move to point 3.
3.
NOTE: DO NOT ATTEMPT TO CHANGE THE HOSE WHILE ANY TENSION ON THE
SPRING EXISTS. DOING SO CAN CAUSE INJURY.
Using a flat head screw driver, remove the side cover marked "cover removal"
4.
by prying it open where indicated. (this cover is the same side as the inlet side of
the hose reel.
Move the internal drum until you expose the hose connection window on the
5.
internal drum. Use a small spanner / screw driver to undo the hose clamp.
Remove hose from barded hose connection on the internal drum and feed hose
out of the hose reel.
Feed new hose through the roller guide onto the barbed hose connection on the
6.
internal drum. Retighten the hose clamp.
Replace the inlet side cover.
7.
Re-tension the spring by following the section "ADJUSTING THE SPRING
8.
TENSION".
As the spring gets more tension the hose will automatically retract back into
9.
the hose reel. Once hose has completely retracted into the hose reel, adjust the
tension on the spring accordingly.
DO NOT OVER TENSION THE SPRING. DOING SO WILL NOT ALLOW THE HOSE
TO BE PULLED OUT ENTIRELY AND MAY RESULT IN DAMAGE TO THE HOSE
REEL AND SPRING MECHANISM.
ADJUSTING THE TENSION SPRING
Over time it is natural for the spring to lose some
tension. The tension can easily be adjusted and
tightened to provide years of service.
CHANGING THE HOSE
Release all tension on the hose prior to
1.
commencing. See section "ADJUSTING THE
SPRING TENSION".
