Gardena 14637 Manual del usuario - Página 6
Navegue en línea o descargue pdf Manual del usuario para Cortacésped Gardena 14637. Gardena 14637 12 páginas.
1.3.2 Additional electrical safety warnings
DANGER!
Cardiac arrest!
This product makes an electromagnetic field while it operates. This field
may under some conditions interfere with active or passive medical
implants. To decrease the risk of conditions that can possibly injure or
kill, we recommend persons with medical implants to speak with their
physician and the medical implant manufacturer before you operate the
product.
v Do not use in explosive environment.
v Do not operate the product in rain or wet conditions.
This may increase the risk of electric shock.
1.3.3 Additional personal safety warnings
DANGER!
Risk of suffocation!
Small parts can be easily swallowed. There is also a risk that the polybag
can suffocate toddlers.
v Keep toddlers away when you assemble the product.
v Do not cut grass by pulling the machine towards you.
v Keep the air inlets clean with a brush before storage.
v Do not reach through openings while using the mower.
v Disabled or weak persons should ask a second person for help with the
transport (weight).
v Do not disassemble the product further than the delivery status.
v Use gloves, wear slip resistant shoes and wear eye protection.
v Only start the mower with an upright standed handle.
v Do not overload the mower.
v Never operate the product when you are tired, ill or under the influence of
alcohol, drugs, or medicine.
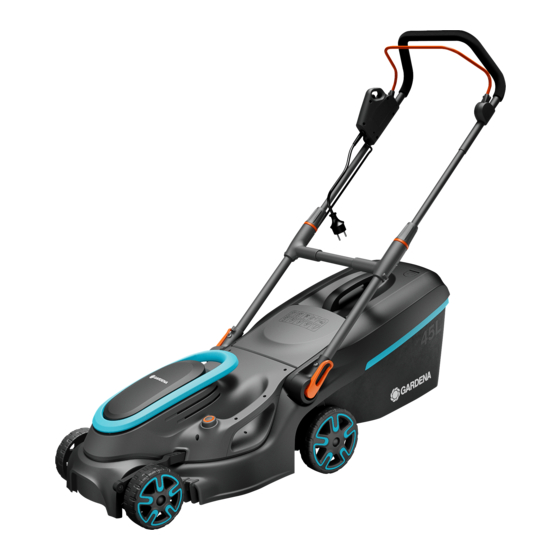
2. ASSEMBLY
DANGER!
Cutting injury due to the blade!
Risk of cut injury due to accidental starting.
v Use gloves.
v Wait for the blade to stop.
v Pull the mains plug out of the mains socket.
2.1 To assemble the handlebar [ Fig. A1 ]:
(S)
1. Fold both levers
outwards.
2. Turn both handlebar holders
(2)
(S)
3. Push both levers
to the handlebar
4. Unscrew the two pre-assembled screws
(2)
holders
.
5. Push the handlebar
(1)
into the handlebar holders
Make sure that the handlebar is completely in place and the holes of
the handlebar are inline up with the holes of the handlebar holders.
6. Put both screws
(3)
in the holes of the openings
(3)
7. Tighten both screws
with a screwdriver.
Make sure that the screws are completely tightened.
2.2 To attach the cable to the handlebar [ Fig. A2 ]:
(4)
v Attach the cable
to the clamps
Make sure that the cable is not trapped between the handlebar and
the mower, otherwise the cable may be damaged.
2.3 To assemble the grass catcher bag [ Fig. A3 ]:
1. First Push the tongue
(6)
into the two connectors
the grass catcher bag
(8)
until the connections audibly engages.
Make sure that both connectors are engaged.
2. Then Push the tongue
(6)
into the connector
(8)
catcher bag
until the connection audibly engages.
Make sure that the connector is engaged.
3. First push the catcher bag handle
(11)
cover
.
4. Then push the catcher bag handle
(11)
cover
until the connections audibly engages.
Make sure that all connectors are engaged.
10
to the operating position.
(1)
.
(3)
from the handlebar
(2)
.
(2)
in the mower.
(5)
(1)
on the handlebar
.
(7)
at the bottom of
(9)
on the side of the grass
(10)
at the back into the catcher bag
(10)
at the front into the catcher bag
3. OPERATION
DANGER!
Cutting injury due to the blade!
Risk of cut injury due to accidental starting.
v Use gloves.
v Wait for the blade to stop.
v Pull the mains plug out of the mains socket.
3.1 To connect the mower [ Fig. O1 ]:
CAUTION!
Electric shock!
To avoid damage to the plug the extension cable must be inserted into
the cable lock.
v Before you operate insert the extension cable into the cable lock.
(12)
1. Plug the socket
of the extension cable
mower.
2. Loop the extension cable
(13)
, insert the loop into the cable lock
pull tight.
3. Plug the extension cable
(13)
into a mains socket.
3.2 Working position:
v Adjust the height of the handlebar so that you are in an upright position
when using the mower.
3.2.1 To adjust the handlebar length [ Fig. O2 ]:
The handlebar length can be adjusted to your body height.
1. Loosen both nuts
(16)
.
(1)
2. Adjust the handlebar
to the required length.
3. Tighten both nuts
(16)
again.
3.3 To adjust the cutting height [ Fig. O3 ]:
The cutting height can be adjusted from 35 – 65 mm in 4 positions.
3.3.1 To reduce the cutting height:
v Push the button
(19)
and push the handle
height.
3.3.2 To increase the cutting height:
(19)
v Push the button
and pull the handle
cutting height.
3.4 To mow with the grass catcher bag [ Fig. O4 ]:
DANGER!
Cutting injury due to the blade!
Risk of cut injury due to accidental starting.
v Do not put your hands in the discharge opening.
3.4.1 To put the grass catcher bag into the mower:
(17)
1. Lift the protective flap
.
2. Put the grass catcher bag
(8)
into the mower by the handle
Make sure that the grass box is securely connected.
3. Start the mower.
3.4.2 To empty the grass catcher bag:
The level indicator
ö
opens during mowing. When it closes during
mowing, the grass catcher bag is full.
(8)
1. When the grass catcher bag
2. Lift the protective flap
(17)
.
3. Remove the grass catcher bag by the handle
(8)
4. Empty the grass catcher bag
(13)
(14)
onto the plug
on the
(15)
(29)
down to reduce the cutting
(29)
upwards to increase the
(10)
.
is full, stop the mower.
(10)
.
.
and