Gardena PowerMax Li-40/32 Manual del usuario - Página 6
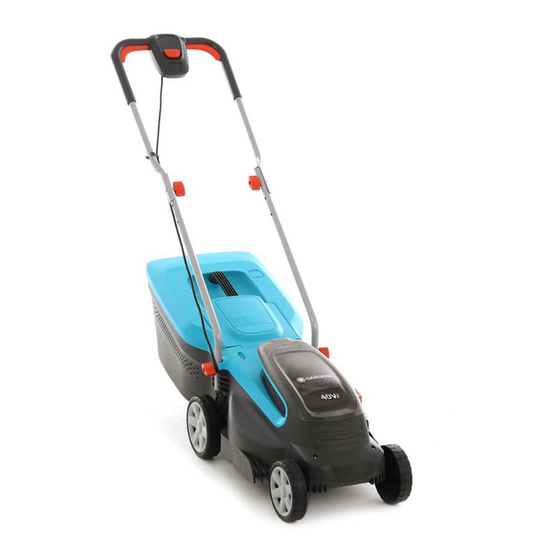
Navegue en línea o descargue pdf Manual del usuario para Cortacésped Gardena PowerMax Li-40/32. Gardena PowerMax Li-40/32 11 páginas. Battery lawnmower
También para Gardena PowerMax Li-40/32: Manual del usuario (11 páginas), Manual del usuario (17 páginas)
Check your replacement battery before each use. Visually check the battery
before each use. A non-functioning battery must be disposed of correctly.
Do not send by post. For further details, please contact your local disposal
companies.
For risks of injury do not use the battery as a power source for other products.
Only use the battery for the GARDENA product intended.
Only charge and use the battery in ambient temperatures between 0 °C and
40 °C. Allow battery to cool down after long periods of use.
Check the charging cable regularly for signs of damage or ageing (brittleness).
Only use it in perfect condition.
Do not stowe and transport the battery above 45 °C or in direct sunlight.
Ideally, the battery should be stored below 25 °C so that self-discharge is low.
Do not expose the battery to rain or wet conditions. Water entering a battery will
increase the risk of electric shock.
Keep battery in order (clean) especially air vents.
If usage of the battery is not planned for a certain time (winter period) reload the
battery to avoid a deep discharge.
Do not store while still attached to a tool, this prevents misuse and accidents.
Do not store the battery in places where static electricity is present.
Electrical safety
DANGER! Cardiac arrest!
This product makes an electromagnetic field while it operates. This field may
under some conditions interfere with active or passive medical implants. To
decrease the risk of conditions that can possibly injure or kill, we recommend
persons with medical implants to speak with their physician and the medical
implant manufacturer before you operate the product.
Before use, examine the cable for signs of damage or ageing. If the cable is
found to be defective, take the product to an Authorised Service Centre and
have the cable replaced.
Do not use the product if the electric cables are damaged or worn.
Immediately disconnect from the mains if the charger cable is cut, or the insula-
tion is damaged. Do not touch the electric cable until the cable has been discon-
nected. Do not repair a cut or damaged cable. Replace it with a new one.
Do not carry the product by the cable.
Do not pull on the cable to disconnect any of the plugs.
Use only on AC mains supply voltage shown on the product rating label.
Our products are double insulated to EN 60335. Do not connect an earth to any
part of the product.
Check the working area for hidden cables.
Do not use for pond care or close to water.
Personal safety
DANGER! Risk of suffocation!
Small parts can be easily swallowed. There is also a risk that the polybag can
suffocate toddlers. Keep toddlers away when you assemble the product.
Do not use in explosive atmosphere.
Never operate the product when you are tired, ill or under the influence of alcohol,
drugs or medicine.
Do not overload the mower.
Use gloves, wear slip resistant shoes and wear eye protection.
Do not use under wet conditions.
Do not disassemble the product further than the delivery status.
Only start the mower with an upright standed handle.
Do not use the start levers alternately.
Use the handles carefully.
Safety Cut-Out
The engine is protected by a Safety Cut-Out which is activated when the blade
becomes jammed or if the engine is overloaded. When this occurs, stop and
disconnect the product from the mains. The Safety Cut-Out will only reset when
you release the start / stop lever. Clear any obstruction and wait for a few minutes
for the Safety Cut-Out to reset before you continue to use the product.
2. ASSEMBLY
DANGER! Risk of injury!
Cut injury when the blade turns or the product starts
accidentally.
v Wait for the blade to stop, remove the safety key and use
gloves before you do assembly.
To connect the lower handle [ Fig. A1 ]:
(1)
1. Put the lower handle
in the product.
Make sure that the handles are fully in place and the handle hole
is inline with the threaded hole.
10
2. Put the washer
(2)
on the wing screw
3. Put the wing screw
(3)
in the threaded hole in the product.
4. Tighten the wing screw
(3)
.
To connect the upper handle [ Fig. A2 ]:
(4)
1. Put the upper handle
on the lower handle
Make sure that the handles are fully in place and the handle holes
are inline.
(5)
2. Push the screw
through the hole.
3. Put the washer
(2)
and the wing nut
4. Tighten the wing nut
(6)
.
To fix the cable to the handle [ Fig. A3 ]:
1. Fix the cable
(7)
to the handle with the clip
2. Check that the cable
(7)
is not trapped between the lower and
the upper handle.
To assemble the grass box [ Fig. A4 / A5 ]:
1. Turn the cover
(10)
on the grass box.
Make sure that the cover
(10)
aligns to the grass box.
(10)
2. Push the cover
on the grass box until the connections click.
Make sure that all connections are connected.
(11)
3. Push the handle
into the cover
(9)
4. Push the chute
into the grass box and pull the chute
until it audibly engages.
3. OPERATION
DANGER! Risk of injury!
Cut injury when the blade turns or the product starts
accidentally.
v Wait for the blade to stop, remove the safety key and
use gloves before you attach the battery or transport the
product.
To charge the battery [ Fig. O1 ]:
DANGER! Risk of injury!
Damage to the battery or the battery charger!
Overvoltage damages the battery and the battery charger.
v Make sure that you use the correct mains voltage.
Before you use the battery the first time, the battery must be fully
charged.
The lithium-ion battery can be charged in any state of charge and the
charging process can be disconnected at any time without to damage
the battery (no memory effect).
For GARDENA Electric Lawnmower Art. 5033-20:
The GARDENA Battery BLi-40/100 Art. 9842 is in the scope
of delivery.
(14)
1. Connect the mains cable
to the battery charger
(14)
2. Connect the mains cable
to a 230 V mainssocket.
(12)
3. Connect the charger cable
When the charging control lamp
once per second the battery is being charged.
When the charging control lamp
green the battery is fully charged. For charging time,
see 7. TECHNICAL DATA.
4. Check the charge status regularly while you charge.
5. When the battery is fully charged, disconnect the battery
battery charger
X
.
(14)
6. Disconnect the mains cable
Battery charging indicator [ Fig. O2 ]:
Battery charging indicator during charging:
«
∑
100 % charged
,
and
«
67 – 100 % charged
and
34 – 66 % charged
«
lit,
∑
0 – 33 % charged
«
flashing
(3)
.
(1)
.
(6)
on the screw
(5)
.
(8)
.
(10)
until it clicks.
(9)
forward
X
.
(13)
to the battery
.
(15)
at the charger flashes green
(15)
at the charger is lit
(13)
from the
from the mains.
€
lit
∑
€
lit,
flashing
flashing