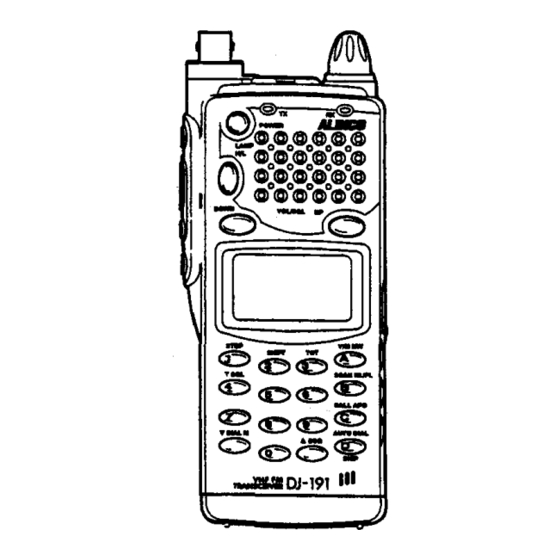
Alinco DJ-191 Manual de instrucciones - Página 14
Navegue en línea o descargue pdf Manual de instrucciones para Receptor Alinco DJ-191. Alinco DJ-191 18 páginas. Cert communications team procedures
También para Alinco DJ-191: Manual de instrucciones (18 páginas), Referencia rápida (3 páginas), Referencia rápida (4 páginas)

III
22
SCAN/SKIP
You can scan the memory channels with the @5"key.
Select to skip any memory channel in scan, by pressing and holding
iii
key and
pressing the ~' key (frequency's decimal point disappears).
8-4 Other Functions
BATTERY SAVE FUNCTION (BS)
The battery save function helps conserve battery power. When no operation is per-
formed and no signal is received for 5 seconds, the battery save function will activate
automatically.
The factory's default setting of the battery save function is ON.
To deactivate this function, press and hold the MONI key while pressing and holding
the power switch. The"
b
5-
0
F"
icon will be displayed on the LCD indicating that the
battery save function is disabled.
Repeating above steps will re-activate the battery save function.
(Note: Regardless of the above, the battery save function is temporarily disabled during
the DSQ MODE or Scanning mode.)
BEEP ON/OFF
Press and hold the @5"keywhileturning on the power switch. This will toggle between
beep sound on and off.
KL (KEY LOCK)
This function conveniently locks keys to prevent accidental function access.
Only following controls are available during the activation of the KL function.
1. Main Tuning Dial
2. PTT switch
3. LOW PTT switch
(T
Version)/
4. O:;,,·'key
"Tone Burst" switch (E Version)
5. MONI key
6.
b
key (VOUSQL)
7.
0
key (VOUSQL)
FL (FREQUENCY LOCK)
This function conveniently locks keys to prevent accidental frequency changes,
function access.
Only following controls are available during the activation of the FL function.
1. PTT switch
2. LOW PTT switch
(T
Version)1
3.
0:;"·'
key
"Tone Burst" switch (E Version)
4. MONI key
5.
0
key (VOUSQL)
6.
0
key (VOUSQL)
APO (AUTOMATIC POWER OFF)
The APO function automatically turns the transceiver power off if no switches or
controls are operated, for 30 minutes. This function protects against battery drainage
when you forget to turn the power off.
To activate the APO function, perform the followings:
1. Press and hold the
iii
key, then press the
0
key.
The "APO" icon will appear on the LCD.
2. While the "APO" icon appears, if no operation is performed for 30 minutes, an OFF
of
Morse Code is automatically heard.
3. At the end of Morse Code, the transceiver power is automatically turned off.
CTCSS TONE FREQUENCIES
There are 50 different tone frequencies available for tone encode. Decoder EJ-28U is
available as an option.
Following is the list of those frequencies:
(Hz)
67.0
69.3
71.9
74.4
no
79.7
82.5
85.4
88.5
91.5
94.8
97.4
100.0
103.5
107.2
110.9
114.8
118.8
123.0
127.3
131.8
136.5
141.3
146.2
151.4
156.7
159.8
162.2
165.5
167.9
171.3
173.8
177.3
179.9
183.5
186.2
189.9
192.8
196.6
199.5
203.5
206.5
210.7
218.1
225.7
229.1
233.6
241.8
250.3
254.1
T,O,T, (Tlme-Out-Timer)
A time-out-timer automatically shuts down transmission and resumes receiving after a
set period of continuous transmit time.
To protect the radio from excessive transmit, a Time Out Timer has been installed. This
can be programmed to activate from 0 seconds to 450 seconds (7.5 Minutes).
Press and hold the
iii
key and press the
<f.)
to select the TOT programming mode;
the LCD will display the selected Time Out Time in seconds. Use the Main Tuning Dial
to change the Time Out setting. Push the
(is
key or PTT to exit.
(Refer to page 29 "Appendix" for T.O.T-Penalty Time function.)
CABLE CLONING (for all versions except DJ-491 C)
With an interface cable (see following diagram), cloning is possible with your Alinco
transceiver. This means that the entire memory and VFO contents of one transceiver
will be transfered to another transceiver via the interface cable.
Here is how it works:
1. Turn power off on both radios.
2. Plug-in one end of the interface cable into the speaker jack of one radio, and plug-in
the other end into the speaker jack of the other radio.
3. Turn on the power on both radios.
23
