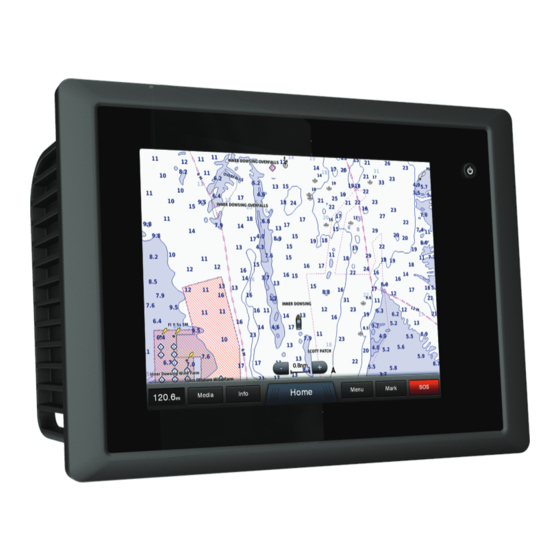
Garmin GPSMAP 8000 Glass Helm Series Manual de instrucciones - Página 28
Navegue en línea o descargue pdf Manual de instrucciones para Equipamiento marino Garmin GPSMAP 8000 Glass Helm Series. Garmin GPSMAP 8000 Glass Helm Series 48 páginas.

NMEA 2000 or NMEA 0183 compatible wind sensor to perform
a wind hold or a wind-based tack or gybe.
Setting the Wind Hold Type
Before you can enable the wind hold type, you must connect a
NMEA 2000 or NMEA 0183 wind sensor to the autopilot.
For advanced autopilot configuration, see the installation
instructions included with your autopilot.
1
From the autopilot screen, select Menu > Autopilot Menu >
Autopilot Setup > Wind Hold Type.
2
Select Apparent or True.
Engaging Wind Hold
Before you can enable the wind hold type, you must connect a
NMEA 2000 or NMEA 0183 wind sensor to the autopilot.
When the autopilot is in standby mode, select Wind Hold.
Engaging Wind Hold from Heading Hold
Before you can enable the wind hold type, you must connect a
NMEA 2000 or NMEA 0183 wind sensor to the autopilot.
With heading hold engaged, select Menu > Wind Hold.
Adjusting the Wind Hold Angle with the Autopilot
You can adjust the wind hold angle on the autopilot when wind
hold is engaged.
• To adjust the wind hold angle in increments of 1°, select
.
• To adjust the wind hold angle in increments of 10°, hold
.
Tack and Gybe
You can set the autopilot to perform a tack or gybe while
heading hold or wind hold is engaged.
Tacking and Gybing from Heading Hold
1
Engage heading hold
(Engaging the
2
Select Menu > Autopilot Menu > Tack Gybe.
3
Select a direction.
The autopilot steers your boat through a tack or gybe.
Tacking and Gybing from Wind Hold
Before you can engage wind hold, you must have a wind sensor
installed.
1
Engage wind hold
(Engaging Wind
2
Select Menu > Tack Gybe.
3
Select Tack or Gybe.
The autopilot steers your boat through a tack or gybe, and
information about the progress of the tack or gybe appears
on the screen.
Setting a Tack and Gybe Delay
The tack and gybe delay allows you to delay steering a tack and
gybe after you initiate the maneuver.
1
From the autopilot screen, select Menu > Autopilot Menu >
Autopilot Setup > Sailing Setup > Tack Delay.
2
Select the length of the delay.
3
If necessary, select Done.
Enabling the Gybe Inhibitor
NOTE: The gybe inhibitor does not prevent you from manually
performing a gybe using the helm or step steering.
The gybe inhibitor prevents the autopilot from performing a
gybe.
1
Select Menu > Autopilot Menu > Autopilot Setup > Sailing
Setup > Gybe Inhibitor.
2
Select Enabled.
22
or
or
Autopilot).
Hold).
Digital Selective Calling
Networked Chartplotter and VHF Radio
Functionality
If you have a NMEA 0183 VHF radio or a NMEA 2000 VHF
radio connected to your chartplotter, these features are
enabled.
• The chartplotter can transfer your GPS position to your radio.
If your radio is capable, GPS position information is
transmitted with DSC calls.
• The chartplotter can receive digital selective calling (DSC)
distress and position information from the radio.
• The chartplotter can track the positions of vessels sending
position reports.
If you have a Garmin NMEA 2000 VHF radio connected to your
chartplotter, these features are also enabled.
• The chartplotter allows you to quickly set up and send
individual routine call details to your Garmin VHF radio.
• When you initiate a man-overboard distress call from your
radio, the chartplotter shows the man-overboard screen and
prompts you to navigate to the man-overboard point.
• When you initiate a man-overboard distress call from your
chartplotter, the radio shows the Distress Call page to initiate
a man-overboard distress call.
Turning On DSC
Select Settings > Other Vessels > DSC.
DSC List
The DSC list is a log of the most recent DSC calls and other
DSC contacts you have entered. The DSC list can contain up to
100 entries. The DSC list shows the most recent call from a
boat. If a second call is received from the same boat, it replaces
the first call in the call list.
Viewing the DSC List
Before you can view the DSC list, the chartplotter must be
connected to a VHF radio that supports DSC.
Select Info > DSC List.
Adding a DSC Contact
You can add a vessel to your DSC list. You can make calls to a
DSC contact from the chartplotter.
1
Select Info > DSC List > Add Contact.
2
Enter the Maritime Mobile Service Identity (MMSI) of the
vessel.
3
Enter the name of the vessel.
Incoming Distress Calls
If your compatible chartplotter and VHF radio are connected
using NMEA 0183 or NMEA 2000, your chartplotter alerts you
when your VHF radio receives a DSC distress call. If position
information was sent with the distress call, that information is
also available and recorded with the call.
designates a distress call in the DSC list and marks the
position of the vessel on the Navigation chart at the time of the
DSC distress call.
Navigating to a Vessel in Distress
designates a distress call in the DSC list and marks the
position of a vessel on the Navigation chart at the time of the
DSC distress call.
1
Select Info > DSC List.
2
Select a position-report call.
3
Select Review > Navigate To.
Digital Selective Calling
