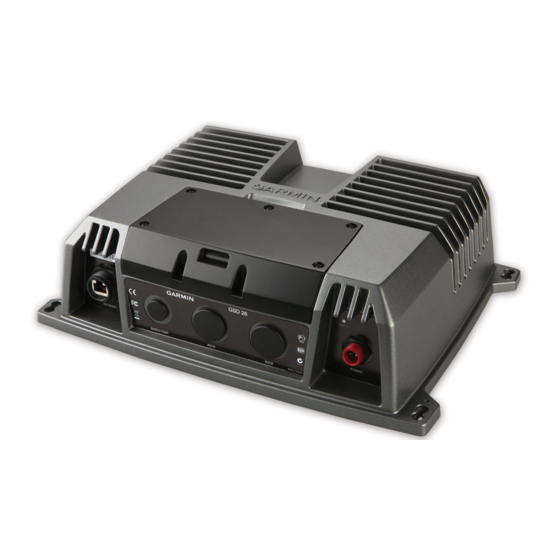
Garmin GSD 26 Manual de instrucciones de instalación - Página 2
Navegue en línea o descargue pdf Manual de instrucciones de instalación para Equipamiento marino Garmin GSD 26. Garmin GSD 26 6 páginas. Professional sonar module
También para Garmin GSD 26: Manual de instrucciones de instalación (6 páginas), Manual de instrucciones de instalación (14 páginas)

• The sounder must be mounted in a location with adequate
ventilation where it will not be exposed to extreme
temperatures.
• The sounder should be mounted so that the LEDs are visible.
• The sounder should be mounted so that the power and
network cables can be easily connected.
• The sounder should be mounted so that the transducer cable
can be connected. If required, transducer extension cables
are available through your Garmin dealer.
Mounting the Device
If you are mounting the bracket on fiberglass with screws, it is
recommended to use a countersink bit to drill a clearance
counterbore through only the top gel-coat layer. This will help to
avoid any cracking in the gel-coat layer when the screws are
tightened.
Stainless-steel screws may bind when screwed into fiberglass
and overtightened. Garmin recommends applying an anti-seize
lubricant to the screws before installing them.
Before you mount the device, you must select a mounting
location and determine the mounting hardware needed for the
surface.
NOTE: Mounting hardware is included with the device, but it
may not be suitable for the mounting surface.
1
Place the device in the mounting location and mark the
location of the pilot holes.
2
Drill the appropriate pilot hole for one corner of the device.
3
Loosely fasten the device to the mounting surface with one
corner and examine the other three pilot-hole marks.
4
Mark new pilot-hole locations if necessary, and remove the
device from the mounting surface.
5
Drill the appropriate pilot holes for the other three marks.
6
Secure the device to the mounting location.
Connecting the Sounder
When connecting the power cable, do not remove the in-line
fuse holder. To prevent the possibility of injury or product
damage caused by fire or overheating, the appropriate fuse
must be in place as indicated in the product specifications. In
addition, connecting the power cable without the appropriate
fuse in place will void the product warranty.
Do not force a cable into its port. Forcing the cable can damage
the pins. If the cable is properly aligned, the cable should
connect easily.
Before you connect the sounder to the network, power, and the
transducer, you must mount the sounder
Sounder) .
1
Route the cables using the appropriate tie wraps, fasteners,
and sealant to secure the cables along the route and through
any bulkheads or the deck.
2
Install the locking rings on the marine network and power
cables
(Installing Locking Rings on the
3
Connect the bare-wire end of the power cable to a 12 Vdc
power source and to ground.
4
Align the notch on the end of the power cable with the power
port on the device, and press the cable into place.
5
Tighten the locking ring.
2
NOTICE
WARNING
NOTICE
(Mounting the
Cables) .
6
Repeat steps 4 and 5 for the network cable, and connect the
device to a transducer
(Connecting the Device to a
Transducer or
Sensor) .
7
Select an option:
• If your boat is equipped with a GMS 10 network port
expander, connect the network cable to an available port
on the GMS 10.
• If your boat is not equipped with a GMS 10 network port
expander, connect the network cable directly to the
network port on your chartplotter.
Cable Routing Grommets
When routing cables through your boat, it may be necessary to
drill holes to route the cables. Cable routing grommets can be
used to cover cable installation holes. You can purchase
grommets from your Garmin dealer or directly from Garmin at
www.garmin.com
.
Connecting the Device to a Transducer or
Sensor
You must install cord grip plugs in any unused cord grip to make
sure water cannot enter the transducer wiring block area and
damage the sounder.
The terminal blocks are not removable.
Preparing the Cable
1
Remove the terminal block lid from the sounder.
2
Select an option:
• Feed a sensor cable through the small cord grip
pull the cable into the terminal block area.
• Feed a transducer cable through one of the large cord
grips
on the housing, and pull the cable into the
terminal block area.
NOTE: Do not tighten the cord grip.
Connecting the Wires to the Terminal Block
Before you connect the wires, consult the wiring diagrams
(Transducer Wiring
Diagrams) to select the proper wiring
configuration for your transducer and the wiring tables
(Transducer Wire Color
Tables) for specific examples of Garmin
wire colors.
1
Connect the uninsulated section of each wire to the terminal
block using a 3 mm flat screwdriver.
2
Connect the bare shield wire to one of the two ground posts
under the terminal block using a #2 Phillips screwdriver.
Securing the Wire Connections
1
After connecting the wires, use a 24 mm (1 in.) wrench to
tighten the nut around the transducer cable.
When tightened correctly, you should not be able to pull the
transducer cable out of the housing.
2
Insert a cord grip plug into each unused cord grip.
NOTICE
, and
