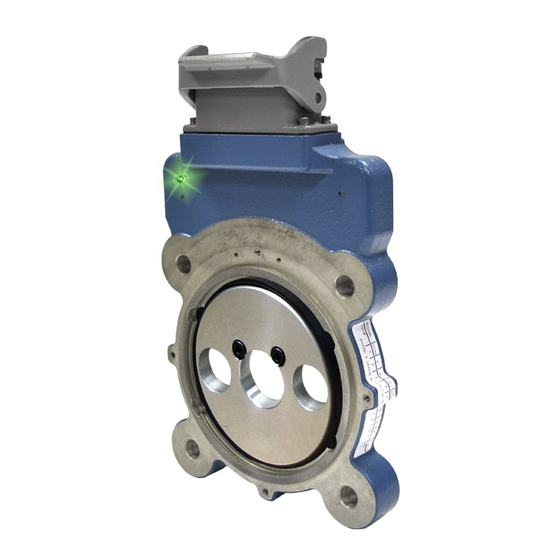
Avtron AV67 Manual de instrucciones - Página 4
Navegue en línea o descargue pdf Manual de instrucciones para Media Converter Avtron AV67. Avtron AV67 10 páginas. 4 1/2 inch c-face mount modular

If the alarm output and/or LED indicate a wiring fault (ORANGE):
Remove all output wires/connections (A,A/,B,B/,Z,Z/). The LED should
turn GREEN. If the LED does not turn GREEN, the encoder is not
receiving enough voltage at +V to properly operate. Correct input
voltage problem at power supply or cabling.
If the LED turns GREEN once all outputs are disconnected, reconnect
each output, one at a time, monitoring for ORANGE LED. For partial/
resistive short circuits, the LED may take a few minutes to turn
ORANGE. To speed the troubleshooting process, if possible, spin the
encoder while replacing individual output connections. This will make
the ORANGE LED condition occur faster. Once the shorted output(s)
are located, correct the shorting condition, and the encoder LED should
remain GREEN.
If the LED is OFF, but power is being applied to the encoder, check
the output voltage level at A, A/,B, B/. If all outputs are ON (≈+V), the
connections to +V and COM are reversed. Swap connections between
+V and COM; the LED should turn GREEN.
NOTE:
Do not use rotors from THIN-LINE I (M56, M56S, M67,
M85, M115) with THIN-LINE III. This will cause incorrect
PPR output, but the Encoder LED will remain green.
ENCODER REMOVAL
The AV56A stator housing can be removed by loosening and removing
the socket head cap screws.
CAM SCREW ROTOR REMOVAL
Disengage the (2) cam screws by turning them counterclockwise less
than 1 full turn. The cam heads will visibly move away from the shaft.
Remove the rotor by hand by pulling it away from the motor. If the rotor
will not move, do NOT use a gear puller, and do not use a heat gun.
Instead, insert two M6 screws, >25mm length into the Jack Screw
Holes shown in Fig 2. Alternately tighten the screws to push the rotor
away from the motor and remove it.
LARGE BORE SET SCREW ROTOR REMOVAL
Disengage the (2) set screws by turning them counterclockwise until
removed from the rotor. Retain the set screws. Remove the rotor by
hand by pulling it away from the motor. If the rotor will not move, do
NOT use a gear puller, and do not use a heat gun. Instead, pry the
rotor away from the motor gently, being careful to only pry against the
rotor metal hub and not the magnetic outer strip.
MOTOR FACE CONFIGURATION
5.875" [149.2]
45°
(4) 3/8" - 16
0.005" [0.127] M
A
FIGURE 1
0.63 MIN, See back page for MAX
[16.00]
0.004" [0.10]
B
-A-
-B-
0.002" [0.05]
A
4.500" [114.3]
DIA
SEE SPARE PARTS
CHART FOR AVAILABLE
SHAFT SIZES
0.030" [0.75] MAX x 45° CHF
AV56A
CONNECTOR SPARE PARTS
OPTION
ENCODER
STYLE
CODE
SIDE
Industrial
315233
EPIC on
P,G
Encoder
315229 Terminal 315936
Industrial
EPIC w/
Q
Adapter
Block
315232 Surface
Industrial
EPIC on 3'
Z
315229 Terminal 315936
Cable
471819 Bushing 401112
Mini-MS
R, S
315296
Twist Lock
314383
10 pin MS
Y
315933
10 pin MS A, B, C, D
ROTOR SETTING TOOL
SUPPLIED
3.819" [97.00]
SEE SPARE PARTS
ROTOR OD
CHART FOR ROTOR ID
(2) M4 x 0.7 x 6.0 LG
SET SCREW
TIGHTENING
TORQUE - 2 NM
0.160 MAX
[4.1]
0.44 ± 0.10
[11.20 ± 0.25]
4
CABLE SIDE PLUG
Base
315937
Hood
Terminal
Conn1-02
401112
Adapter
315937
Hood
Terminal
Conn1-02
Adapter
Base
316110
Plug
In-Line
315932
Plug
411216
411217
Conn1-01
Cable
Bushings
411218
411219
Base
315932
Plug
411216
Conn1-01
411217
Cable
Bushings
411218
411219
0.658" ± 0.050"
[16.71 ± 1.27]
COVER
RETAINER
Counterbore
on AV56S
No Counterbore
on AV56A
6.73 ± 0.13
(4) 3/8"-16 x 0.875"
TIGHTENING TORQUE
20-30ft - lbs [27-40 NM]
