Chris King R45 DISC Manual - Página 8
Navegue en línea o descargue pdf Manual para Herramientas Chris King R45 DISC. Chris King R45 DISC 20 páginas. Hub
También para Chris King R45 DISC: Manual del usuario (16 páginas)
Reassembly of two piece axle on front Classic hub
Figure 5)
1. Lightly grease threads on axle, adjusting cone and axle end. Apply two drops of Tri-flow
or a quality 10w synthetic oil to axle O-ring.
2. Insert main axle into hub shell.
3. If axle end and adjusting cone are assembled as one unit, disassemble by threading
axle end out of adjusting cone.
4. Thread adjusting cone onto the protruding threads of main axle.
5. Lightly snug adjusting cone up to bearing.
6. Thread axle end into adjusting cone until it stops.
7. Proceed to "Adjustment of two piece axle on front Classic hub", below.
Adjustment of two piece axle on front Classic hub
Figure 5)
1. Insert 5 mm hex wrenches into both ends of axle assembly.
2. Hold right hand stationary and turn left hand counterclockwise 1/4 turn until assembly is
loose.
3. Hold hex wrenches stationary and adjust bearing preload with adjusting cone.
4. Advance adjusting cone until it just contacts bearing, then back off approximately 1/16
turn (this allows for axle compression while under skewer clamp pressure).
5. Once preload is set, tighten axle assembly to 110 inch-pounds.
6
6. Double check adjustment by clamping wheel into fork with quick-release. Check for
play or binding, and readjust if needed.
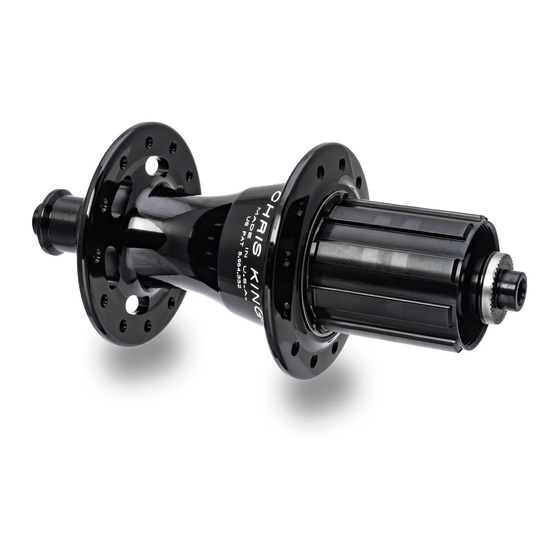
Disassembly of two piece axle on rear Classic hub
Axle End
Adjusting
Cone
The following instructions assume that the driveshell is facing to the right:
1. Remove cassette lock ring and cogset using a chain whip and HG cogset lock ring removal
tool.
2. Insert 5 mm hex wrenches into both ends of axle assembly.
3. Hold right hand stationary and turn left hand counterclockwise 1/4 turn until assembly is
loose.
4. Loosen and unscrew adjusting cone and axle end until they are free from the main
axle.
5. Remove axle by pulling on drive side end of axle.
Rear Classic
Hubshell Assembly
Driveshell
O-ring
O-ring
Assembly
Figure 6
(see
(see
(see Figure 6)
Rear Two Piece
Axle Assembly
6
7
™
For
bea
Furt
Hub
Chr
Re
(see
The
1
2
3
4
5
6
7
Note
in th
bea
Ad
(see
The
1
2
3
4
5
6
Note
If th
dam