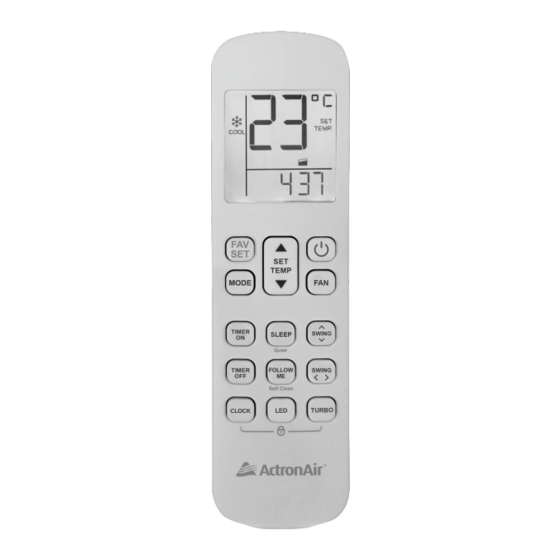
ActronAir RC-01 Manual - Página 9
Navegue en línea o descargue pdf Manual para Mando a distancia ActronAir RC-01. ActronAir RC-01 12 páginas. Suitable for models: cre-071as, cre-100as, cre-125as, cre-140as, wre-026as, wre-035as, wre-050as, wre-071as, wre-080as, mre-035as, mre-050as

5. Timer Setup and Operation
Clock Setting and Timer Operation
Set the clock
Before you start operating the air conditioner, set the
clock of the remote controller using the procedures
given in this section. The clock panel on the remote
controller will display the time regardless of whether the
air conditioner is in use or not.
Initial Setting of the Clock
After batteries are inserted in the remote controller, hold
down the CLOCK button for 3 seconds, the clock panel
will display "12:00" and begin to flash.
1. TIME adjust button
Use the SET TEMP up and down buttons to set the time.
Each time you press the button, the time moves forward
or backward by one minute depending on which side
you press. The time adjusts as quickly as you press the
button.
Hold the button to adjust the time forward or backward
by 10 minutes depending on which side you press down.
2. CLOCK button
When the right time is achieved, press the CLOCK button
or wait for 3 seconds, the clock time stops flashing and
the clock starts operating.
3. Readjusting the Clock
Press the CLOCK button on the remote controller for
about 3 seconds, the time in the clock display will start
to flash. To set the new time, follow 1 and 2 of "Initial
Setting of the Clock".
CAUTION
When you select the timer operation, the remote
controller automatically transmits the timer signal to the
indoor unit for the specified time. Therefore, keep the
remote controller in a location where it can transmit the
signal to the indoor unit properly.
The effective operation time set by the remote controller
or the timer function is limited to the following settings:
0.5, 1.0, 1.5, 2.0, 2.5, 3.0, 3.5, 4.0, 4.5, 5.0, 5.5, 6.0, 6.5, 7.0,
7.5, 8.0, 8.5, 9.0, 9.5, 10, 11, 12, 13, 14, 15, 16, 17, 18, 19, 20, 21,
22, 23 and 24.
Remote Control
Timer operation
Press the TIMER ON button to set the auto-on timer of
the unit. Press the TIMER OFF button to set the auto-off
timer of the unit.
To set the Auto-on time.
1. Press the TIMER ON button. The remote controller
will display Timer on (
time and the signal "h" will be shown on the LCD
display area of your indoor unit. Now it is ready to
reset the Auto-on time to START the operation.
2. Press the TIMER ON button again to set desired
Auto-on time. Each time you press the button, the
time increases by half an hour between 0 and 10 hours
and by one hour between 10 and 24 hours.
3. After setting the TIMER ON, there will be a one second
delay before the remote controller transmits the
signal to the air conditioner. Then, after approximately
another one second, the signal "h" will disappear and
the clock time will re-appear on the LCD display area
of your indoor unit.
4. To cancel the auto-timed program, simply adjust the
auto-on timer to 0.0.
To set the Auto-off time.
1. Press the TIMER OFF button. The remote controller
will display Timer on (
time and the signal "h" will be shown on the LCD
display area of your indoor unit. Now it is ready to
reset the Auto-off time to START the operation.
2. Press the TIMER OFF button again to set desired
Auto-off time. Each time you press the button, the
time increases by half an hour between 0 and 10 hours
and by one hour between 10 and 24 hours.
3. After setting the TIMER OFF, there will be a one second
delay before the remote controller transmits the
signal to the air conditioner. Then, after approximately
another one second, the signal "h" will disappear and
the clock time will re-appear on the LCD display area
of your indoor unit.
4. To cancel the auto-timed program, simply adjust the
auto-off timer to 0.0.
Page 9
), the last Auto-on setting
), the last Auto-off setting
