Epson PhotoPC 550 Manual - Página 10
Navegue en línea o descargue pdf Manual para Proyector Epson PhotoPC 550. Epson PhotoPC 550 13 páginas. Epson photopc 550: specifications
EPSON PhotoPC 550
background. Minimize your application window to see the
Twain Driver window. If you see a message that says
Camera Is Not Responding
Click to transfer
your picture(s).
6. Select the picture you want and click
transfer the picture. Or, click
pictures.
NOTE
Some applications import only one picture at a time.
7. If you want to delete images from your camera, select the
image and then click
Delete
8. If necessary, click
Close
application.
You see the imported picture or pictures in the work area.
What To Do if the Camera Is Not Responding
When you try to acquire pictures from the camera, you may
see a screen like the following:
Follow these steps to fix your camera connection:
1. Make sure the camera is turned on and has not shut off
automatically. If it has, turn it off and then back on again by
closing and opening the lens cover.
2. Check the cable and make sure the connections to the
camera and computer are secure.
3. Make sure your batteries have enough power, or your AC
adapter is connected.
4. Click
Test Connection
continue with step 5.
5. Select another port if necessary. In most cases, it is best to
leave the
setting at
Port
If you have a serial device connected to one port and an
internal modem on the other, you can try COM3 or
COM4.
10 -
PhotoPC 550
, see the following section.)
Get Selected
to transfer all the
Get All
.
to exit and return to your
. If you see the same screen,
.
Auto
6. Select a slower speed. You may need to experiment to
choose the best speed.
The
7. Click
Test Connection
pictures, see your User's Guide for more troubleshooting
tips.
Using SmartMedia Cards
SmartMedia cards increase the camera's picture storage
capacity as shown in the following table.
Number of pictures (minimum capacity)
Image Quality
to
Standard
High
Super High
NOTE
When a SmartMedia card is installed in the camera, images are
stored on the card instead of the camera's internal memory.
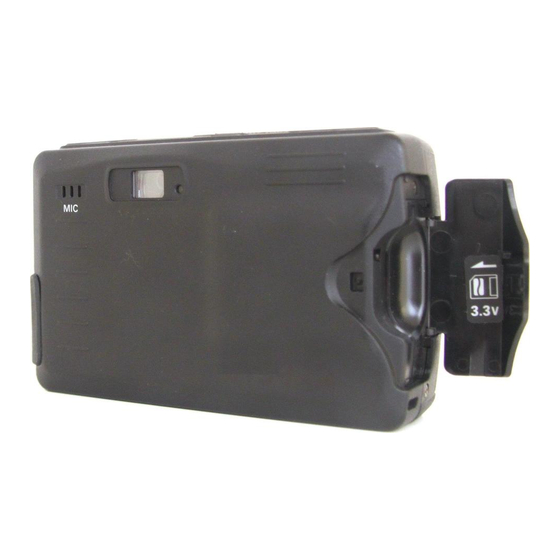
Installing a Storage Card
Before you start, make sure the camera is turned off. Then
follow these steps:
1. Open the storage card slot cover on the side of the camera.
2. Insert the card all the way into the storage card slot.
3. Close the storage card slot cover.
10/8/97
again. If you still don't see your
Internal Memory
2MB Card
24
73
12
36
6
18
4MB Card
147
73
36