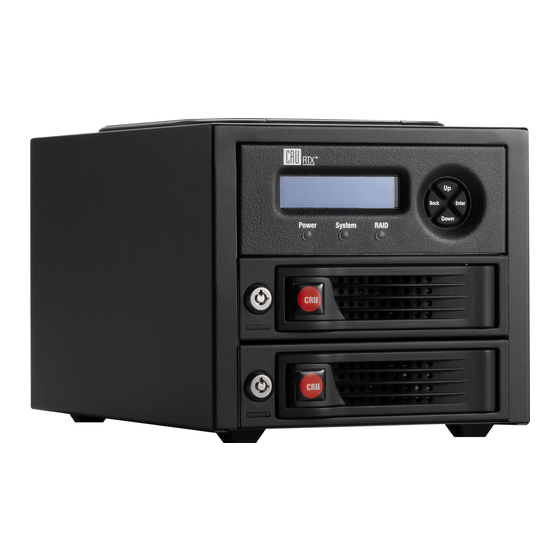
CRU RTX220-3QR Manual del usuario - Página 5
Navegue en línea o descargue pdf Manual del usuario para Recinto CRU RTX220-3QR. CRU RTX220-3QR 9 páginas. Rtx 2-bay -3qr series
También para CRU RTX220-3QR: Manual de inicio rápido (2 páginas)

LED
Drive
Glows amber when the drive is being accessed, either
Activity
reading or writing from the drive.
Encryption
• Glows red when there is an encryption engine error.
Key Error*
Contact CRU Technical Support.
• Flashes red when the security key is not present or is
not functioning
Encryption*
Glows green when the encryption key is present and
encryption is enabled.
*The Encryption and Encryption Key Error LEDs are found
only on Secure models of RTX-3QR. The LEDs are located just
above the encryption key slot.
6 LCD Menu Screens
Use the Navigation Buttons to change screens.
Screen
Mode
Shows the RAID level used.
Status
Indicates the overall health of the RAID. Available status
messages are Normal or Degraded.
Disk
Indicates the status of the individual disk in the numbered
hard drive slot:
• OK: Indicates that hard drive is in use or ready to use
• No Disk: Indicates that the hard was removed or not
installed
• Unused: A new drive was installed and is not used by
the RAID
• Failing: Indicates the drive is malfunctioning.
Disk Temp
Displays temperature of the individual disk in the num-
bered slot.
Sys Temp
Displays overall temperature inside the system.
Fan Status
Indicates whether the fan is operating normally or has
failed and is in need of a replacement. Contact Technical
Support if the fan has failed to arrange for a repair.
Change
Allows you to change the RAID level (see section 7.2).
RAID
Mode
7 RAID Configuration
You may skip this section if you purchased your RTX-3QR
unit pre-configured with drives. All two-bay RTX 3QR units
ship with RAID 1 as the default mode.
RTX-3QR offers two options for RAID configuration; RAID
0 and RAID 1. Stop all data transfers before setting or
changing RAID types or rebuilding a degraded array. Failure
to do so can result in the loss of data. To set up or change the
RAID type, disconnect all data cables and reboot the RTX
3QR unit. After the unit has initialized, the LCD will display
the drives' mode and status.
Page 5
Behavior
Description
7.1 Creating a New RAID
Use the LCD and menu selection buttons to complete these
steps if you did not purchase your unit pre-configured.
Changing RAID levels will erase any data on the drives.
Make a backup copy of any data you wish to keep before
changing the RAID.
a)
Disconnect the RTX-3QR unit from the computer.
b)
Insert two hard drives (preferably both the same make,
model, and capacity) into the RTX-3QR unit and flip
the power switch on the rear of the unit.
c)
After the RTX-3QR unit boots up, it will begin alarming
and the LCD will display the error "Error: Not a RAID
Set". Press the Enter button to silence the alarm.
d)
Press the Enter button a second time and the LCD
screen will ask "Make New RAID?" Press Enter
to confirm.
e)
The LCD will display "Select RAID Type". Press Up or
Down to cycle through to your desired RAID type and
press Enter.
f)
The screen will display "Will Erase all Data OK?"
Pressing Enter will result in the loss of all data on
the drives. Ensure all data is backed up, then press
Enter.
g)
The new configuration will be selected and the RTX-
3QR unit will reboot. The RAID is now created.
7.2 Changing the RAID Type
a)
Disconnect the RTX 3QR unit from the computer.
b)
Press the Up button to cycle the LCD menu to the
"Change RAID Mode" screen and press the
Enter button.
c)
The LCD will display "Select RAID Type". Press Up or
Down to cycle through the available options to your
desired RAID type and press Enter.
d)
The screen will display "Will Erase all Data OK?"
Pressing Enter will result in the loss of all data on the
drives. Ensure all data is backed up, then press Enter.
e)
The new configuration will be selected and the RTX
3QR unit will reboot. The RAID is now created.
f)
The RTX-3QR unit has been configured and is ready
for operation. Follow the instructions for the
appropriate operating system usage instructions to
initialize and format the drives.
CRU Mark
10.25.12
PMS 711
2 cyan
