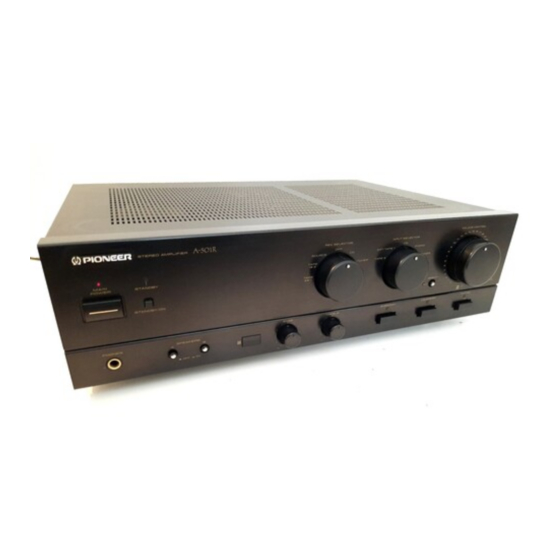
Pioneer A-550R/HE Manual de servicio - Página 25
Navegue en línea o descargue pdf Manual de servicio para Amplificador Pioneer A-550R/HE. Pioneer A-550R/HE 27 páginas.
©
PHONO
SELECTOR
button
(A-550R
only)
Set
in
accordance
with the type
of cartridge
used
with your
turntable.
MM
{
JL
)
:
Set
to
this position
when
using
a
moving magnet
car-
tridge,
or
a
moving
coil
cartridge
with
a
high
output
of
1
mV
or
more.
MC
{.«-):
Set
to
this position
when
using a
moving
coil
car-
tridge.
©
PHONES
jack
When
using
headphones,
insert
the plug
into this jack.
®
SPEAKERS
A
selector
button
Use
this
button to
listen
to
the speaker
systems connected
to
SPEAKERS
A
terminals.
ON
(a):
Depressed
position:
Sound
is
heard
from
the
speaker
systems.
OFF
(
.M):
Released
position:
No
sound
is
heard
from
the speak-
er
systems. Set
to
this
position
when
listening
with
headphones.
®
SPEAKERS
B
selector
button
Use
this
button to
listen
to
the
speaker
systems connected
to
SPEAKERS
B
terminals.
ON
{
jess.):
Depressed
position:
Sound
is
heard
from
the
speaker
systems.
OFF
(
M):
Released
position:
No
sound
is
heard
from
the speak-
er
systems.
Set
to
this
position
when
listening
with
headphones.
®
Remote
control
sensor
window
@
BASS
tone
control
Use
to adjust
the
low-frequency
tone.
The
center
position
is
the
flat
(normal) position.
When
turned
to
the
right,
low-frequency
tones
are
emphasized;
when
turned
to
the
left,
low-frequency
tones
are
de-emphasized.
NOTE:
•
This
con
troi
does
not opera
te
when DIREC T
button
is
in
the
on
position.
•
At
volume
levels
lower
than
"4,"
the set
tone
control
ef-
fect
is
obtained.
At
volume
levels
higher than
"4,"
the effect
becomes
in-
creasingly
weaker.
©
TREBLE
tone
control
Use
to
adjust
the high-frequency
tone.
The
center
position
is
the
flat
(norma!) position.
When
turned
to
the
right,
high-
frequency tones
are
emphasized;
when
turned
to
the
left,
high-
frequency tones
are
de-emphasized.
NOTE:
•
This control
does
not operate
when DIRECT
button
is
in
the
on
position.
•
At volume
levels
lower
than
"4,"
the set
tone control
ef-
fect
is
obtained.
At
volume
levels
higher than
"4,"
the effect
becomes
in-
creasingly
weaker.
©
SUBSONIC
filter
button/indicator
(A-550R
only)
Use
this
button
when
playing records
with coarse grooves,
on:
The
indicator
lights: In this
position,
frequencies
of
1
7
Hz
and below
are
cut,
eliminating
super-low-frequency
noise
caused by
coarse
record grooves,
and
thus
helping prevent
sound
distortion.
off:
The
indicator
goes
off:
Leave
in
this
position
for
normal
playback.
NOTE:
This
button
does not
operate
when DIRECT
button
is in
the
on
position.
®
LOUDNESS
button/indicator
Use
when
listening at
low volume
levels,
on:
The
indicator
lights:
Boosts low and
high frequencies
to
give
added punch
to
playback even
at
low volume
levels,
off:
The
indicator
goes
off:
Should normally be
left
in
this
po-
sition.
NOTE:
This
button
does not
operate
when DIRECT
button
is
in
the
on
position.
©
DIRECT
button/indicator
Use
this
button/indicator
when
you do
not
wish
to
pass
the
out-
put
from
input terminal
equipment
through
the various
frequency
adjusting
circuits
(BASS, TREBLE,
SUBSONIC, LOUDNESS)
and
adaptor terminals
(ADAPTOR).
on:
The
indicator
lights:
The
signals input
through
the input
ter-
minals
are
reproduced without
passing
through
the
vari-
ous frequency
adjusting
circuits.
This
results
in flat,
pure
sound which
is
a
more
faithful
reproduction
of
the input
source.
off:
The
indicator
goes
out:
The
signal
passes through
the
var-
ious
frequency
adjusting
circuits.
©
MUTING
button/indicator
Use
to
temporarily cut
sound
volume,
on:
The
indicator
lights.
The sound
is
cut
off.
off:
the
indicator
goes
off.
The sound
will
return to
its
previous
volume.
32