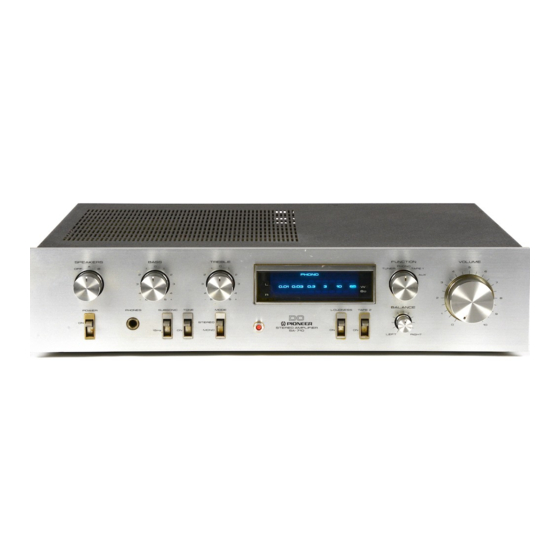
Pioneer SA-710 Manual de instrucciones - Página 9
Navegue en línea o descargue pdf Manual de instrucciones para Amplificador Pioneer SA-710. Pioneer SA-710 13 páginas.
También para Pioneer SA-710: Manual de servicio (10 páginas)

PIONEER
C
voLUME coNTRoL
Use
this control
to
adjust the
output
level
to
the
speakers
and
headphones.
Turn
it
clockwise
to
increase
the
output
level. No sound
will
be heard
if
you
set
it
to "O."
@
HEADPHoNE JAcK
Plug
the
headphones
into this jack
when
you want
to
listen
through
your
stereo
headphones.
NOTE:
Set
the
speaker
selector
to
OFF
when
listening
only with
head-
phones.
@
SUBSONIC
FILTER
SWITCH
When
this switch
is
set
to the
15Hz
position, the
subsonic
f
ilter
with
a
cut-off frequency
of
1SHz is
actuated.
The
subsonic
f
ilter
serves
to
attenuate frequencies lower
than
15Hz
in a
6dB/oct slope.
lt
is
therefore effective
in
suppressing
ultra-low-frequency noise
which
is
generated
by
record
warp and other
causes.
You cannot
actually
hear
this
noise
but
it
is
a factor in the
generation
of
intermodulation
distortion and
it
may
damage
your
speaker
system.
Set this switch
to
the
1SHz position
during
record
play
for
the
best
effect.
@ roruE swrrcH
Set
this
switch
to
ON when adjusting
the
bass
and
treble
controls.
When set
to
the upper (OFF)
position, the
tone
control circuits
are
disengaged
and frequency
response
is
flat.
This function
is
convenient
for
checking phono
car-
tridge and
speaker
tone quality and
listening
room
acoustics.
o
MODE SELECTOR
Use
this
selector
for
selecting
the
performances.
STEREO: Set
to
this position
for
normal
stereo
repro-
MONO:
duction.
M
ixes
left
and right
channel signals
and
reproduces
them
monophonical
ly.
@
PowER rNDrcAToR
When
the power switch
is set
to
ON
this
lamp lights
up,
indicating the
amplifier
is
turned
on.
@
LOUDNESS SWITCH
When listening
to
a performance
with
the
volume
control
turned down, set
this switch
to
ON
and
the
bass and
treble
will
be accentuated.
When
the volume is low, the
human ear
finds
it
harder
to
hear
the
bass
and
treble
than
when
the volume
is
high.
The
loudness
switch is thus
designed
to
compensate
for
this deficiency. By setting
it
to
ON, the
bass
and treble
come
through
much more
strongly
and
the
sound takes on
a punch
even
when the
volume
control
is
turned down.
G) TAPE 2
SWTTCH
Set
this switch
to
the ON position when monitoring
a
tape
performance
on
a
tape deck
which
you
have
connected
to
the TAPE
2 jacks
or when monitoring
a recording.
NOTE:
Set
the switch
to
the upper
(OFF)
position
when listening to
records
or
broadcasts, etc.
selected
by
the
function
selector.
@
BALANcE coNTRoL
Use
this control
to
balance
the volume
of
the
left
and
right
channels.
First,
however, set
the
mode selector
to
MONO, and adjust
so
that the
sound
appears
to
come
from
somewhere
exactly
between
the
two
speakers.
lf
the
sound
appears
to
be louder on the
right,
it
means
that
the
volume
of
the right
channel
is
higher.
Turn the
balance
control
to
the
left
and adjust.
Conversely,
if
the
sound
appears
to
be louder
on
the
left,
it
means
that the
volume
of
the
left
channel
is
higher.
Therefore,
turn the
balance
control
to
the right
and
adjust.
After
adjusting,
return
the
mode selector to
STEREO.
