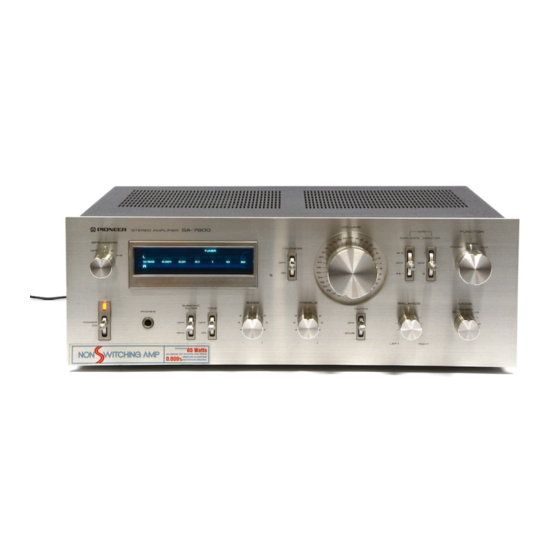
Pioneer SA-7800 Manual de instrucciones - Página 8
Navegue en línea o descargue pdf Manual de instrucciones para Amplificador Pioneer SA-7800. Pioneer SA-7800 12 páginas.
También para Pioneer SA-7800: Manual de servicio (30 páginas)

FRONT
PANEL
FACILITIES
@ POWER SWITCH
Set this switch to ON to supply power to the
amplifier. There will be a short delay when it is
set to ON, because the muting circuit has been
actuated to suppress the unpleasant noise that is
sometimes generated when the power is on and
off.
.
@ POWER INDICATOR
When the power switch is set to ON this lamp
lights up, indicating the amplifier is turned on.
@) SPEAKER SELECTOR
Use this selector to select the speaker systems.
OFF: Sound not obtained from speakers.
A:
Sound
obtained from speakers connected
to the A speaker terminals.
B:
Sound
obtained
from
speakers connected
to the B speaker terminals.
A+B: Sound
obtained
from speakers connected
to both A and B speaker terminals.
@ TAPE MONITOR INDICATOR
The TAPE lamp lights up when the tape monitor
switch is set to either position ''1" or "'2''.
©) POWER METER
This
meter
allows
you
to read
out
the rated
power level on the fluorescent display tube when
speakers with a nominal impedance of 8 ohms are
connected to the amplifier's speaker terminals.
© FUNCTION INDICATORS
The PHONO,
TUNER,
AUX
function indicators
light up in accordance
with the position of the
function selector.
NOTES:
The
function
indicator
will not go off when
the tape
monitor
switch
is set to position
'1' or
'2"',
8
@: LOUDNESS SWITCH
When listening to a performance with the volume
control turned down, set this switch to ON and
the bass and treble will be accentuated.
When
the volume
is low, the human ear finds it
harder to hear the bass and treble than when the
volume
is high.
The
lotidness
switch
is thus
designed to compensate
for this deficiency. By
setting it to ON, the bass and treble come through
much
more
strongly and the sound takes on a
punch even when the volume control is turned
down.
VOLUME CONTROL
Use this control to adjust the output level to the
speakers and headphones.
Turn it clockwise to
increase the output level. No sound will be heard
if you set it to oo. The scale is graduated in dB
which
indicate the attenuation when the max-
imum output level is OdB.
@ TAPE DUPLICATE SWITCH
Use this switch when employing two tape decks
to duplicate
recorded
tapes or edit tapes. This
switch is otherwise kept at the OFF position.
1» 2: When playing back the tape on a deck con-
nected to the TAPE 1 jacks and recording
(duplicating) on a deck connected to the
TAPE 2 jacks.
OFF:
Set to this position when not duplicating.
21:
When
playing back
the tape on
a deck
connected to the TAPE 2 jacks and record-
ing (duplicating) on a deck connected to
the TAPE 1 jacks.
