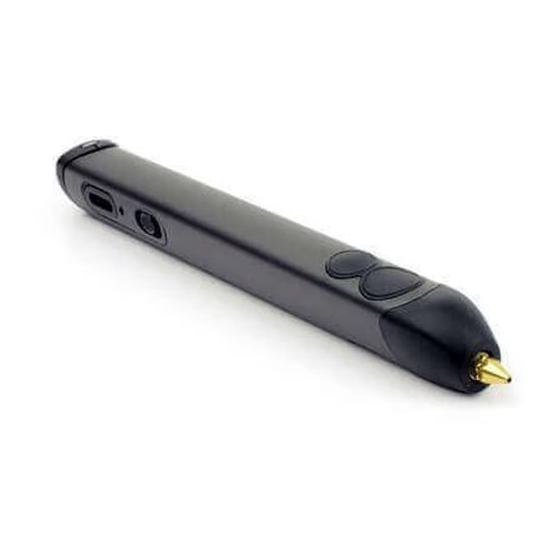
3Doodler 2.0 Manual de inicio rápido
Navegue en línea o descargue pdf Manual de inicio rápido para Accesorios 3Doodler 2.0. 3Doodler 2.0 2 páginas.
También para 3Doodler 2.0: Manual (4 páginas), Manual del usuario (10 páginas)

#WhatWillYouCreate?
Quick
Start
Guide
Light red
whilst
Doodling?
DON'T FRET
Your 3Doodler is functioning
normally. The red light / pausing
is caused by the pen heating up
to stay at optimal temperature.
The 3Doodler needs to pause
while doing this. Wait a few
seconds and keep Doodling!
Pro Tips
NOZZLE REMOVAL
Make sure the pen is HOT (blue or green
LED) before trying to unscrew the nozzle. When
screwing the nozzle back on don't force it.
Nozzle Removal Tool
(included)
TEMPERATURE ADJUSTMENT
Manual temperature optimization for minor flow adjustment
and expertly consistent 3Doodles. Turn it 90° to the
right to crank up the heat, or 90° to the left to turn it down.
Use the mini screwdriver
(included)
WELD PLASTIC
You can join 3Doodled pieces by touching the hot tip of the
3Doodler to both parts to melt them together while extruding.
Don't worry about rough edges; you can trim those later.
1. PLUG IN
& SELECT
TM
2. INSERT
TEMP (HI/LO)
YOUR
It will take 1 - 2
minutes for your
STRAND
3Doodler to heat up.
Press the
fast or
slow button.
HI
SET YOUR 3DOODLER
TO THE CORRECT
ABS
FLEXY
TEMPERATURE:
Snip Snip
THOSE ENDS!
Keep it clean. Snip your ends to avoid
any unnecessary jams in your 3Doodler.
Inspiration
JOIN THE COMMUNITY
Discover and share instant inspiration (and hundreds
of free stencils!) with our global community at:
the3Doodler.com/community
@3Doodler
Button
Features
SLOW SPEED
Hold down on the small
button for slow.
FAST SPEED
Hold down on the big
button for fast.
3. READY
DOUBLE CLICK
SET
Constant Doodling without
holding down any buttons.
DOODLE
Hold down button to pause
Single click to stop
It will take 30 - 40
BOTH BUTTONS
seconds for your
plastic to extrude.
Hold down on both buttons
to reverse your strand while the
LED flashes.
For more detailed instructions and
LO
additional tips please see the user
manual or visit
the3Doodler.com
PLA
WOOD
Plastic
Curling?
GET A GRIP
Push your pen firmly into the paper,
allow the plastic to extrude for a
couple of seconds, and then lift the
pen up off the paper.
Plastics &
Accessories
Choose from 60+ vibrant plastic colors. Transform
your Doodling with our latest accessories including
the Nozzle Set.
Nozzle removal tool
with 6 new nozzles
The perfect place
to store your 3Doodler
For more accessories please visit
http://the3doodler.com/store/
For more information,
customer service, repairs, or
warranty inquiries please contact
us at
BEFORE SWTICHING
FROM HI TO LO
PLASTIC
TRANSITION
When switching from a HI temp plastic (like ABS) to a
LO temp plastic (like PLA), run the pen on the HI
setting until the HI temp plastic is fully extruded
(you'll see the plastic color change!). Then switch the
pen to the LO temp setting.
After you have finished using your 3Doodler, remove
any remaining plastic.
Trouble
Reversing?
1.
Hold down on BOTH extrusion buttons at the
same time to reverse the plastic strand.
2.
If your strand is too short to fully reverse, you will
not be able to retrieve it. If this happens turn the
pen on and wait for the pen to heat up (the LED
light will change to Blue or Green).
3.
Remove the nozzle with the spanner provided in
the box.
4.
Now take the unblocking tool (or a straightened
paperclip) and feed it into the nozzle end of the
pen to dislodge any blocked plastic. The
dislodged plastic should shake free from the
back of the pen. If it doesn't shake free, from the
back of the pen. If it doesn't shake free, please
proceed to remove the maintenance cover to
clear out the plastic.
5.
Replace the nozzle while the pen is hot and then
try the pen again - don't over-tighten the nozzle
or apply excess force.
In a
Jam?
PUSH FIRST
If it's still not working then follow
the step by step instructions in
the user manual or message us
at
our YouTube channel at:
youtube.com/3Doodler
TURN OVER >>>>>>
or visit
