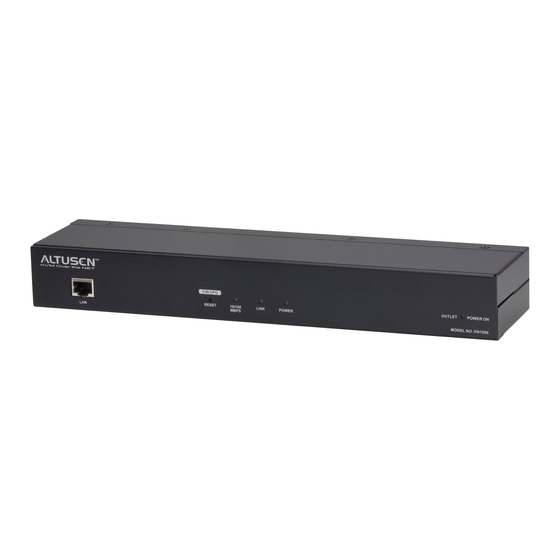
Altuscn KN1000 Manual de inicio rápido
Navegue en línea o descargue pdf Manual de inicio rápido para Matriz de conmutación Altuscn KN1000. Altuscn KN1000 2 páginas. Kvm over the net

KN1000 KVM Over the NET™
Online Registration
International:
Quick Start Guide
• http://support.aten.com
North America:
• http://www.aten-usa.com/product_registration
© Copyright 2011 ATEN
®
International Co., Ltd. www.aten.com
Technical Phone Support
Altusen and the Altusen logo are trademarks of ATEN International Co., Ltd.
International:
• 886-2-8692-6959
All rights reserved. All other trademarks are the property of their respective owners.
China:
This product is RoHS compliant
PAPE-1215-800G
Printing Date: 11/2011
• 86-10-5255-0110
Japan:
• 81-3-5615-5811
Patent No.
Korea:
• 82-2-467-6789
TW I273415
US 7142721
US 7340556
JP 4651633
North America:
TW 199673
US 7350091
US 6957287
CN ZL 02129894.7
• 1-888-999-ATEN Ext: 4988
TW 203183
US 7472217
JP 4558319
CN ZL 02824593.8
United Kingdom:
• 44-8-4481-58923
All information, documentation, and specifications contained in this media are subject to change without prior notification by the manufacturer.
Please visit our website to find the most up to date version.
1
Package Contents
The KN1000 package consists of:
1 KN1000
1 Rack Mount Kit
2 Custom KVM Cable Sets
1 Software CD
1 Custom Console Cable Set
1 User Instructions
1 USB 2.0 Virtual Media Cable
1 Power Adapter
1 Grounding Wire
1 Outlet Power Cord
2
Hardware Review (Front View)
1
2 3 4 5
1. LAN Port
4. Link LED
2. Firmware Upgrade / Reset Switch
5. Power LED
3.10/100Mbps LED
6. Power Outlet LED
3
Hardware Review (Rear View)
1 2
3
1. Circuit Breaker
2. Grounding Terminal
3. Power Inlet
4. Power Outlet
5. Power Jack
4
Requirements
Remote User Computers
• For best results we recommend that the computers used to access the switch have at least a P III 1
GHz processor, with their screen resolution set to 1024 x 768.
• Browsers must support 128 bit SSL encryption.
• For best results, a network transfer speed of at least 128 kbps is recommended.
• For the Windows Client AP, at least 25 MB of memory must be available after installation.
• For the Java Client AP, the latest version of Sun's Java Runtime Environment (JRE) must be
installed, and at least 55 MB of memory must be available after installation.
• For the browser-based WinClient Viewer, at least 60 MB of memory must be available after
installation.
• For the browser-based Java Applet Viewer the latest version of Sun's Java Runtime Environment
(JRE) must be installed, and at least 130 MB of memory must be available after installation.
• For the Log Server, you must have the Microsoft Jet OLEDB 4.0 or higher driver installed.
Servers
The following equipment must be installed on these servers:
• A VGA, SVGA or multisync port
• For USB KVM Cable Connections: a Type A USB port and USB host controller
• For PS/2 KVM Cable Connections: 6-pin Mini-DIN keyboard and mouse ports
Cables
• Two custom KVM cable sets (1 USB; 1 PS/2) to link the KN1000 to a server or KVM switch are
provided with this package.
• One custom Console cable set to link the KN1000 to a local console is provided with this package.
Note: This cable set has been designed to operate with either PS/2 or USB consoles.
• A USB 2.0 cable for use with the Virtual Media function is provided with this package.
• Cat 5e or higher Ethernet cable (not provided with this package), should be used to connect the
KN1000 to the LAN, WAN, or Internet.
6
• One power cables to connect the KN1000 to the server for power management functionality is
provided with this package.
4
5
6
7
8
9
10
6. Virtual Media Port
7. PC/KVM Port
8. Console Port
9. PON Port
10. RS-232 Port
5
Hardware Installation
Rack Mounting
For convenience and flexibility, the KN1000 can be mounted on a system rack.
To rack mount the unit do the following:
1. Remove the two original screws from the bottom of the unit (near the rear of the unit).
2. Using the screws provided with the rack mount kit, screw the mounting bracket into the KN1000 –
as shown in the diagram.
Note: The illustrations show the mounting bracket attached to the bottom of the unit; it can also be
attached to the top.
Phillips hex head
M3 x 8
3. Screw the bracket into any convenient location on the rack.
Note: Rack screws are not provided. Use screws that are appropriate for your rack.
DIN Rail Mounting
To mount the KN1000 on a DIN rail:
1. Screw the mounting bracket to the back of the KN1000 as described in steps 1 and 2 of the
wall mounting procedure.
2. Use the larger screws supplied with the Rack Mount Kit to screw the DIN rail brackets to the
mounting bracket – as shown in the diagram.
3. Hang the unit on the DIN rail.
