Blue Clean AR525 Manual del usuario - Página 7
Navegue en línea o descargue pdf Manual del usuario para Lavadora a presión Blue Clean AR525. Blue Clean AR525 16 páginas.
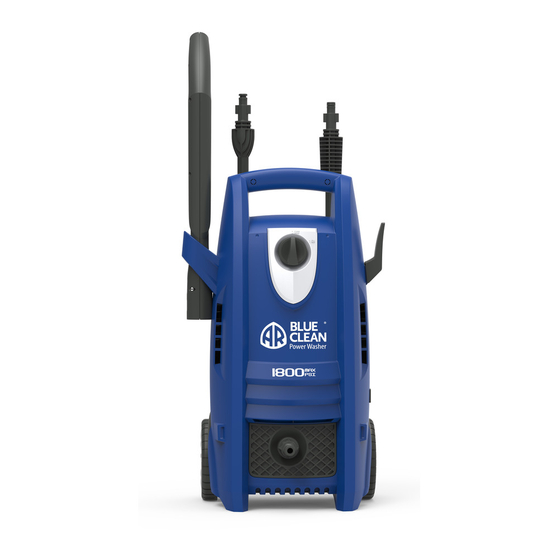
Fig. 2
Fig. 1
Fig. 3
Trigger
Fig. 4
UNPACKING & ASSEMBLY
•
After unpacking the BLUE CLEAN POWER WASHER, lay out parts
and accessories. Familiarize yourself with the parts in the package
by comparing them to those listed on the "PACKAGE CONTENTS"
page.
•
The BLUE CLEAN POWER WASHER requires some minor
assembly.
•
Install the power cord holder by sliding the clip onto the groove onto
the side of the power washer (Fig. 1).
•
Please refer to (Fig. 1) for accessory storage locations on the power
washer.
High Pressure Hose
•
Screw the high pressure hose (clockwise) on the back of the unit
at the bottom (Fig. 2). The end of the hose must be inserted into
the water outlet far enough so the collar can thread onto the outlet
threads until hand tight. Do not use pliers or vice grips to tighten. If it
takes fewer than six or so turns you have not properly tightened the
front of you so to ensure that the threads are started correctly. Failure
to properly tighten the high pressure hose will result in the hose
slipping or popping off immediately upon turning the unit on. Do not
worry about damage if this occurs - just reinstall and take extra care
•
Connect the other end of the high pressure hose to the spray gun by
just ahead of the trigger guard. It will lock into the spray gun with
3
pulling slightly on the hose. The hose is now securely attached to the
spray gun.
•
To release the hose from the spray gun, press the blue button on the
underside of the gun toward the trigger guard. The hose will slide out
from the connection.
Spray Gun
•
To lock the trigger of the spray gun aim the gun away from you and
push the lock button from right to left, (Fig. 4), after doing so, squeeze
or pull the trigger to make sure it is locked and will not move. Get in
the habit of leaving the lock button in the "locked" position when the
power washer is not in use. This ensures the gun is in "safe" mode
until it is ready for use.
7
en