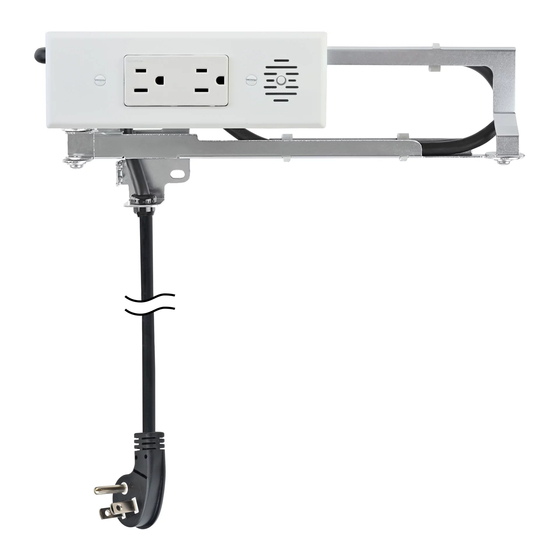
Docking Drawer Blade Duo 2012-2 Series Instrucciones de instalación - Página 2
Navegue en línea o descargue pdf Instrucciones de instalación para Accesorios Docking Drawer Blade Duo 2012-2 Series. Docking Drawer Blade Duo 2012-2 Series 2 páginas.
También para Docking Drawer Blade Duo 2012-2 Series: Instrucciones de instalación (2 páginas)

Step 5 -
Reinstall the drawer box and slide
the Docking Drawer Blade Series receptacle
box through the cutout. Secure it with the 4
receptacle box mounting screws.
Step 6 -
Align arms. With the drawer mostly
closed, mark the position of the rear mounting
bracket. It is important to make sure the
drawer moves freely in and out and that the
arms are square and even. Spend sufficient
time at this step before fastening the bracket
to the rear wall to make sure everything
is square and the arms are in the correct
position. Once that is done, secure with the 3
rear mounting bracket screws provided.
Step 7 -
Install the
cover plate.
*For Blade
Duo outlets,
make sure that
the cover plate is
installed so that it covers
the receptacle box flanges.
Step 8 -
Connect the Docking Drawer power
cord to the in-cabinet electrical supply. For
more details about locating an in-cabinet
electrical supply for your Docking Drawer
installation, please refer to the Electrical
Planning Guide located at dockingdrawer.com/
downloads.
Wiring Diagram:
120º
F
Docking Drawer
Wall
Receptacle
How to Operate the Outlet
The 15 and 20 amp Blade Duo and Blade series
in-drawer outlets include a 120˚F interlocking
thermostat to protect against overheating
inside the drawer. To reset, correct the source
of over temperature and push the button in
the center of the vents of the cover plate. Note:
You may need to wait a few minutes for the
unit to cool before the thermostat can be reset.
Push to reset
interlocking
thermostat
®
AG040521
Have questions? Need help? Call us!
(925) 233-5598
12893 Alcosta Blvd, Suite M,
San Ramon, CA 94583
www.dockingdrawer.com
