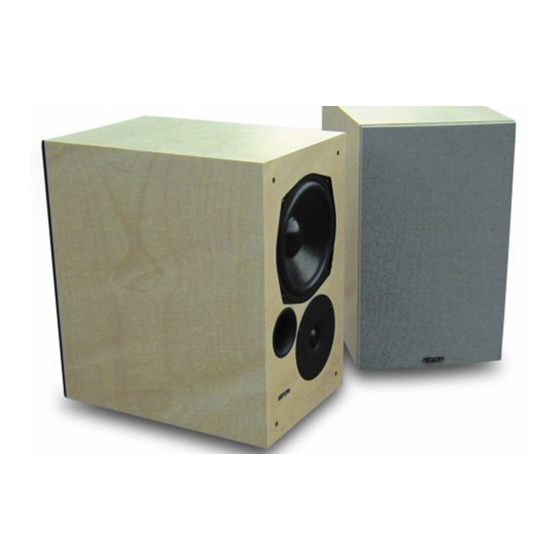
Cyrus CLS50 Instrucciones de uso - Página 4
Navegue en línea o descargue pdf Instrucciones de uso para Altavoces Cyrus CLS50. Cyrus CLS50 6 páginas.
También para Cyrus CLS50: Instrucciones de uso (9 páginas)

User Instructions
IMPORTANT CAUTIONS!
Read before installing this equipment!
•
Do not expose your loudspeakers to excessive cold, heat, humidity
or sunlight - see Maintenance.
•
Do not discard the original packaging. The original Cyrus packaging
is an important element of your warranty.
•
Do not connect your loudspeakers to the mains electricity supply.
•
Ensure that your loudspeakers are correctly wired and are in phase -
see 'Connecting your loudspeakers'.
•
Do not mount your loudspeakers by the rear panel. Wall brackets
must support the underside of the product.
When setting up the system or playing music it is always important to pay
particular attention to the following points-
•
Do not change any component in your system without first switching
off your amplifier. Every time you change the connections from any
signal source to your amplifier, ensure that you first switch off the
amplifier.
•
Do not use your amplifier at full power. This will 'clip' the amplifier
and may damage your loudspeakers. Full power with many
amplifiers can occur at around half volume setting.
•
When switching on your system, do so with the volume control at
minimum and turn the level up gradually.
•
When changing discs, adjusting tuners, rewinding tapes, etc., turn
the volume control down to its minimum.
•
Filters, tone controls or graphic equalisers are not recommended for
use in a system with Cyrus speakers.
•
Never use Cyrus speakers part supported on a shelf. All 3 feet must
be supported.
•
It is recommended that Cyrus speakers should be attached securely
to stable loudspeaker stands. This will help performance as well as
stability.
Welcome to the world of Cyrus!
Congratulations on your choice of Cyrus loudspeakers. Our state-of-the-
art design technology and outstanding quality of manufacture has won
countless awards around the world. We are confident that you will derive
great pleasure from owning a product from one of the most recognised
and respected manufacturers of hi-fi equipment.
Please read these instructions carefully before commencing installation.
They provide full guidance to help you install your Cyrus loudspeakers
safely and correctly.
Unpacking Your Loudspeakers
CAUTION!- Take care not to touch the drive units when unpacking and
setting up the speakers. The drive units may be permanently damaged!
Retain all the packing materials so that your loudspeaker can be
repacked and shipped without damage.
To avoid damage to your system, always ensure that mains power is
disconnected from all system components until installation is complete.
GB
GB
Front Grilles
The front grilles of the speakers provide protection from accidental
damage to the sensitive drive units. If this protection is not required, the
grilles may be removed. For maximum performance we recommend
listening with the grilles removed.
To remove the grilles, grip the frame and ease the grille away from the
front of the speaker, starting from the top. The grille can be re-fitted by
lining up the four fixing pegs with the miniature sockets in the front of the
speaker.
The Cyrus Icon grille is attached with magnetic side strips. To remove the
grille from the Icon, gently pull the tab concealed at the base of the
speaker. To re-fit the Icon grille, align the bottom of the grille with the
base first, then slowly bring the grille towards the top of the cabinet. The
magnetic fixing system will draw the grille into the correct position
automatically.
Cyrus loudspeaker stands
Refer to the instruction sheet supplied with the stands.
Positioning your loudspeakers in a stereo system
The sound quality achieved by your speakers is greatly affected by the
position of the speakers and listener in the room. The most important
dimension is the distance between the speaker and the wall behind it (the
back wall). When first setting up the speakers we make the following
recommendations-
1.
Where possible, locate the speakers at least 1m from the corners of
the room.
2.
Place the speakers 2-3m apart and approximately 0.5m from the
wall.
3.
Set the speakers with no 'toe-in' (square to the wall).
From this initial setting, small position adjustments can later be made to
tailor the sound to your requirements. Moving the speakers closer to the
wall will adjust the sound balance to give more bass but with a smaller
soundstage. Moving the speakers away from the wall will reduce bass but
will increase the size of the soundstage. Setting the speakers with a toe-in
towards the listener will reduce the depth of the image within the
soundstage, but may focus individual elements of the image.
Positioning your loudspeakers in an A/V system
Our guidelines for setting up the speakers in a A/V system are very
similar to those for a stereo system. If the system has a centre channel
dialogue speaker the front left and right speakers may be positioned
further apart to give a larger listening field for more people. When first
setting up the speakers in an A/V system we make the following
recommendations-
1.
Where possible, locate the speakers at least 1m from the corners of
the room.
2.
Place the front speakers 3-4m apart and 0.5m from the wall.
3.
Place the centre channel speaker as close as possible to the
picture.
4.
Set the rear surround channel speakers with a 'toe-in', angled
towards the listener.
From this initial setting, small position adjustments can later be made as
listed for stereo systems in the previous section.
For a system with a subwoofer the surround sound decoder may be set
for small speakers which will direct deep bass to the subwoofer and give
the system extra headroom.
Cyrus Loudspeakers
1
