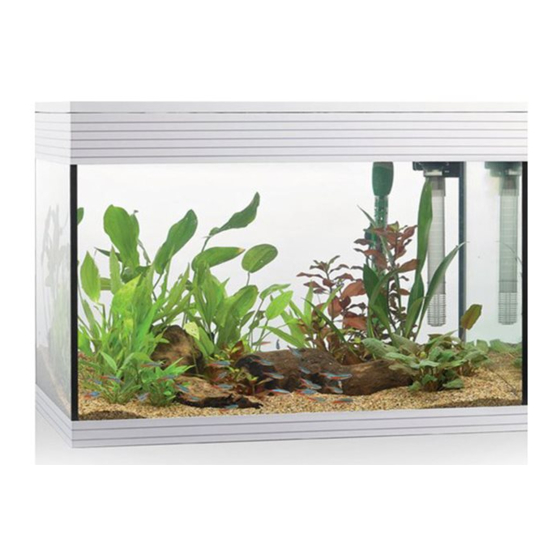
Askoll pure l Manuel d'instruction - Page 7
Parcourez en ligne ou téléchargez le pdf Manuel d'instruction pour {nom_de_la_catégorie} Askoll pure l. Askoll pure l 14 pages. Aquarium kit

PURE Aquarium KIT
4.3. Assembly
To prevent the risk of scratching the product: clean it
exclusively using a soft cloth moistened with water. Do
not use abrasive products, toxic substances or deter-
gents.
1) Clean the tank with a cloth moistened with water (fig. 6).
2) Prepare the tank bottom (sand or other suitable material) ac-
cording to the arrangement desired.
3) Install the thermal heater with its provided bracket (fig. 7).
IMPORTANT: For proper installation, make sure the adjustment
knob is below the bottom edge of the decorative trim. Place
the thermal heater in the aquarium and press its suction caps
against the wall so that they adhere. Set the desired water tem-
perature using the adjustment knob referred to the graduated
scale in °C (fig. 8).
4) Restore the frame to the tank.
5) Unwind the thermal heater cable and route it out of the tank via
the pump compartment (fig. 9).
6) Restore the pump in its compartment, tidy away the thermal
heater power cable (fig. 10).
7) Pick the baskets for the mechanical filtration sponges. Take out
the sponges, rinse them under running water and replace them
in the baskets (fig. 11).
8) Pick the biological baskets with their cover (fig. 12).
9) Pick the ceramic cylinders and a 3ACTION cartridge. For the XL
model, use 2 3ACTION cartridges.
10) Open the bags containing the ceramic cylinders in a sink, then
pour the cylinders into the biological baskets and rinse them un-
der running water; also rinse the 3ACTION cartridge after taking
it out of its bag (fig. 13).
11) Place the biological baskets, the baskets for the mechanical
filtration sponges and the 3ACTION cartridge back into the pro-
vided spaces in the frame (fig. 14).
12) Dispose of the plastic bags in observance of local regulations.
13) Restore the light cover to the frame after removing the sticker
securing its power cable (fig. 15).
14) Route the power cables for the three electrical devices (lighting
unit, pump unit and thermal heater) out of the tank through the
fairlead seat (fig. 16).
15) Restore the filter cover to the frame and hook up the lighting unit
to the led driver with its connector (fig. 17).
16) Gather all cables into the provided cable guide (fig. 18).
4.4. Installation
Do not connect the electric devices of the product to
the mains before having completed the installation. Do
not use the thermal heater and the pump dry.
After installation, do not move the product.
If necessary, move it only if the tank is completely
empty.
8
CAUTION
WARNING
Do not lean any heavy objects on the intake tube.
Take care not to allow the material on the tank bot-
tom (sand, etc.), leaves, plants and other objects to
obstruct the intake grilles at the end of the intake tube.
1) Open the light cover and slowly fill the tank ⅓ full, then install the
decorations and aquatic flora.
2) Slowly fill the tank to between the min and max marks on the
label inside the tank itself (fig. 19).
3) Close the light cover and check the tank for leaks.
5. STARTING UP THE SYSTEM
5.1. Routine operation
To avoid electric risk, each power cable of the electric
devices has to show a drip loop positioned lower than
the plug-outlet connection point in order to prevent any
drop from reaching such point.
1) Read the warnings in Chap. 1.
2) After having connected the plug of each electric device verify the
operation of the same (in case of malfunction refer to chap. 7):
• Water should flow out of the delivery.
• The warning light of the thermal heater should turn on if the
water temperature is lower than the setpoint.
• The programming timer should be on, with its two first digits
flashing.
5.1.1. Programming the timer and lighting system
PURE
aquariums are equipped with a new digital timer with a
LED
simple interface (fig. 20) which has several functions:
•
Light on / off in manual mode.
•
Light on / off in automatic mode, at set times.
•
Rolling Filtration Timer (RFT), which reminds the user to replace
the 3ACTION cartridge every 15 days to keep the aquarium in
the best condition.
The timer has three touch sensitive buttons, 4 status icons and 4
digital digits. If you set automatic light on/off times, the unit runs a
daily cycle with the following steps:
1) Day light on, the brightness slowly increases over around 30
minutes (dawn effect).
2) Day light off, the brightness slowly decreases over around 30
minutes (dusk effect).
3) Once the day light has turned off completely, the blue night light
turns on for about 3 hours (moon effect).
4) After three hours, the system shuts off the night light too and all
lights stay off until the next daily cycle starts.
You can always turn the light on and off manually, even if the timer is
set to automatic mode.
The timer is equipped with a lock function to prevent accidental pres-
sure of the keys. Key locking is activated automatically after 3 min-
CAUTION
WARNING
