Coachsound TourMaster-Lite TML2500 Manuel d'installation - Page 10
Parcourez en ligne ou téléchargez le pdf Manuel d'installation pour {nom_de_la_catégorie} Coachsound TourMaster-Lite TML2500. Coachsound TourMaster-Lite TML2500 11 pages. Two channel audio server
Également pour Coachsound TourMaster-Lite TML2500 : Manuel de l'utilisateur (15 pages)
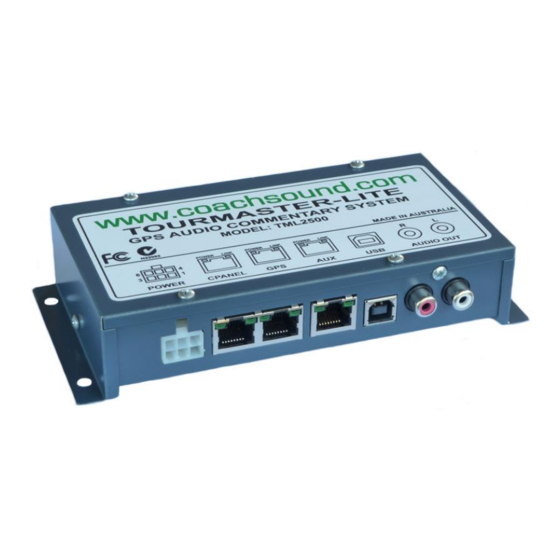
TourMaster-Lite Installation Guide v2.0
Driver Control Panel Installation Notes:
•
Allow 50mm (2 inches) at rear of panel for cable connection;
•
Mount panel out of direct sunlight;
•
Mount in dry, dust free environment (panels are not waterproof);
•
Mount within easy view and operation for the operator;
•
Display contrast is adjustable with a small screwdriver via the hole in the rear of the panel;
•
Connect to the head-unit's "CPANEL" port via supplied CAT-5 cable;
•
The control panel is not waterproof.
•
The bracket has 3 mounting holes
4.3 GPS Aerial Installation and Dimensions
GPS Aerial Installation Notes:
•
Mount on top of vehicle roof with unobstructed view of the sky;
•
Mount via 3 x M4 screws or with an adhesive/sealant such as Sikaflex 227;
•
Mount away from other aerials such as RT and cellular;
•
Supplied cable length is 5m (16 ft)
•
Mounting the aerial as close to the centre of the road as possible will aid with accurate GPS triggering.
Figure 7 - GPS Aerial Dimensions
9