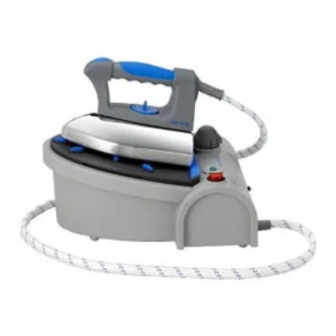
Euro-Pro Shark G6118 Manuel du propriétaire - Page 4
Parcourez en ligne ou téléchargez le pdf Manuel du propriétaire pour {nom_de_la_catégorie} Euro-Pro Shark G6118. Euro-Pro Shark G6118 6 pages. 120v., 60hz., 1500 watts steam generator iron

Even if you have used a steam generator iron before, please read all instructions
and safeguards in the Use and Care Instruction Book. In addition, please note the
following user tips:
USING STEAM
PLEASE NOTE
: Steam performance improves after the first 6-8 hours of usage.
The steam power increases and initial condensation at maximum
temperature is reduced.
1.
Make sure the temperature setting of the iron is within the steam range on the
temperature selector.
2.
Turn power on for iron and steam generator. Before starting to use steam,
make sure the Steam Ready Light is "ON", indicating that steam is available.
NOTE:
Trying to use steam before the Steam Ready Light is "ON" can cause water
drops in the steam coming out of the iron.
CLEARING THE INITIAL CONDENSATION:
3.
Clear the initial condensation by pressing the Steam Button up to 3 seconds.
Repeat if necessary.
IMPORTANT NOTE:
4.
While using the ironing system, if steam has not been released for more than
approximately 5 minutes, the hose has cooled and any steam remaining in the
hose from the last use might condense. Clear this condensation by pressing
Steam Button before proceeding to use the iron.
3
OPERATING INSTRUCTIONS
CLEANING & MAINTENANCE
CAUTION!
NEVER open the
boiler filler cap before ALL the
remaining steam has been
released from the steam
generator and the steam
generator has cooled. To
release the steam, press the
On/Off button to the "Off"
position and push the steam
button on the iron until no
more steam comes out of the
iron. Then open the boiler filler
cap slowly.
1. We strongly recommend the use of
demineralized/distilled water to
ensure optimum performance and
maximize the life of your steam
generator. If you are using
demineralized/distilled water, the
steam generator should be cleaned
once every six (6) to twelve (12)
months. If you use regular tap water,
the steam generator should be
cleaned once a month.
2. Make sure that all the steam has
been released from the steam
generator before doing any cleaning
or maintenance on the appliance.
Follow instructions on page 7 for
releasing the steam.
3. Remove the power cord from the
electrical outlet and let the unit cool
down for at least 4 hours after it has
been used before starting to clean
the steam generator.
4. NEVER immerse the iron or the
steam generator in water or any
other liquid.
CLEANING THE STEAM
GENERATOR BASE
1. Make sure that there is no steam
remaining in the steam generator.
2. Make sure that the steam generator is
completely cold.
3. Remove the boiler filler cap by slowly
turning counter clockwise to allow any
remaining steam to escape.
4. Fill water tank with a solution of 20%
vinegar and 80% water (5 oz vinegar
and 21 oz of water) and let sit
overnight (8-12 hours).
5. Replace the boiler filler cap and
shake.
6. Remove the boiler filler cap and
empty the tank. Rinse with water two
to three times by filling, shaking and
emptying again.
6. Wipe the outside of the steam
generator base with a damp cloth.
CLEANING THE STEAM
GENERATOR IRON
1. Clean the steam generator iron
ONLY when cold.
2. Do NOT use scouring pads,
abrasives or harsh cleansers.
3. Use a commercially sold soleplate
cleanser following the manufacturers
label instructions.
4. Use a soft damp cloth to wipe the
outer shell of the iron.
5. Dry soleplate and iron thoroughly
after cleaning.
STORING YOUR STEAM
GENERATOR IRON
1. Ensure that the seam generator is
depressurized by opening the steam
button on the iron until no further
steam is escaping.
2. Always unplug the power cord from
the electrical outlet when not in use.
3. Always store in a dry place away
from the reach of children.
4. Always drain the water tank before
storing.
5. Always let your steam generator cool
completely before storing.
6. Do not let power cord and steam
hose to touch hot surfaces.
7. Wrap the power cord and steam
hose around the appliance loosely.
8
