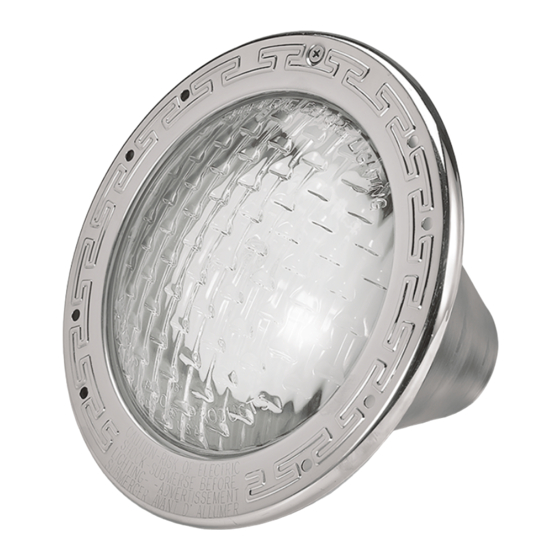
Cantar Pool Products Full Moon Manuel du propriétaire et instructions d'installation - Page 2
Parcourez en ligne ou téléchargez le pdf Manuel du propriétaire et instructions d'installation pour {nom_de_la_catégorie} Cantar Pool Products Full Moon. Cantar Pool Products Full Moon 4 pages. Multi-color l.e.d. pool light

clean, lint-free cloth. It is recommended that the lens O-ring be replaced as a
part of routine maintenance when the bulb is changed.
7. Silicone lubricate the lens O-ring and place it into the groove provided in the
light housing. Press the lens firmly into place.
TM
8. Install the LensLok
retaining ring. Place one end of the LensLok
the groove between the lens and the face ring. Working around the ring toward
the other end, use your thumbs to press the LensLok
that the LensLok
TM
retaining ring is completely seated before reinstalling light
into niche.
9. Mount light assembly in the niche as directed in the light installation section.
Figure 2
NICHE INSTALLATION - GUNITE WALL
SEE FIGURE 3
1. Position and secure the niche to the pool wall rebar with the label "TOP"
located at 12 o'clock.
Note: The uppermost point of the light lens must be at least 18"
below the minimum water level.
2. Connect wiring conduit to the factory installed brass conduit fitting on the
back of the niche.
Brass conduit - Secure a #8 solid copper of the niche. The wire should then
be attached to the steel structure of the pool and to the conduit using an ap-
proved direct burial cold water clamp.
Rigid, non-metalic conduit - A #8 solid or standard insulated copper wire will be
required to run in the conduit connected at one end to the bonding lug inside
the niche and to the junction box at the other. If non-metalic conduit is used,
completely encapsulate the inside bonding lug with an approved material by
the National Electric Code or the Canadian Electrical Code.
3. Apply plaster around the niche bringing it flush with the gunite flange.
4. The niche is now ready for light installation.
Figure 3
2
1. Mark the location of the hole (10-1/4" to 10-1/2" diameter) to be cut in the pool
wall if not factory punched. Note: The uppermost point of the lens must be at
TM
into
least 18" below the minimum water level. Cut along the marked circle.
2. Insert the niche through the hole in the panel section from the inside of the pool.
TM
into place. Be certain
3. The vinyl liner niche features a factory installed "channel gasket" to facilitate
installation and ensure proper sealing. Position the niche assembly so the word
"TOP" (stamped in the channel gasket) is at the 12 o'clock position. Using the
niche as a pattern, mark the top and bottom screw locations. Remove the niche
and drill the screw holes using a 1/4" drill bit. Reinsert the light niche. Align the
holes in the "back-up ring" with those in the niche flange and the pool wall.
Secure the niche using (2) pan head screws through the niche flange holes at
the top and bottom (12 and 6 o'clock) through the pool wall panel, a niche
gasket and into the back-up ring.
4. Install the vinyl liner per manufacturer's instructions.
5. Position the second gasket and face ring over the liner aligning the (10)
mounting holes and pierce the liner at each hole location. Tightly secure the
assembly using provided flat head screws.
6. Connect wiring conduit to the factory installed brass conduit fitting on the
back of the niche.
Brass conduit - Secure a #8 solid copper ground wire to the bonding lug on the
back of the niche. The wire should then be attached to the steel structure of the
pool and to the conduit using an approved direct burial cold water clamp.
Rigid, non-metalic conduit - A #8 solid or stranded insulated copper wire will be
required to run in the conduit connected at one end to the bonding lug inside the
niche and to the junction box at the other. Completely encapsulate the inside
bonding lug with an approved material by the National Electric Code or the
Canadian Electrical Code.
7. Trim the liner from inside the niche opening per manufacturer's instructions.
8. The niche is now ready for light installation.
Figure 4
The NEC requires that fixtures must be installed so that the fixture lens
is at least 18" below normal water level. The junction box shall be lo-
cated at least 8" above maximum water level, pool deck or ground,
whichever is greater. The junction box shall be located not less than 4
ft. from the perimeter of the pool, unless separated from the pool by a
fence, wall or other permanent barrier. Junction boxes mounted above
grade in the walkway around the pool shall be afforded additional pro-
tection by locating them in such places as under a diving board, adja-
cent to fixed structures, etc. Check local codes to assure acceptance.
NICHE INSTALLATION - VINYL LINED WALL
SEE FIGURE 4
