Canton INCEILING Manuel - Page 5
Parcourez en ligne ou téléchargez le pdf Manuel pour {nom_de_la_catégorie} Canton INCEILING. Canton INCEILING 8 pages. Inceiling
Également pour Canton INCEILING : Manuel (15 pages)
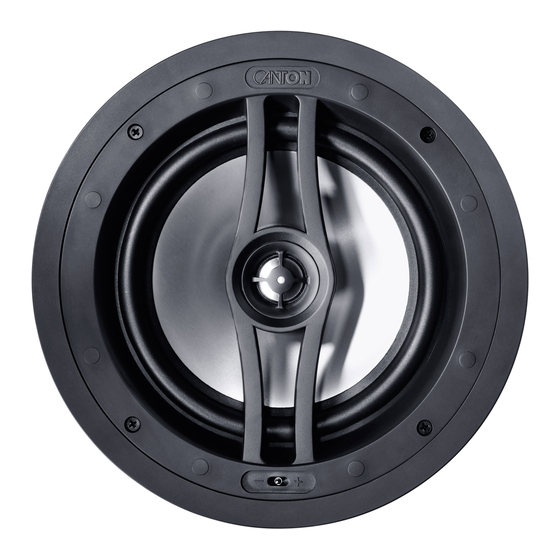
Stecken Sie nun die Schrauben in die dafür vorgesehenen
Löcher und ziehen Sie diese nur leicht an. Achten Sie bitte
darauf, dass die Befestigungslaschen nicht abstehen wie im
Foto links, sondern waagerecht anliegen (nächstes Foto),
damit das InCeiling System in die Einbauöffnung passt.
Now put the screws in their designated openings and
fasten them firmly. Make sure that the mounting tabs do
not stick out like in the photo on the left, but are in a
horizontal position (next photo) so that the InCeiling
system will fit in the installation opening.
Stehen die Befestigungslaschen (4 Stück pro Lautsprecher-
system) waagerecht und sind die Schrauben leicht eingedreht,
sind sie bereit für den Einbau.
If the mounting tabs (4 per InCeiling system) are in a hori-
zontal position and the screws firmly screwed in they are
ready for installation.
Bevor Sie die Lautsprecher-Kabel an den Klemmanschlüssen
des InCeiling Systems befestigen, müssen Sie die Kabel sprei-
zen und etwa 1,5 cm der Kabelenden abisolieren. Verbinden
Sie nun das markierte Kabel (+) mit dem roten Klemman-
schluss an der Frequenzweiche, das zweite Kabel (-) mit dem
schwarzen Anschluss.
Before fastening the speaker cable to the screw clamps of
the InCeiling systems, you must first split the two-
conductor cable and strip off about 1.5 cm of insulation
from the cable ends. Now connect the marked cable (+)
with the red screw clamp on the crossover network, the
second cable (-) with the black screw clamp.
Stecken Sie nun den Lautsprecher in die Öffnung und drehen
Sie ihn in die richtige Position.
Now fit the speaker in the installation opening and turn it
in the correct position.