Draper GHD150WA Manuel d'instructions - Page 15
Parcourez en ligne ou téléchargez le pdf Manuel d'instructions pour {nom_de_la_catégorie} Draper GHD150WA. Draper GHD150WA 20 pages. 150mm bench grinder with wire wheel and worklight
9.
OPERATING THE GRINDER
9.1
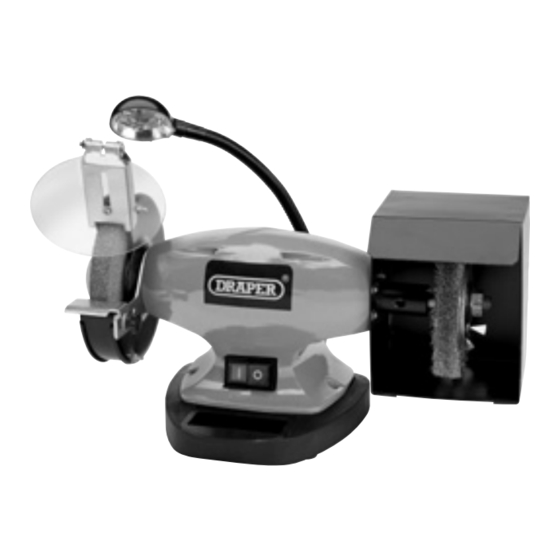
ON/OFF SWITCH - FIG. 7
Turn the grinder "on" using the switch marked "I". To
turn off, press the switch marked "O".
9.2
WIRE WHEEL REMOVAL - FIG. 8
Insert a spindle locking tool, such as a screwdriver (not
supplied), into slot
fixed position. Untighten nut
supplied).
Remove nut fully, then slide wire wheel from spindle
and pull away.
9.3
CHANGING THE GRINDING WHEEL -
FIG. 9
1.
Switch the bench grinder "OFF" and disconnect
from the power supply.
2.
Remove the screws which secure the grinding
wheel side covers then take off covers.
3.
Insert spindle lock tool, holding the spindle in a
fixed position use a screwdriver then remove the
nut and flange.
NOTE: The grinding wheel nut has a left thread.
4.
When fitting a new grinding wheel always check
that the stated max. grinding wheel RPM exceeds the RPM of the bench grinder. Also
check the grinding wheel for damage such as flaws or cracks, then if the wheel appears
satisfactory, fit the new wheel to the grinder.
5.
Remove the old wheel and replace it with the new one.
6.
Place the flange on the spindle and tighten the spindle nut just enough to hold the
wheel firmly. Do not over tighten the nut as the wheel may become damaged. Repeat
the above to replace the opposite wheel.
7.
Re-assemble the side covers.
8.
Stand to one side of the grinder and switch "ON". Let the grinder operate at full speed
for approximately one minute so that any undetected cracks or flaws in the wheel will
become apparent.
, whilst holding the spindle in a
using a spanner (not
FIG.7
FIG.9
FIG.8
15