BDH Elkay 376A-1 Manuel d'instruction - Page 3
Parcourez en ligne ou téléchargez le pdf Manuel d'instruction pour {nom_de_la_catégorie} BDH Elkay 376A-1. BDH Elkay 376A-1 4 pages. Illuminated pir timer
Installation Steps
DO NOT APPLY MAINS UNTIL INSTRUCTED!
Step 1
Ensure the mains power to the circuit is
switched off. Place the previously identified
live in wire as per diagram, into the
terminal marked L In, the switched live
out into the terminal marked L out
(see diagram 1).
Step 2
Set the timing as per timing table
(see diagram 4). The black square illustrates
where the dip switch should be situated.
For example:
10min 1 = OFF, 2 = ON, 3 = OFF, 4 = ON
Note: Dip switch must be positioned away
from the numbers for ON and against the
numbers for OFF.
Operation of the Unit
•
In standard operation, the PIR will now
sense body heat when passing through
the detection zone. Each time the PIR
is triggered the red LED will light and reset
back to the start of the timing period.
The unit will then wait 20 seconds
approximately before allowing the PIR
unit to sense and re-trigger the timing
period again.
•
If no one is present in the room or the
detection zone is not passed through during
its set time period, the timer will time out,
turning the lights or appliance off and
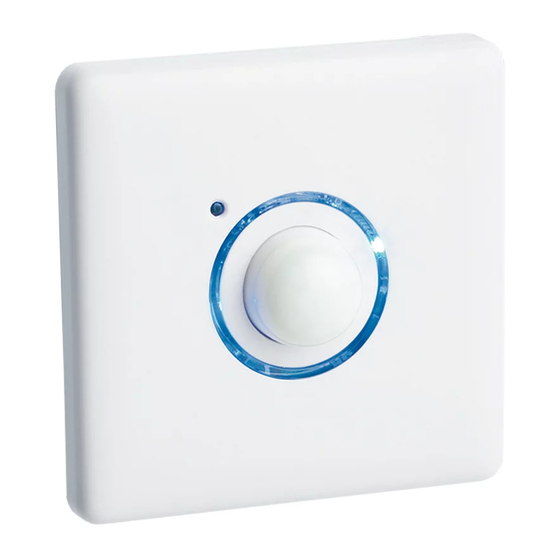
the blue locator ring will light up.
INSTRUCTION GUIDE
|
Step 3
When initialising rotate lux level to
maximum (+).
Step 4
Switch on battery using dip switch 4.
You will notice a red flashing LED light on
the front of the unit. Attach the unit to the
wall with the screws provided then clip the
front fascia plate on. Switch on mains
power supply, the unit will default your
load to the ON condition (Blue ring OFF) for
approximately 60 seconds before switching
OFF (Blue ring comes ON and red LED will
flash periodically during initialisation).
Please leave for appropriately 5 minutes to
allow the unit to initialise. There is no
longer ANY need to press the PIR dome.
Step 5
Reduce lux level to sufficient level by rotating
clockwise towards (–) if required. All the way
to the minus (-) represents zero lux level.
•
The PIR unit will only trigger the lights
or appliance if the ambient light level
is below that set on the lux level
adjustment potentiometer. See diagram
1 for location of potentiometer
(lux level adjustment).
•
When the ambient light level is sufficient
the override switch (pressing the lens as
shown in picture 5) can be used to turn
on the lights for the set period of time.
This can be used when additional light is
required in the room.
ILLUMINATED PIR TIMER – 2 WIRE
3