3onedata NP301 Manuel d'installation rapide
Parcourez en ligne ou téléchargez le pdf Manuel d'installation rapide pour {nom_de_la_catégorie} 3onedata NP301. 3onedata NP301 3 pages. Device server
NP301 Serial Device Server
Quick Installation Manual
3onedata Co., Ltd.
Address:
3/B, Zone 1, Baiwangxin High Technology
Industrial Park, Xili, Nanshan District, Shenzhen
Website:
www.3onedata.com
Tel:
+86 0755-26702688
Fax:
+86 0755-26703485
【Package Checklist】
Please check whether the package and accessories are intact
while using the serial device server for the first time.
1. Serial device server × 1
2. Power adapter × 1
3. Straight-through cable × 1
4. 5-pin terminal block
5. 3-pin terminal block
6. Qualify certificate × 1
7. Warranty card × 1
If any of these items are damaged or lost, please contact our
company or dealers, we will solve it ASAP.
【Product Overview】
This product is a serial device server. Model as follow: NP301
(Single Ethernet, 1-port RS-232 or RS-485/422)
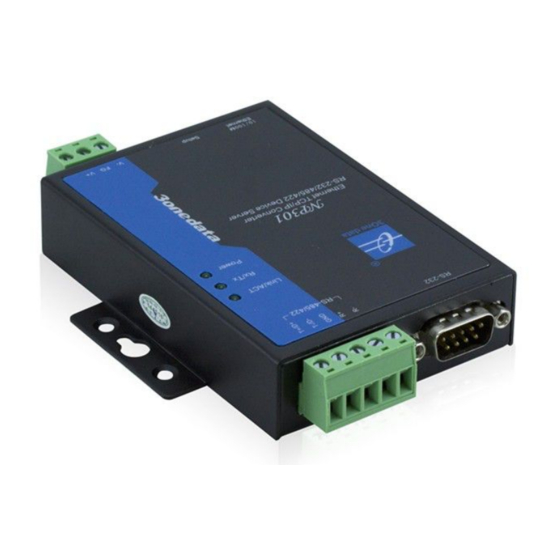
【Panel Design】
Top view
Side view and front view
Bottom view
1.
RS-485/422 serial port
2.
RS-232 serial port
3.
Ethernet port link/act indicator
4.
Serial port transmission or receive data indicator
5.
Power supply status indicator
6.
Wall mounting kit
7.
10/100Base-T(X) copper port
8.
Restore factory settings button
9.
Terminal block for power input
【Mounting Dimension】
Unit: mm
Note Before Mounting:
Don't place or install the device in area near water or
moist, keep the relative humidity of the device
surrounding between 5%~95% without condensation.
Before power on, first confirm the supported power
supply specification to avoid over-voltage damaging the
device.
The device surface temperature is high after running,
please don't directly contact to avoid scalding.
【Wall Mounting】
Mounting the Device
Step 1
On the wall of device mounting, place the device on
the wall for reference or reference the mounting
dimension to mark two screw position.
Step 2
Nail two M4 screws on the wall and keep 2mm
interspace reserved.
Step 3
Hang the device on two screws and slide