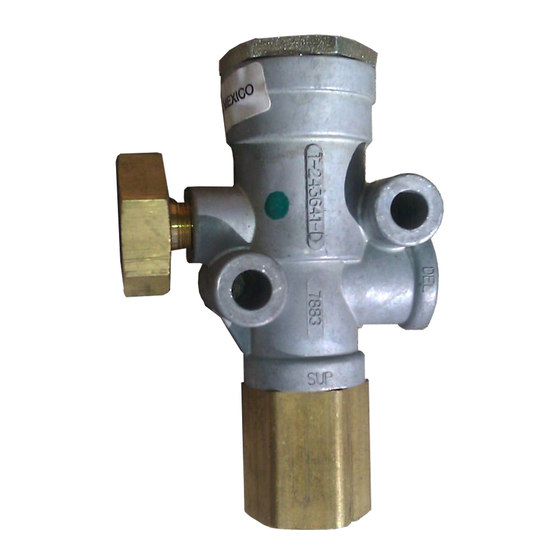
BENDIX SV-3 Manuel - Page 4
Parcourez en ligne ou téléchargez le pdf Manuel pour {nom_de_la_catégorie} BENDIX SV-3. BENDIX SV-3 6 pages. Synchro valve, trailer release valve

OPERATING AND LEAKAGE TESTS
OPERATING TEST
Two accurate air gauges are necessary to perform these
tests. Depending upon installation, it may be necessary to
remove valve to properly test it. Correct opening pressures
of the valve should be known before beginning tests; consult
vehicle manual.
1. Install an accurate gauge in the common control and
supply line; install another gauge in the delivery port.
2. Gradually apply air pressure to the common supply and
control line. As common supply and control pressure
increases, note at what pressure delivery of air through
valve is made and compare with specifications in vehicle
manual.
3. Slowly decrease pressure in the common supply and
note at what pressure delivery line pressure is vented;
compare with vehicle manual.
4. Pay particular attention to the exhaust check valve in
the exhaust port if so equipped (note figure 3). Make
certain it is free of contamination and the rubber valve is
free to function. Replace this item as necessary.
LEAKAGE TEST
1. With 120 psi air pressure present in supply, control and
delivery ports:
- Apply a soap solution around control port cap nut and
supply port cap nut. No leakage is permitted.
- Apply soap solution to the exhaust port; leakage must
not exceed a 1" bubble in less than 5 seconds (100
sccm).
Excessive leakage would indicate a faulty o-ring, inlet/
exhaust valve or piston exhaust seat.
2. Plug the delivery port and apply 10 psi to the supply port
only. Apply soap solution to the exhaust port:
-For the SV-1
valve - leakage must not exceed a 1"
™
bubble in less than 5 seconds (100 sccm).
-For the SV-3
& SV-4
™
a 1" bubble in less than 10 seconds (50 sccm).
Excessive leakage would indicate a faulty inlet valve or
inlet valve seat.
If the valve does not function as described or if leakage is
excessive, it is recommended that it be replaced with a new
unit, or repaired with genuine Bendix parts available at Bendix
outlets.
REMOVING AND INSTALLING
REMOVING
1. Block and hold vehicle by means other than air brakes.
2. Drain air brake system.
3. Identify the air lines to facilitate reinstallation, disconnect
the lines, remove the mounting bolts, and then the valve.
4
valve - leakage must not exceed
™
INSTALLING
1. Mount the valve securely.
2. Check and clean air lines; identify air lines and connect
to valve.
DISASSEMBLY
1. Remove the control port cap nut and its o-ring. Remove
the o-ring from the cap nut.
2. Remove the piston from the valve body. Remove the large
and small piston o-rings from the piston.
3. Remove the piston return spring from the body.
4. Remove the supply port cap nut and its o-ring. Remove
the o-ring from the cap nut.
5. Remove the inlet/exhaust valve stop (SV-1
spring guide (SV-3
™
exhaust valve spring.
Note: The SV-4
™
valve contains a check valve which is
installed in the opposite end of the inlet/exhaust
valve return spring.
6. Remove the inlet/exhaust valve.
7. Remove the exhaust check valve if so equipped.
CLEANING AND INSPECTION
1. Using good commercial grade of solvent, clean and
thoroughly dry all metal parts. Do not damage bores
with metal tools.
2. Inspect the interior and exterior of all metal parts that
will be reused for severe corrosion, pitting and cracks.
Superficial corrosion and/or pitting on the exterior portion
of the body and cap nuts is acceptable. Replace the
entire valve if the interior of the body or cap nuts exhibit
signs of corrosion or pitting.
3. Inspect the body bore and the check valve seat in the
supply port cap nut of the SV-4
or gouges. Replace the entire valve if either are found.
4. Inspect the pipe threads in the body and cap nuts. Make
certain they are clean and free of thread sealant.
5. Inspect all springs for signs of corrosion, pitting and
cracks. Replace as necessary.
6. Inspect all air line fittings for corrosion and replace as
necessary. Make certain to remove all old thread sealant
before reuse.
7. Inspect the exhaust check valve making certain all
passages are clear and open.
™
valve) or the
& SV-4
™
valve), then the inlet/
valve for deep scuffing
™
