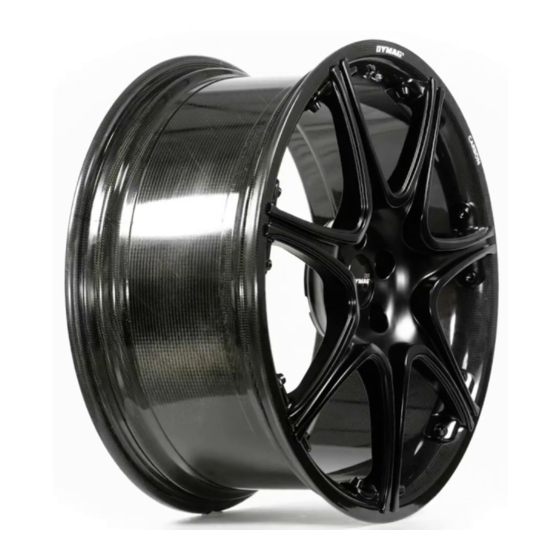
Dymag BOXSTROM Manuel du propriétaire - Page 8
Parcourez en ligne ou téléchargez le pdf Manuel du propriétaire pour {nom_de_la_catégorie} Dymag BOXSTROM. Dymag BOXSTROM 11 pages. Carbon hybrid automotive wheels

DYMAG® BOXSTROM™
CARBON HYBRID AUTOMOTIVE WHEELS
OWNERS GUIDE
wheel from sitting flush against the mounting surface. This will give a false torque
reading, which could cause the fasteners to loosen and result in the loss of
a wheel
12.4.
Hold the new custom wheel on the vehicle hub and check for a flush mount of the
wheel to the mounting surface of the vehicle. The mounting surface of the wheel
must fit flush to the vehicle's hub mounting surface. Whilst the wheel is held
in position, check that no part of the wheel rests, touches or obstructs the brake
drum, balancing weights, brake caliper, suspension component, rivets or any other
part
12.5.
Install three fasteners finger tight and rotate the wheel to check caliper clearance
and suspension clearance and to find bent flanges or axles
12.6.
Perform the same check on the remaining three wheels on the vehicle
13. TYRE CLEARANCE CHECK
The wheel manufacturing warranty does not cover tyre to fender clearance or tyre to
suspension clearance. This clearance must be fit-checked before mounting all of the tyres,
using the following procedure:
13.1.
Mount one tyre on a wheel intended for use on the front of the vehicle (see tyre
fitting guide below)
13.2.
Install the tyre/wheel assembly on the front hub and with the vehicle still on
the lift, turn the steering from extreme right to extreme left, whilst checking for
any interference with fender well, or suspension components
13.3.
Lower the vehicle and repeat step two with the weight of the vehicle applied
13.4.
Whilst observing the tyre/fender clearance, gain assistance to "bounce" the front
of the vehicle to check that suspension travel does not cause tyre rub. Also check
that the wheel balance weights do not contact suspension components
13.5.
Repeat process for the rear tyre/wheel assembly
WARNING: DO NOT PUT HANDS, FINGERS OR ANY BODY PART BETWEEN TYRE AND
VEHICLE WHILST CONDUCTING THESE CHECKS
14
14. TYRE FITTING GUIDE
14.1.
Wheels and tyres are clearly marked with their sizes. Ensure that the wheel and
tyre sizes match before mounting
14.2.
The tyre manufacturer's rim width recommendations must be followed when
selecting wheel size
14.3.
Mount all tyres according to the tyre manufacturers and the tyre machine
manufacturers recommended procedures. To avoid scratching or damaging a
wheel during mounting/dismounting of tyres, make sure that the tyre machine
is properly adjusted and all necessary protective covers are used where metal to
wheel contact is made. Mount the tyres using only wheel hub support tyre fitting
machines being careful to ensure that the tyre bead is pushed into the wheel well,
as the machine rotates to fit the tyre. Machines that clamp the rim may damage
the rim finish
14.4.
Use tyre fitting lubricant generously on all bead surfaces of the wheel and tyre. It
is strongly recommended that a quality proprietary bead sealing compound is
used on all very low profile tyres (below 35% aspect ratio). This ensures a good
initial seal of the tyre bead to the wheel
14.5.
Do not exceed 40 psi (pounds per square inch) of pressure when seating the tyre
to the head of the rim. If the tyre bead does not seat on the wheel at this
pressure, deflate the tyre, rotate the tyre 180 degrees on the rim, relubricate and
check for tyre/wheel size match before re-inflation
14.6.
Once beads are seated, install valve core, reconnect the air chuck and inflate
the tyre until the correct pressure is reached according to the tyre manufacturer's
recommendation. Check the bead edges and the valve for leaks, and then install
the valve cap
14.7.
Protective eyewear should be used at all times during the mounting/dismounting,
installation and servicing of wheels
WARNING: DO NOT INFLATE THE MOUNTED TYRE WITH THE CENTRE-POST HOLD-
DOWN CONE, OR RIM CLAMPS TIGHTENED ON THE WHEEL.
LOOSEN THE HOLD-DOWN CONE, BUT DO NOT COMPLETELY REMOVE, AND
RELEASE THE RIM CLAMPS TO LET THE TYRE EXPAND.
www.dymag.com
