CEL-MAR ADA-4010A Manuel de l'utilisateur - Page 8
Parcourez en ligne ou téléchargez le pdf Manuel de l'utilisateur pour {nom_de_la_catégorie} CEL-MAR ADA-4010A. CEL-MAR ADA-4010A 13 pages. Rs-485/rs-422 to rs-232 addressable converter
Également pour CEL-MAR ADA-4010A : Manuel de l'utilisateur (16 pages)
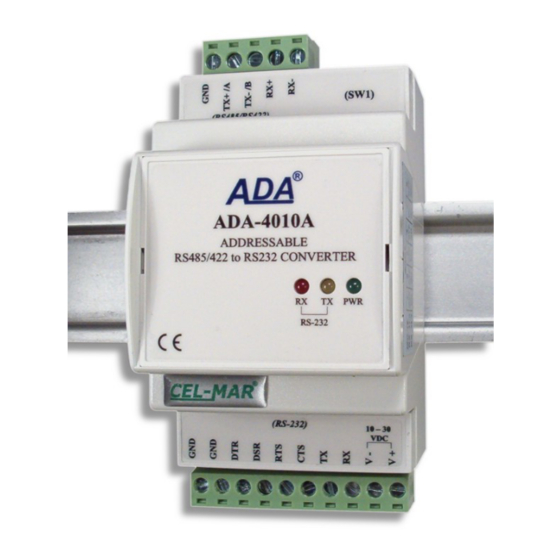
ADA-4010A
5.2. CONFIGURATION BY USING ADACONFIG
You can make the configuration of ADA-4010A converter by using ADAConfig Software - selling with converter.
You have to connect converter to computer and power supply to make the configuration. If the PWR LED lights you should set the
section of SW1 switch to configuration mode. Example is shown below:
SW1-1
SW1-2
ON
OFF
If you set configuration mode the yellow LED located by SW1 micro-switch will blink with frequency 1 Hz. Now you can start
ADAConfig Software and make the configuration of transmission parameters for each converter interfaces and set his visible address
from side of RS485/RS422 port. First you should set in ADAConfig Software number of COM port for communication with converter,
then readout the configuration from converter memory using the button [Read converter configuration] and make the proper changes
of interface setting. If you set option addressing converter, on configuration window you should set proper converter address from
range 1 - 255. If you set OFF this option the converter function as baud rate converter
In both cases you can set additional transmission parameters for RS232 interface and RS485/422 interface as bellow:
- baud rate (kbps): 0.3, 0.6, 1.2, 1.8, 2.4, 4.8, 7.2, 9.6, 14.4, 19.2, 28.8, 38.4, 57.6, 76.8, 115.2, 230.4,
- number of data bites: 5, 6, 7, 8,
- control parity: no control, parity control, control of none parity,
- number of stop bits : 1, 2,
- frame spacing – range from 1 to 255 (time silence as frame's end),
When you finish configuration setting you should save changes on converter memory by using button [Write converter configuration].
Return to work in normal mode is made by using SW1 switch (yellow LED blink OFF) as below.
SW1-1
SW1-2
OFF
OFF
5.3. SOFTWARE CHANGING
In case of software changing (firmware) you should set configuration mode by using SW1 micro-switch as below:
SW1-1
SW1-2
ON
OFF
Fig 7. ADAConfig view
8