GReddy INFO TOUCH Manuel d'utilisation de base
Parcourez en ligne ou téléchargez le pdf Manuel d'utilisation de base pour {nom_de_la_catégorie} GReddy INFO TOUCH. GReddy INFO TOUCH 6 pages.
GReddy INFO TOUCH Basic Operation Guide:
Installing the unit.
OBD (TYPE)
1. Connect to OBD connecter.
2. Connect the Red wire with the Male bullet plug on the white connect to the
Black/White female bullet connector on the cigarette lighter cable.
3. Connect the cigarette lighter cable to the vehicles cigarette lighter socket for
ignition power.
NON OBD (Old NISSAN).
1. Connect to NISSAN diagnosis connector.
2. Connect the Red wires together on the White connector.
(Do not use cigarette lighter cable)
3. Additional special wiring may be required. (optional parts)
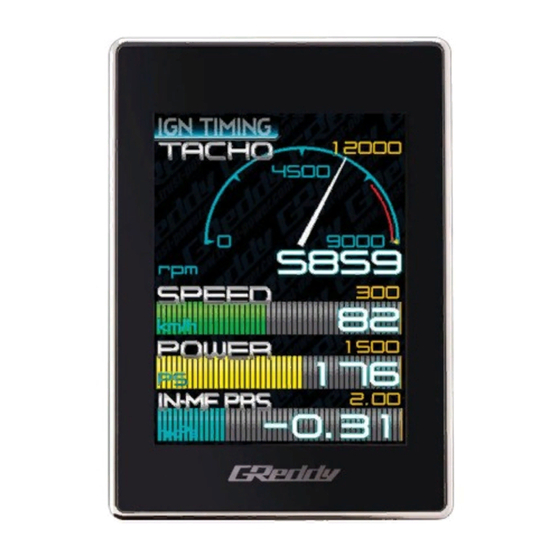
Basics of the Info Touch Screen.
1. Connect unit and power up Info Touch
2. Everything is controlled by touching a point on the screen with your finger.
3. From the Monitoring Screen, Items (sensor parameter) are displayed in white
4. From the Monitoring Screen, if you touch anywhere on the screen besides the Item,
it will go to the Main Menu [PATTERN] [ITEM] [SETTING] and the Back button
5. The BACK button (looping left arrow) will return to the last screen displayed.
6. The ENTER button (down to the left arrow) will return to the Monitoring
Screen
7. Touch Scroll Bar and the (up arrow) & (down arrow) to scroll down the
screen.
8. Touch the different buttons, digital displays or symbols for various controls.
Changing from Japanese to English Language.
1. From the Monitoring Screen, touch the screen. (anywhere except at the item name)
2. The Main MENU with [PATTERN] [ITEM] [SETTING] will appear.
3. Select [SETTING].
4. Select [
] (the button at the very top of the screen)
5. Select [ENGLISH].
6. Touch the Enter button.
Changing Display Direction.
1. From the Monitoring Screen, touch the screen. (anywhere except at the item name)
2. The Main MENU with [PATTERN] [ITEM] [SETTING] will appear.
3. Select [SETTING].
4. Select [DISPLAY]
5. Select [DIRECTION].
1