CELETTE CEL.11244-G-01 Manuel original - Page 12
Parcourez en ligne ou téléchargez le pdf Manuel original pour {nom_de_la_catégorie} CELETTE CEL.11244-G-01. CELETTE CEL.11244-G-01 20 pages.

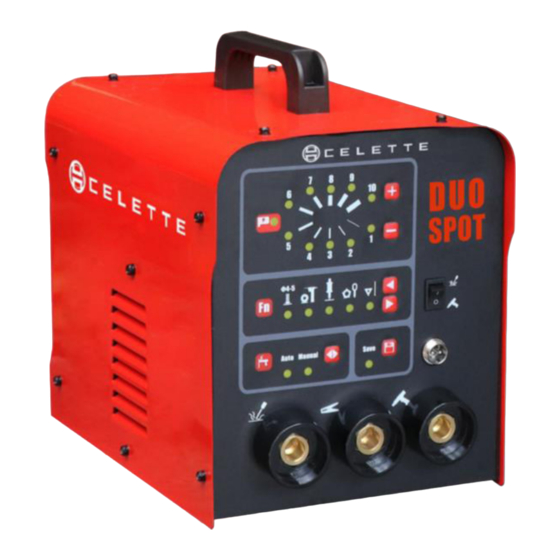
E/F: Output power adjustment.
Larger the number, the higher output power. There are 10 level for welding power. In general operation,
the user only choice welding mode, the system will auto match welding power. But the user can adjust it
by themself. After adjust the welding setting, it will don't cover the system recommended setting. Till to
press "save", the machine will save customer setting and cover the recommended setting.(Keep to press
the two buttons
G:
Socket for work clamp.
H:
Control socket for torch.
I:
Socket for torch.
J:
Power switch.
K:
Input power cable (Confirm the power voltage before use).
L:
Ground connector for the machine case.
M:
Discharge indicator.
When the indicator is light up, it means the machine charge is finish, The machine can welding operation.
After discharge operation, the discharge indicator will light off for a few moment. When the discharge
indicator is light off, it means the machine is charging. The time of light off will increase, following of the
more setting power. If in manual mode, the user trigger on the torch when the discharge indicator will
light off ,the machine can output, but the it will reduce output power.
N:
Brass electrode/carbon electrode heating or welding function choice.
O:
Socket for brass electrode/carbon electrode heating.
P:
Fuse.
3.8 STUD WELDING TORCH:
3.8.1 TORCH (AS DIAGRAM):
Torch work principle: Press the stud screw connects to the base metal.
The welding torch will discharge by contact way.
That applies to:
Soft steel, stainless steel stud screw. Length of stud screw less than 150mm.
3 SUPPORT FEET
SCREW CLAMP
www.celette.com
for 2 second, the welding setting will be recover factory defaults.)
TORCH HEAD HOLDER
TRIGGER
SHELL
PRESSURE
ADJUSTMENT
HANDLE
Page No: 12
