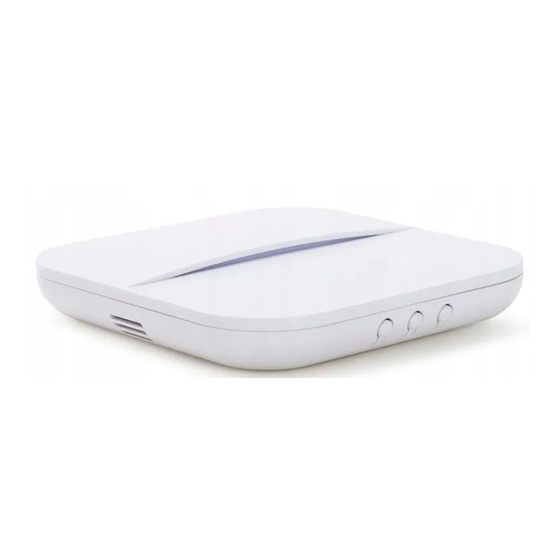
8level ALRM-KIT-BASE Manuel de démarrage rapide - Page 2
Parcourez en ligne ou téléchargez le pdf Manuel de démarrage rapide pour {nom_de_la_catégorie} 8level ALRM-KIT-BASE. 8level ALRM-KIT-BASE 2 pages.

Pairing the control panel with Smart Alarm
Proceed as follows:
- Click "Add Device" in the application
- Select "WiFi Network Device"
- Press "WiFi" (
) on the panel housing and hold it for approx. 3 seconds.
The control panel starts blinking purple, which means it is ready to be paired with the application.
- Click "Next" in the application. The screen will display the parameters of the WiFi to which the control panel
will be added. The application will suggest the SSID of the WiFi to which the mobile device has access. The user
must enter the password for the suggested WiFi. The user can enter the SSID and password for any WiFi in
which the control panel is to operate.
- Click "Next" in the application. You will see the following message: Connected to network\n1
connected successfully.
- Press "Finish"; the LED on the control panel will turn blue, which means that the control panel is paired with
the application.
3. Linking the system
The sensors and remote controls attached to the kit are factory-paired with the control panel. However, if they
must be paired again, proceed as follows.
Adding sensors and controllers using the application.
- Switch on the control panel with the slide switch located on the rear side of the housing (ON position). The LED
on the control panel lights up in light blue.
- Press the button on the panel housing and hold it for approx. 3 seconds.
The panel LED starts blinking green.
- Activate Smart Alarm. Select "Accessories" in "My Accessories" menu. Then select "Detectors". You will see a
screen showing zones (one zone represents one detector).
- Choose the zone to which the selected detector will be added.
- Trigger a signal from the selected detector, for example by moving your hand in front of the motion detector
or by moving away the door detector elements. When the detector sends a signal to the control panel, it will
be assigned, which you can also see in the application menu.
To assign all detectors, proceed according to this scheme.
Adding sensors and controllers using the housing buttons.
Please note that devices can be assigned in three groups:
- The first group includes controllers (remote controls)
- The second group includes sensors (motion detector, door opening detector, smoke detector, etc.)
- The third group includes the keys for radio-frequency identification (RFID)
Procedure:
- Switch on the control panel with the slide switch located on the rear side of the housing (ON position). The
LED on the control panel lights up in light blue.
- Press the button on the panel housing and hold it for approx. 3 seconds.
The control panel switches to controller (remote control) adding mode. The panel LED starts blinking green. If
you press any button on a remote control, that remote control will be added to the control panel. This is
confirmed by the green LED continuously illuminated on the panel housing. After pressing
another remote control. In this way you can add up to 4 remote controls.
- To add detectors, short press
. You will enter the second group of paired devices (detectors). The panel
LED is blinking green. - Activate the detector that you want to add to the control panel, for example by moving
your hand in front of the motion detector or by moving away the door detector elements.
A short sound and continuous illumination of the green LED confirms that the detector has been assigned. To
add another detector, press
it. In this way you can add up to 32 detectors.
- By short pressing
green LED on the panel housing blinks. Apply the RFID card to the lower section of the panel housing. A short
sound and the diode shining continuously confirm that the card has been assigned. You can add another RFID
card after pressing
Note: If the green LED emits a continuous light after you pressed
Device
occupied by an assigned device.
The set is ready to work once all devices are paired
Arming and disarming the alarm
With the control panel: the alarm is armed/disarmed by pressing
A short press is used to switch modes: armed, building empty/armed, people inside the building/disarmed.
Using a remote control, you can arm the alarm in two modes:
- Alarm armed (building empty)
- Alarm armed (people inside the building)
The SOS button activates the alarm buzzer.
Alarm armed – people inside the building
Disarming the alarm with an RFID card
Using an RFID card, you may only disarm the alarm. You can do it by applying the RFID card to the lower section
of the panel housing.
Specification of control panel modes:
Alarm armed (building empty) – activates all detectors located both inside and outside the building.
Alarm armed (people inside the building) – activates only the detectors located outside the building
(appropriate setup required).
The SOS button activates the alarm buzzer.
Alarm disarmed – deactivates all detectors.
Package contents:
- 1x control panel
, you may add
- 1x PIR motion detector
- 1x door opening detector
- 2x remote control
- 2x RFID card
- 1x 5V feeder
; the green LED on the panel housing blinks; activate another detector to assign
you will go to the third group of assigned devices, where you can add RFID cards. The
. The control panel can store up to 8 RFID cards.
, it means that the chosen zone is already
Alarm disarmed
Alarm armed – building empty
SOS button
