Galvin Engineering GalvinCare CP-BS Manuel d'installation des produits - Page 2
Parcourez en ligne ou téléchargez le pdf Manuel d'installation des produits pour {nom_de_la_catégorie} Galvin Engineering GalvinCare CP-BS. Galvin Engineering GalvinCare CP-BS 4 pages. Lead safe mental health anti-ligature ceiling mounted shower rose stainless steel plate
Product Installation Guidelines
PRE-INSTALLATION - MOUNTING DETAILS – HOLE CENTRES
−
If the mounting holes do not already exist, mark out and drill the holes as shown
in face plate hole dimensions. Ensure drill to suit suitable mounting methods.
Recommended installation height above floor level is 2 metres (6'6"). Spread
−
pattern using mains pressure 500kP as shown in side image
INSTALLATION
INSTALLATION COMPLIANCE: Galvin Specialised products must be installed in accordance with these
installation instructions and in accordance with AS/NZS 3500, the PCA and your local regulatory requirements.
Water and/or electrical supply conditions must also comply to the applicable national and/or state standards.
Failing to comply with these provisions shall void the product warranty and may affect the performance of the
product.
IMPORTANT: Whilst our product designs take into account a broad range of installation types and surfaces, it
is important that surfaces which fixtures are mounted to are flat and free from defect. Additionally, ensure any
protruding connecting thread is square to the wall so that the outlet sits flat against the wall when installed,
ensuring that there are no gaps between the wall and outlet. This is especially important when installing product
ranges that have been designed for correctional and health facilities, where special attention is required to
minimise ligature points and areas for concealment of contraband. In addition to ensuring the products are fitted
securely and in accordance with the following instructions, consideration shall be given to the use of non-pick
mastics such as BASF Sonolastic "Ultra" to ensure a high quality and safe installation.
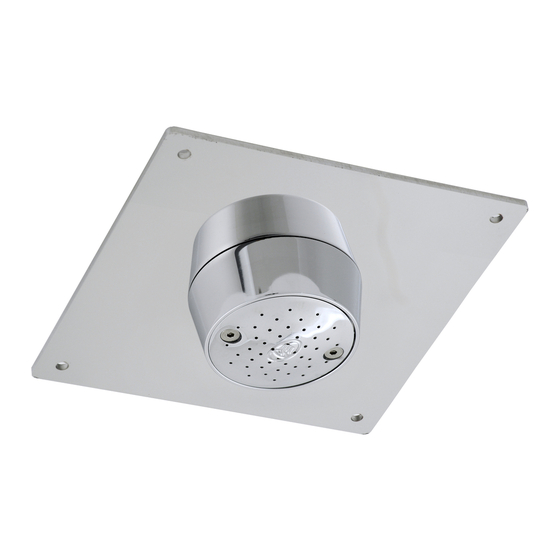
FRONT MOUNTING
1. Secure shower assembly
− Fit the shower assembly into cealing cut out
spud hole.
− Secure shower assembly with suitable
fastenings as shown.
© Galvin Engineering Pty Ltd
Version 1, 17 November 2022, Page 2 of 4
2. Connect the water line
− Connect water supply to the inlet.
− Use suitable sealant to prevent leaks.
Version 1, 17 November 2022, Page 2 of 4
Spread pattern