Gama Sonic GS-94FPW Manuel d'instruction - Page 2
Parcourez en ligne ou téléchargez le pdf Manuel d'instruction pour {nom_de_la_catégorie} Gama Sonic GS-94FPW. Gama Sonic GS-94FPW 4 pages. Victorian solar lamp
Solar Lamp Location:
For optimum light duration throughout the night, it is very important to place
the solar panel in a spot where it will receive the maximum amount of direct
sunlight throughout the day. Also, for best results install your solar panel
facing the south.
Note: For best results, allow the solar lamp to be charged for two consecutive
sunny days in the "ON" position.
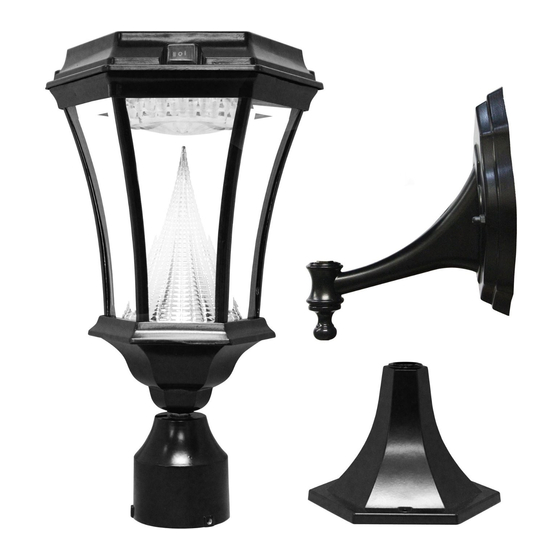
Assembly and operation Instructions (Fig. 1 and Fig. 2)
NOTE: The following steps are for reference only. Consult your local
hardware store for the best installation method for your particular surface.
GS-94P (Post Mount)
1. Use an electric drill to make four holes in the desired surface.
Place provided anchors into holes, place the base of the lamp
(C) in line with the holes and attach with the provided screws.
2. Screw part (A) into Part (C) and turn the Low/Off/High switch
located on the lamp head (E) to Low or High position
according your preferences (Fig. 2).
GS-94W (Wall Mount)
1. Use an electric drill to make two holes in the wall, place
provided anchors into holes, place the wall bracket in line with
the holes and attach with the provided screws.
2. Screw part (D) into Part (A) and turn the Low/Off/High switch
located on the lamp head (E) to Low or High position
according your preferences (Fig. 2).
E
Fig. 1
A
B
C
D